
How Florida Humidity Affects Epoxy Floor Installation (And How Apex Gets It Right)
How Florida Humidity Affects Epoxy Floor Installation (And How Apex Gets It Right) Florida’s humidity
August 28, 2024
Achieving a stunning epoxy resin garage floor is easier than you might think. With the right tools and a little bit of time, you can transform your garage into a sleek, durable space that you’ll be proud of. Whether you’re looking to boost your home’s value or simply want a clean, polished look, an epoxy resin garage floor can be done in just one day.
Curious to learn how? Continue reading to discover step-by-step instructions, helpful tips, and everything you need to know to get started on your epoxy resin garage floor project today!
Before starting the epoxy application, it’s essential to prepare the garage floor properly. This step ensures the epoxy adheres well and lasts long.
By following these preparation steps, anyone can ensure their garage floor is ready for the epoxy coating. A clean and well-repaired floor will lead to a stunning, durable epoxy finish that can be achieved in just one day.
When looking to upgrade your garage floor quickly, selecting the right epoxy resin is key. Here’s a guide to help you choose the best epoxy resin for a fast, impressive transformation.
Epoxy resin is a strong, durable material that bonds well with concrete surfaces. It’s perfect for garage floors because it resists stains, chemicals, and heavy vehicle traffic. For a project that can be completed in a day, a fast-curing epoxy resin is essential.
Look for epoxy resins specifically labeled as “fast-curing” or “quick application.” These products are designed to dry quickly, reducing the time needed for each application layer. Elite Crete Systems offers several options suitable for a one-day project.
Before applying epoxy, ensure the garage floor is clean and free of concrete dust, oil, and debris. This helps the epoxy bond properly and prevents imperfections. Consider using a degreaser and a concrete etcher for thorough preparation.
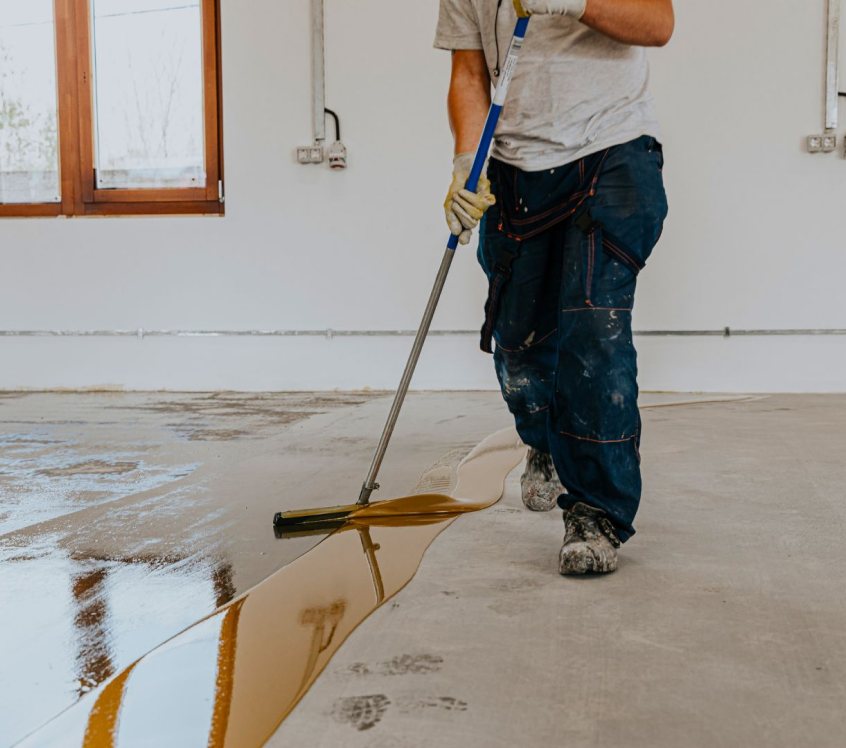
Follow the manufacturer’s instructions for mixing the epoxy resin. This usually involves combining two components: the resin and the hardener. Mix thoroughly to ensure an even application. Apply the first coat evenly with a roller or squeegee, covering the entire floor.
If you want a finish, add color flakes or decorative chips while the first coat is still wet. This adds texture and a unique look to your garage floor. Be sure to distribute the flakes evenly for the best results.
After the first coat has cured, apply the final clear coat. This seals the color flakes and provides a glossy, protective finish. Ensure the final coat covers all areas evenly to enhance durability and appearance.
Fast-curing epoxy resins dry quickly, but it’s important to allow sufficient drying time between coats. Check the product instructions for specific drying process and times. Typically, you can apply a second coat after a few hours, and the floor will be fully cured within 24 hours.
Once the epoxy is fully cured, inspect the floor for any missed spots or imperfections. Touch up as needed to ensure a smooth, flawless finish.
By following these steps and choosing the right fast-curing epoxy resin, you can achieve a stunning garage floor in just one day. Achieve a beautiful, durable garage floor quickly and efficiently with the right epoxy resin and preparation.
Achieving a stunning epoxy resin garage floor in just one day starts with applying the base coat correctly. This step sets the foundation for a durable and beautiful finish. Here are some techniques and tips to ensure success.
By following these techniques and tips, the base coat of the epoxy resin will be applied perfectly, setting the stage for a stunning garage floor. Remember, preparation and attention to detail are key to achieving a professional finish in just one day.
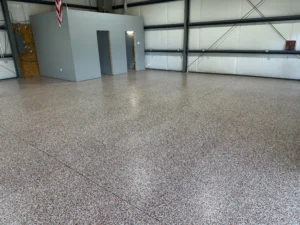
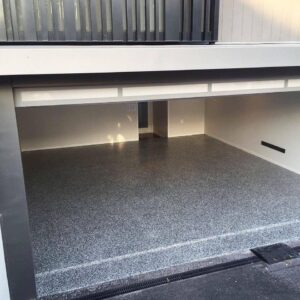
Adding color and flakes to the epoxy resin provides a decorative touch that elevates the look of the garage, making it more appealing and unique.
Color Options: Homeowners can choose from a variety of colors to match their style and preference. Whether it’s a sleek black, a vibrant blue, or a subtle gray, the color options are endless. This customization allows the garage floor to blend seamlessly with the rest of the home or stand out as a bold statement piece.
Decorative Flakes: In addition to color, decorative chips or flakes can be added to the epoxy resin. These flakes come in different sizes and colors, creating a textured and eye-catching surface. They not only enhance the visual appeal but also provide extra grip, making the floor safer to walk on.
Even with these decorative elements, the garage floor will be ready for use within 24 hours. The fast-drying nature of epoxy resin means homeowners won’t have to wait long to enjoy their newly transformed space. By the next day, the garage floor will be fully cured and ready to handle cars, tools, and heavy foot traffic.
Regarding epoxy resin garage floors, one of the biggest challenges is the curing time. Traditionally, epoxy floors need days to fully cure before they can be used. However, there are ways to speed up this process and have a stunning, usable garage floor in just one day. Here’s how:
By following these steps, anyone can achieve a beautiful, durable epoxy resin garage floor in just one day. With the right materials and proper technique, speeding up the curing process is not only possible but also practical. Enjoy a stunning garage floor that’s ready for use the same day it’s installed!
With the right tools and preparation, achieving a stunning epoxy resin garage floor in just one day is straightforward. This blog post covered why epoxy resin is an excellent choice, detailing its durability, easy maintenance, aesthetic appeal, chemical resistance, quick installation, cost-effectiveness, and safety. We also discussed adding color and flakes for a decorative touch, and how to speed up the curing process for same-day use.
Apex Epoxy Flooring is a one-day garage floor company that provides expert garage epoxy flooring installation. Their team follows a meticulous process to deliver a high-quality result, enhancing the value and appearance of your home.
Contact Apex Epoxy Flooring today for free consultations and free estimates!
Yes, you can epoxy a garage floor in one day with the help of experts like Apex Epoxy Flooring. Professional teams have the experience and advanced tools to complete the job quickly and efficiently.
To make your epoxy floor dry faster, ensure good ventilation, use fans to circulate air, and maintain an ambient temperature. However, it is important to follow the manufacturer’s instructions to avoid any issues.
Yes, you can epoxy a garage floor that already has epoxy. However, the existing epoxy must be cleaned, sanded, and properly prepared to ensure the new epoxy adheres well.
Written By:
Michael Thompson brings a deep knowledge of polymer chemistry from his Chemical Engineering studies at Georgia Tech to the forefront of his writings. With over 20 years in the industry, his articles are rich in detail about the science behind epoxy formulations and their real-world applications, guiding professionals and DIY enthusiasts alike.
How Florida Humidity Affects Epoxy Floor Installation (And How Apex Gets It Right) Florida’s humidity
You’ve got an existing coating on your garage floor — maybe a DIY kit, maybe
You’ve decided to epoxy your garage floor. Now comes the fun part: choosing the color
For just $2,700, give your 3-car garage a professional epoxy flooring finish backed by our lifetime warranty. Fill out this form below to take advantage of this limited time offer!
For just $2,300, give your 2-car garage a professional epoxy flooring finish backed by our lifetime warranty. Fill out this form below to take advantage of this limited time offer!
Ready to upgrade your garage with Apex Epoxy Flooring? Fill out the form below, and let us handle the rest. Whether it’s a 2-car or 3-car garage, we’re here to deliver top-notch service.
how long for epoxy garage floor to dry, fast drying epoxy floor, one day epoxy garage floor