
Categories Apex

Epoxy Garage Floor Cost in 2026: Real Pricing Breakdown by Garage Size

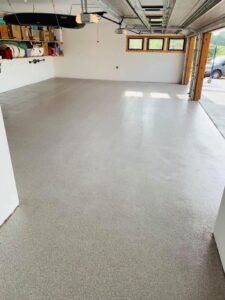
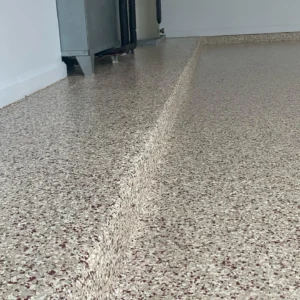
Typical Price Range for Garage Floor Coatings

Blog

Epoxy Garage Floor Cost in 2026: Real Pricing Breakdown by Garage Size

Kyle Long

June 30, 2026

Table of Contents

The Short Version

Epoxy garage floors run $1,500–$10,500 installed in 2026 depending on garage size, system grade, and prep work. Most 2-car garages land at $2,200–$5,800 for a pro-grade flake or polyaspartic-top system. The 3x price swing between cheap and pro-grade is almost always topcoat chemistry + concrete prep — not labor.

Search “epoxy garage floor cost” and you’ll get answers anywhere from $600 to $9,500 for the same 2-car garage. That spread isn’t dishonesty — it’s the difference between a $1.50/sq ft DIY roller kit, a $3/sq ft franchise one-day job, and a $9/sq ft full polyaspartic system on a slab that needed structural repair before a single drop of resin hit the concrete. This guide breaks down what an epoxy garage floor actually costs in 2026, what’s hiding inside the quote you’re looking at, and the four hidden cost drivers that turn a $3,500 estimate into a $5,200 final invoice. Numbers below come from real Apex Flooring quotes across Jacksonville, Tampa, Atlanta, Charleston, Savannah, and our other Florida and Georgia markets — not industry averages pulled from a 2018 survey.

Average Epoxy Garage Floor Cost by Garage Size

Square footage is the single biggest line item on any coating quote, but the per-square-foot number you see advertised — usually $3 to $7 — is only half the story. The other half is the minimum mobilization cost. A crew, a grinder, a vacuum, a generator, and a truckload of resin still has to show up whether your garage is 240 sq ft or 800 sq ft, so very small jobs carry a higher effective cost per foot.

2026 Installed Pricing by Garage Size

Garage SizeTypical Sq FtDIY KitBudget Pro (1-day)Premium Polyaspartic
1-car240–320$200–$450$1,800–$2,600$2,400–$3,400
2-car400–560$400–$800$2,800–$3,900$3,600–$5,200
2.5-car560–680$550–$1,000$3,400–$4,600$4,400–$6,200
3-car600–800$650–$1,200$3,900–$5,400$5,200–$7,400
4-car / shop900–1,400$1,000–$2,000$5,400–$8,400$7,200–$11,500

The premium polyaspartic column reflects a full surface-prep grind, crack repair, two coats of pigmented basecoat, broadcast vinyl color flake to refusal, and a UV-stable polyaspartic topcoat. The “budget pro” column reflects a thinner two-coat system installed over an acid-etched or lightly ground slab — fine for a clean garage that won’t see hot tires or chemicals, undersized for the average Jacksonville garage where afternoon rain and 95-degree humidity sit on the floor every summer.

Per-Square-Foot Math

If you want to back into your own number, here’s the rough 2026 range for North Florida and the Southeast:

  • $2.50–$3.50/sq ft — basic two-coat epoxy or single-broadcast flake, acid-etched prep, 1-year workmanship warranty.
  • $4.00–$5.50/sq ft — full diamond-grind prep, broadcast flake, polyurethane or polyaspartic topcoat, 5–10 year warranty.
  • $6.00–$9.00/sq ft — premium polyaspartic or polyurea system, full flake to refusal, color-matched flake blend, 15-year to lifetime warranty.
  • $10+/sq ft — metallic epoxy, decorative quartz, or custom logo installs. Often double the materials cost.
“The 3x price swing between a $1,500 floor and a $4,500 floor is almost never labor — it’s topcoat chemistry plus how aggressively the slab was prepped.”

What’s Included in a Professional Epoxy Quote (and What’s Not)

The single most common reason two quotes look $1,800 apart for the “same” job is that one of them is missing line items. A real apples-to-apples comparison requires both quotes to spell out every step.

Included in a Real Pro Quote

  • Diamond grinding with a CCS-30 or larger planetary grinder and a HEPA vacuum — not acid etch. Acid etch is a $400 shortcut that fails first.
  • Crack and joint repair — chase out the crack, vacuum, fill with a polyurea or polyaspartic joint filler, shave flush.
  • Two pigmented basecoats — single-coat installs fail. The second coat is where you build the mil thickness that protects the concrete.
  • Color flake broadcast to refusal — meaning we throw flake until the floor literally can’t hold any more. Light flake is a tell that the contractor is saving $40 of materials.
  • UV-stable topcoat — polyaspartic or polyurethane. Pure epoxy yellows and chalks in direct sunlight, which means any garage with a window or open door.
  • Cleanup and haul-away of grinding slurry, old paint chips, and packaging.
  • Written workmanship warranty with the contractor’s name and license on it — not a manufacturer pamphlet.

Usually Not Included (Watch For These)

  • Moisture testing. A calcium chloride or relative humidity probe test costs us $40–$80 to run. If your slab fails, you need a moisture mitigation primer that runs $1.10–$1.80/sq ft on top of the base price.
  • Concrete patching beyond simple crack fill — spalled corners, hot-tire scaling, or pitted surfaces over 1/8″ deep are usually a separate line item at $4–$8/sq ft of patched area.
  • Old coating removal. If your slab already has paint, sealer, or an old epoxy layer, removing it adds $1.50–$3.50/sq ft. This is where most “recoat” quotes balloon.
  • Furniture and vehicle moving. Most contractors will move it; some charge $150–$300 per garage.
  • Drain or trench work. Anything plumbing-adjacent is a separate trade.

The Rule of Thumb

If a quote is more than $1,500 lower than the next two you got, ask which of those items got dropped. The honest answer is usually “we acid-etch instead of grind” or “we do a single basecoat.” Both will look fine for 18 months. Neither will survive the Florida summer cycle of heat, humidity, and hot tires for 10 years.

Cheap Epoxy vs Pro-Grade Systems: Why Prices Vary 3x

A $1,500 floor and a $4,500 floor are not the same product. The chemistry, the prep, and the labor hours behind each are different categories. Here’s what you’re actually buying at each tier.

Tier 1: DIY and Big-Box Kits ($1.50–$2.50/sq ft)

The hardware-store epoxy kit is a water-based or low-solids epoxy paint. It’s typically 30–50% solids by volume, which means half of what you roll on evaporates as it cures. The dry film thickness is 3–6 mils — about the thickness of a sheet of paper. It scratches with a snow shovel, peels under hot tires within 12–18 months, and turns yellow in direct sun. There is a place for these kits — a basement workshop floor that never sees a vehicle is a fine candidate. A daily-driven Florida garage is not.

Tier 2: Budget Contractor / One-Day Franchise ($2.50–$4.00/sq ft)

This is where most “$1,999 special” ads live. You’ll usually get a 100% solids epoxy basecoat or a thinned polyaspartic, acid-etch or light-grind prep, a partial flake broadcast, and a single topcoat. The total dry film thickness lands around 15–25 mils. It looks great on day one. Common failure modes at 2–5 years: edge lift at the garage door threshold, hot-tire pickup in the parking spots, and yellowing in the sun strip near the door. Warranty is usually 1–3 years and limited to “manufacturing defects” — not adhesion failure.

Tier 3: Full Pro Polyaspartic ($4.00–$7.00/sq ft)

This is the system we install most often. Full CCS-30 diamond grind to expose concrete pores, vacuum, joint and crack repair, a flexible polyurea or polyaspartic basecoat, full vinyl flake broadcast until the floor is saturated, scrape and vacuum the excess, then two clear polyaspartic topcoats. Dry film thickness runs 30–45 mils. UV-stable, hot-tire resistant, chemical resistant, and abrasion rated for commercial floors. Real-world life: 15–20 years with normal residential use. Warranty: 10–15 years on materials and workmanship. This is the system on every quote we send for a garage epoxy floor install in Florida or Georgia.

Tier 4: Decorative or Industrial Specialty ($7–$12+/sq ft)

Metallic epoxy, decorative quartz, custom color-matched flake blends, ESD floors, chemical-containment urethane cement. These exist for showrooms, custom car garages, restaurant kitchens, and industrial settings. For a residential garage, this tier is usually about looks rather than performance — a Tier 3 system is mechanically equal to most Tier 4 systems for half the cost.

Hidden Cost Drivers: What Turns $3,500 Into $5,200

The five line items below are responsible for nearly every “the quote went up” conversation in our business. They are not surprises to the installer — they are surprises to the homeowner because the cheaper bid didn’t include them. When you’re comparing quotes, ask explicitly about each of these. Tap any driver below to see the dollar impact and what triggers it.

1. Cracks, joints, and concrete repair+

Garages built before 1995 in Florida often have control joints that have widened to 3/8″ or more, plus spalling at the door threshold where rain has cycled freeze-thaw and salt damage for thirty years. Every linear foot of crack repair runs $4–$8. Spalled-corner rebuild with a polymer-modified patch runs $40–$120 per corner depending on depth.

A typical 30-year-old Jacksonville slab needs $300–$600 of crack and edge repair before a coating goes down. New construction (post-2015) usually needs less than $100.

2. Moisture vapor testing & mitigation+

Florida slabs sit on a high water table. Vapor pressure pushes moisture up through the slab continuously — sometimes at 8–12 lbs per 1,000 sq ft per 24 hours, well above the 3 lb threshold where standard epoxy bonds reliably.

If your slab tests high, we install a moisture mitigation primer (typically an epoxy-based vapor barrier) that adds $1.10–$1.80/sq ft. Skipping this is the #1 reason coatings peel in Florida — the moisture pushes the coating off the slab from underneath. We covered this in detail in our Tampa epoxy service notes; the Gulf Coast slabs run even higher than Jacksonville.

3. Hot-tire pickup risk on hot-climate driveways+

Hot tires off a Georgia or Florida highway can hit 160–180°F. That heat plasticizes a weak coating and the tire literally pulls the epoxy off the slab when the car cools and the rubber re-grips.

Mitigation is a combination of full broadcast flake (the flake breaks the tire’s contact surface), a polyaspartic topcoat with high cross-link density, and parking on hot days only after the car has cooled in the driveway. Tier 1 and Tier 2 floors do not mitigate this; Tier 3 does. There’s no “add-on” line item for hot-tire resistance — it’s baked into the spec or it isn’t.

4. Surface prep beyond a standard grind+

“Light grind” and “deep grind” are not the same operation. A slab with thick old paint, mastic from a removed carpet pad, or an old epoxy layer needs an aggressive 16-grit metal-bond grind followed by a finer resin-bond pass. That’s two passes instead of one, plus diamond-tool wear.

Add $0.75–$2.00/sq ft for a slab with existing coatings to remove. This is where a “we’ll just go right over the old paint” contractor wins the quote and loses the floor in year two.

5. Slope, drain, and color-blend upgrades+

If your garage was poured without a slope to the door (or worse, slopes toward the house) and you want water to drain out, that’s a separate self-leveling underlayment job at $3–$6/sq ft. Adding a center trench drain is plumbing work and a permit, not a coatings job.

Custom flake blends — matched to a specific paint color, two-tone borders, or a logo — usually run an extra $300–$900 in materials and an extra crew-hour or two of layout. Beautiful, but a real line item.

Is Epoxy Worth the Cost vs Polyaspartic or Paint?

The honest answer depends on what you’re solving for. Below is how we frame the choice for homeowners who ask us to compare options on the same garage.

Quick Comparison — Cost per Year

System2-Car InstalledLifespanCost / Year
Epoxy paint (Tier 1)$400–$8001–3 yrs$130–$400
100% solids + polyurethane (Tier 2–3)$2,800–$4,5008–12 yrs$300–$450
Polyaspartic system (Tier 3)$3,600–$5,20015–20 yrs$200–$300
Sealed bare concrete$500–$9005–7 yrs$90–$180

Polyaspartic posts the lowest cost-per-year of any garage coating, and the fastest install — you’re back to driving in 24 hours, vs 3–4 days for traditional epoxy. Most homeowners who do the math end up here, which is why we wrote a dedicated polyaspartic floor coating overview.

When Bare Sealed Concrete Wins

For detached workshops, storage garages, and rental properties where peeling would be a maintenance call you don’t want, a $0.80–$1.50/sq ft densifier plus penetrating sealer is the underrated option. The floor stays grey, stains show, but it doesn’t peel, doesn’t yellow, and won’t ever need to be ground off.

How to Read a Quote and Avoid Getting Burned

If you’re collecting bids, here’s the short checklist to lay them side by side. Anything missing is a question to ask before you sign.

  1. What is the prep method — acid etch, light grind, or full diamond grind? (You want full diamond grind.)
  2. How many coats of pigmented base, and what is the dry film thickness target?
  3. Is the flake broadcast to refusal, or partial coverage?
  4. What is the topcoat product and the manufacturer’s name? (You want polyaspartic or polyurethane, not pure epoxy.)
  5. Is moisture testing included? What happens if the slab fails?
  6. What is the warranty in writing — materials only, or materials and workmanship? Who is the responsible party 10 years from now?
  7. Is the company licensed and insured in your state? (In Florida, ask for the CGC or CBC license number.)

If a contractor pushes back on any of these questions, you have your answer. Reputable installers in Jacksonville, Atlanta, and the rest of the Southeast will walk you through every line item before you ever sign.

Frequently Asked Questions

Why is one quote $1,500 and another $5,800 for the same garage?+

Three reasons. First, prep method — a true diamond grind costs $1–$2/sq ft more in labor than acid etch, and a contractor quoting acid etch will always be cheaper. Second, system thickness — a 12-mil system uses about a third of the resin of a 35-mil system. Third, warranty exposure — a contractor offering 15 years has to price in the cost of fixing failures, and a contractor offering 1 year doesn’t. Cheap quotes aren’t dishonest, they’re just buying you a different product.

Can I DIY a garage floor epoxy kit?+

You can, and for some uses it’s the right call. A Drylok or Behr Premium 1-Part Epoxy will run you $200–$400 in materials and a weekend of labor. It will look great for 12–24 months. After that, you’ll see peeling around the door threshold and in the parking lanes. If you’re staging a house for sale or coating a basement workshop, paint is fine. If you park daily and live in Florida or Georgia humidity, you’ll repaint twice in the time a polyaspartic floor lasts once.

Is a 1-car garage half the price of a 2-car?+

No, but it’s closer than you’d think. There’s a fixed mobilization cost — a crew, a grinder, and a vacuum still have to show up. A 1-car job is usually 60–70% of a 2-car job total, not half. That’s why per-square-foot pricing on very small jobs runs higher than the advertised rate. If you have a detached 1-car or a workshop bay, consider combining it with another small project on the same trip to spread the mobilization.

How long does an epoxy garage floor last?+

Depends on the system. A DIY paint kit gives you 1–3 years in a real garage. A budget contractor install with thin film and acid-etch prep gives you 3–7 years. A full polyaspartic system with diamond-grind prep and broadcast flake gives you 15–20 years. The variable isn’t the brand of resin — it’s the prep and the film thickness. A premium product over bad prep fails just as fast as a budget product.

Does Florida humidity affect epoxy garage floor cost?+

Yes. Florida slabs commonly fail moisture tests, which means an additional vapor-barrier primer at $1.10–$1.80/sq ft. We also have to time installs around dew point — if humidity is over 80% and the slab is colder than the air, condensation forms during cure and the coating delaminates. We watch the forecast and sometimes reschedule, which a fly-by-night installer won’t bother doing. Expect a Florida quote to run 10–15% higher than the same job in Atlanta for these reasons.

Is it cheaper to recoat an existing epoxy floor or grind it off?+

Almost always cheaper to grind it off and start over. Recoating an existing coating only works if the old coating is well-bonded, the same chemistry family, and lightly scuff-sanded. In practice, 80% of the existing coatings we inspect have edge failures, hot-tire spots, or thin areas — the new coat will bond to those weak spots and fail with them. Full grind-and-recoat costs $0.75–$2.00/sq ft more than a fresh install, but you get the full warranty and the full lifespan. Recoating buys you 2–3 years and a hidden failure waiting to happen.

What about financing — can I split a $4,800 floor into payments?+

Yes. Apex offers 0% promotional financing on qualifying coating installs (typically 6–18 months same-as-cash, subject to credit approval) plus longer-term fixed-rate options through our consumer-finance partner. For a $4,800 polyaspartic 2-car, that lands around $267/mo on an 18-month same-as-cash plan or roughly $95–$120/mo on a 60-month fixed plan. Ask your estimator for current promotions when you book the in-home assessment.

Final Thoughts — and a Free Quote

The right epoxy garage floor budget is the one that matches your slab condition, your climate, and your timeline for owning the house. A $1,500 paint job in a dry Atlanta garage that gets sold in 18 months is a smart spend. A $4,800 polyaspartic system in a Jacksonville garage where you plan to retire is a smart spend. The wrong spend is the $3,000 middle option that gets installed over a slab that needed $600 of repair, and shows hot-tire failure in year three.

If you want a real number on your specific garage — not a per-square-foot estimate — Apex Flooring offers free in-home assessments across Jacksonville, Tampa, Atlanta, Charleston, Savannah, Fort Myers, Boca Raton, Hialeah, Port Charlotte, and St. Petersburg. We’ll measure the slab, run a moisture probe if it’s warranted, point out any crack or spall repair, and give you a written quote with every line item spelled out so you can compare it line-by-line to any other bid.

Call (904) 595-9792 or request a free quote online. We’ll tell you straight whether your slab is a Tier 2 or Tier 3 job, whether moisture mitigation is needed, and exactly what your 2026 epoxy garage floor cost will be — no high-pressure sales, no “today-only” pricing tricks, no surprise line items on installation day.

Final Thoughts

Polyurea garage floor coating offers a smart, long-term solution for homeowners looking to improve both the look and performance of their space. With its fast-curing application, it stands up to Florida’s climate and daily use without losing its appeal. For those seeking durability, safety, and a polished finish, polyurea flooring delivers both function and style that lasts.

Table of Contents

epoxy coatings

Call Us Now
(904) 595-9792

Related Epoxy Flooring News

Categories Apex

How Long Does an Epoxy Garage Floor Installation Take? Jacksonville Timeline Guide (Hour-by-Hour Breakdown)

St. Petersburg, FL — Tampa Bay epoxy garage floors for Old Northeast, Snell Isle, and Pinellas County

Blog

Is Epoxy Better Than Vinyl Flooring? A Complete Comparison Guide

Kyle Long

June 24, 2026

Table of Contents

If you’ve been getting quotes for a new garage floor in Jacksonville, you’ve probably heard wildly different answers to the same question: how long does epoxy garage floor take to install? One company swears they’ll be done in a single afternoon, another wants your garage for three full days, and a third says you can’t park on it for a week. Here’s the truth from a master installer who’s been laying coatings across Duval, St. Johns, and Clay counties for years: “1-day epoxy installs” are real for polyaspartic systems, but a traditional 100% solids epoxy job is a 3-day affair, and the timeline you actually get depends on which product you bought and what the slab looks like once we start grinding. This guide breaks it down hour-by-hour so you know exactly what to expect and how to spot a contractor cutting corners on the Florida humidity.

Total Timeline Overview by Coating Type

Before we get into the hour-by-hour, here’s the cheat sheet. Every coating system has its own chemistry, its own pot life, and its own recoat window. That recoat window is what dictates whether your job is one day or three. Polyaspartic and polyurea cure in 60-90 minutes between coats. Traditional epoxy needs 12-24 hours. There’s no shortcut — you can’t make epoxy cure faster by wishing.

Coating System Install Time Walk-On Drive-On Full Chemical Cure
Polyaspartic (single-day) 6-10 hours 8-12 hours 24 hours 3-5 days
Polyurea base + polyaspartic top 1 day 12 hours 24 hours 5 days
Hybrid epoxy + polyaspartic top 2 days 16-24 hours 48 hours 5-7 days
Traditional 100% solids epoxy (3-coat) 3 days 12-24 hours 72 hours 7 days

A typical 2-car Jacksonville garage is 400-500 square feet. A 3-car runs 600-800. The square footage barely changes the timeline because the cure window between coats is fixed — a one-man crew laying a 2-car polyaspartic in 8 hours is the same job as a three-man crew laying a 3-car in 8 hours. What changes is the prep day if the slab is in rough shape.

Day 1 Hour-by-Hour: Surface Prep (the slowest, most critical phase)

This is where the entire job is won or lost. I’ll tell any homeowner straight up: if your coating fails in two years, 90% of the time it’s because somebody skipped or rushed the prep. The bond between coating and concrete is mechanical — the coating physically grips into the pores we open up with diamond grinding. Skip the grind, you’re basically gluing paint to a polished countertop. It’ll peel.

Hour 0-1: Move-out and masking

Garage gets cleared — every tool, bike, lawnmower, and storage shelf out, including stuff hanging within 18 inches of the floor. Grinding dust gets everywhere even with HEPA extraction. We mask the bottom of drywall, door jambs, and garage door tracks with 6-mil plastic and blue tape. Water heater or fridge in the garage gets wrapped too.

Hour 1-4: Diamond grinding

The loud part. We run a planetary grinder (Husqvarna PG 450 or Lavina 25GX for residential bays) with metal-bond diamond tooling, usually 30-grit followed by 80-grit. A walk-behind HEPA dust extractor — Pulse-Bac or Ermator — pulls 99% of the silica dust off. Goal is a CSP 2 or CSP 3 profile — texture of 80-grit sandpaper. Slab looks chalky white when we’re done. 2-car bay: 2-3 hours. 3-car with rough control joints: 4-5 hours.

Hour 4-5: Crack chase and patch

With the slab bare, every crack and pop-out shows up clearly. We chase hairlines with a crack-chaser blade, then fill with a polyurea joint filler (Metzger/McGuire RoadWare 10 Minute or Spartan Surfaces SP-1500). Spalled corners get a fast-set polyurea patch that’s grindable in 15 minutes. Control joints get filled and shaved flush.

Hour 5-6: Profile test, vacuum, tack

Final CSP check (sometimes a fingernail test, sometimes an ICRI rubber profile comparator), full vacuum, tack with a damp microfiber, and a calcium chloride moisture test on new construction or history-of-dampness slabs. In Jacksonville the water table sits 3-8 feet down depending on neighborhood — on-grade slabs in Mandarin, Riverside, and the Beaches often read higher MVER than slabs in Nocatee or Julington Creek. Anything above 3 lbs/1000 sqft/24hr, we’re switching to a moisture-mitigation primer.

Day 1 (afternoon): Primer Coat or Moisture Barrier

Not every job gets a primer — but in Florida, more do than don’t. If your slab tested high for moisture, if it’s older than 30 years, or if there’s any history of efflorescence (that white crusty stuff), we’re rolling a primer.

What primer we use and why

For standard slabs we use a thin-mil epoxy primer like Sherwin-Williams ArmorSeal 1000 HS or a polyaspartic penetrating primer from Spartan Surfaces. For moisture issues we step up to a 100% solids moisture-vapor barrier — Koster VAP I/2000 or Aquafin VB. The vapor barriers cost 3-4x more per gallon, but they’re the only thing that’ll save the floor when MVER is above 5 lbs.

Application and cure window

Primer goes down with a 3/8″ nap roller after a perimeter cut-in with a brush. A 2-car bay takes about 45 minutes to coat. Standard epoxy primer needs 8-12 hours to recoat. A polyaspartic primer recoats in 60-90 minutes — that’s the magic that makes single-day jobs possible. Vapor barriers usually need 12-16 hours minimum.

Day 2: Base Color Coat and Decorative Flakes

This is the day your garage starts looking like a garage floor instead of a construction site. The base coat is the structural layer — it’s what holds the color, supports the flakes, and gives the system its build thickness.

Base coat application

For traditional epoxy we use 100% solids in your chosen base color — Sherwin-Williams ArmorSeal 8100 or Spartan Surfaces’ SPARTACOTE Flex SB for polyaspartic. Behr Premium is fine for DIY but we don’t run big-box product professionally. Base goes down at 8-12 mils wet using a notched squeegee then back-rolled. 2-car bay: 60-90 minutes to coat.

The flake broadcast

While the base is wet, we broadcast vinyl color flakes (Torginol or Color Chips, Inc.) to refusal — throw flake until the floor is fully covered and excess bounces off. Two-person job: one rolling base, one tossing flake right behind. Timing is everything — if the base sets up before the flake hits, the flake won’t embed. 2-car bay: 20-30 minutes of frantic work, then we walk away.

Cure window before scrape

The base with embedded flake needs to cure hard enough to walk on with spiked shoes before we scrape. Polyaspartic: 60-90 minutes. Epoxy: overnight. After cure, we scrape with a 5-inch razor blade on a pole — knocks off loose flake standing up like little flags, leaving a smooth profile for the topcoat.

Day 3: Topcoat and Cure

Day 3 is the shortest install day but it’s the day that decides how the floor holds up to hot tires, gasoline drips, jack stands, and the kids’ bikes. The topcoat is the sacrificial wear layer — it takes the abuse so the color coat doesn’t have to.

Clear coat application

For premium jobs we run a 2-component polyaspartic clear like SPARTACOTE Clear PURE or Citadel Polyaspartic 85. For budget jobs it’s a 2-part epoxy clear topped with a polyurethane. The clear goes down at 4-6 mils wet using the same squeegee-and-backroll method. Coverage on a 2-car bay is 60-75 minutes including a perimeter cut-in. Pot life for polyaspartic is short — 20-30 minutes once mixed — so we mix small batches and move fast.

The window from “done” to “use it”

Here’s where homeowner expectations get fuzzy. “Done” means we’re packing tools. “Use it” depends on what you’re doing. Foot traffic in socks: 8-12 hours after the topcoat for polyaspartic, 24 hours for epoxy. Pets back in: same as foot traffic but add 4 hours so the off-gassing isn’t bothering them. Heavy objects (toolboxes, fridges): 24-48 hours. Driving a car on it: that’s the big one — see the cure-times section below.

Polyaspartic “1-Day” Install Reality Check

The marketing claim is everywhere: “Get your dream garage floor in just ONE DAY!” It’s true. It’s also frequently a lie. Let me explain both.

When 1-day is real

A legitimate single-day polyaspartic install looks like this: crew of 3-4 arrives at 7 AM, grinds and preps from 7 to 11, lays primer at 11, base coat with flake broadcast at 1 PM, scrape at 3:30, clear topcoat at 4:30, packs up at 6 PM. That’s 11 hours start to finish. Walk on in socks by midnight. Drive on the next afternoon. This works because polyaspartic recoats in 60-90 minutes — the cure chemistry literally allows it.

When 1-day is fiction

Here’s where contractors fudge: they skip the diamond grind in favor of an acid etch (which doesn’t open a real profile), they skip the primer to save 90 minutes, they apply the flake into a half-set base so it doesn’t lock in, and they thin the topcoat to extend the pot life. The job looks great for 6 months. Then the flakes start letting loose at the garage door threshold where hot tires hit, and within 18 months you’ve got peeling at the edges and bald spots where the dog walks.

How to spot the rushed job

Three tells: First, ask if they’re diamond grinding or acid etching — if it’s acid etch, walk away. Second, ask what the recoat window is for the product they’re using and watch them quote you something suspiciously short. Third, look at their truck — a legitimate single-day crew has a planetary grinder, a HEPA dust extractor, and at least two 5-gallon mixing buckets. If they show up with a shop vac and a paint roller, that’s not a coating job, that’s a paint job. Apex Epoxy Flooring runs full prep on every single-day install — no shortcuts, even when the calendar is tight.

Cure Times — When You Can ACTUALLY Use the Garage

Cure isn’t a single moment. There are three distinct cure thresholds and crossing each one unlocks a different use.

Walk-on cure (4-12 hours)

This is when the topcoat is tack-free and you can step on it in soft shoes without leaving a footprint. Polyaspartic: 4-8 hours. Epoxy: 12-24 hours. Don’t drag anything across it yet — even a cardboard box can leave a scrape.

Drive-on cure (24-72 hours)

This is the threshold most homeowners care about. Polyaspartic: 24 hours minimum, 48 hours preferred. Epoxy: 72 hours, no exceptions. The reason is hot tires — when a tire that’s been driving on Jacksonville asphalt at 95°F hits a not-fully-cured coating, the plasticizers in the rubber bond to the soft coating and lift it when you back out. This is called hot tire pickup and it’s the #1 cause of fresh-coating failure. If your installer says you can drive on it in 12 hours, get that in writing.

Full chemical cure (5-7 days)

This is when the coating is fully crosslinked and resistant to gasoline, brake fluid, transmission fluid, battery acid, and pool chemicals. Until you cross this threshold, clean spills immediately and don’t park anything that drips. After full cure, the floor is bulletproof.

How Florida Humidity Affects Your Timeline

Jacksonville sits at 75-85% relative humidity from May through October. Epoxy chemistry hates humidity — too much moisture in the air during cure causes amine blush (a milky, sticky film) and slows the crosslink reaction. Here’s how a good Florida crew works around it.

Morning starts, afternoon thunderstorm avoidance

Our crews start at 7 AM whenever possible. Florida afternoon thunderstorms typically roll through between 2 PM and 5 PM from June through September. If we’re applying a topcoat at 4 PM with a thunderstorm 20 minutes out, we’re risking moisture infiltration through an open garage door. We schedule final topcoats for morning whenever possible, especially during the wet season.

Dehumidifier use

For high-end jobs and any commercial work, we bring a portable dehumidifier (Phoenix 200 MAX or similar) into the garage during cure. Drops the RH inside the bay from 80% to 50% in about two hours. Makes a huge difference for polyaspartic, which is more humidity-sensitive than epoxy.

When we push to next day to avoid blush

If we walk in at 7 AM and the dew point is above 70°F, we’ll often delay the first coat by 2-3 hours to let the slab warm above the dew point. Applying coating to a slab that’s colder than the dew point causes condensation under the coating — instant adhesion failure. Sometimes this pushes a single-day install to a day-and-a-half. We’d rather lose a half day than rip the floor up and start over.

Florida temp window

Ideal application temps are 65-85°F surface temperature. Below 60°F (rare here but happens in January mornings), the chemistry crawls. Above 90°F, pot life shortens dangerously — a 30-minute pot life can drop to 8 minutes in a 95°F garage. We use an infrared thermometer to check the slab temp every couple of hours.

Hurricane Prep: When to Schedule Around Storm Season

Atlantic hurricane season runs June 1 through November 30, with peak risk for Jacksonville from mid-August through late October. The best install windows are March through May (low humidity, mild temps, dry weeks, no storm risk) and November through February (cool, dry, no storms — just watch for the occasional cold snap dropping below 60°F overnight). Avoid late August through October when possible — not because the install can’t be done, but because if a named storm forms and you have to evacuate mid-cure, you’ve got a problem. Apex Epoxy Flooring tracks the National Hurricane Center 5-day cone before scheduling installs in peak season, and we’ll reschedule at no charge if a storm threatens within 72 hours of your install date.

Why Some Jobs Take Longer Than Quoted

Sometimes a 3-day quote becomes a 4-day reality. Here’s why, in order of frequency.

Concrete moisture surprises

Moisture content changes with the seasons and after heavy rain weeks. If the slab tests high on install day, we add a moisture-mitigating primer — 12-24 hours added to the timeline. Most common with slabs poured directly on grade in low-lying neighborhoods.

Hairline crack discovery

Cracks you can’t see under paint or sealer show up plainly after grinding. Ten cracks adds 30 minutes; a hundred cracks adds half a day. Older slabs (1980s and earlier) in Murray Hill, Ortega, and parts of San Marco tend to have more cracks than newer construction.

Oil contamination and threshold damage

Where a car has been parked for 20 years, oil soaks deep into the concrete. Grinding alone doesn’t pull it out — we either grind deeper, spot-treat with degreaser and TSP scrub (adds 2 hours), or in extreme cases use an oil-stop primer. About 1 in 5 garages needs this extra work. Damaged garage door thresholds need polymer-modified mortar repair too — 30 minutes of work plus 2-4 hours of cure before we can coat over it.

Frequently Asked Questions

Can you really install an epoxy garage floor in one day?
Yes — but only with a polyaspartic or polyurea-based system, never with traditional epoxy. Polyaspartic chemistry recoats in 60-90 minutes versus epoxy’s 12-24 hour recoat window, which is what makes the single-day timeline mathematically possible. A real single-day install still includes full diamond grinding, crack repair, primer (if needed), base coat with flake broadcast, scrape, and clear topcoat — usually 8-11 hours on site with a 3-4 person crew. If anyone offers you a “1-day epoxy” install using actual epoxy resin, they’re either misnaming the product or skipping critical cure windows.
How long before I can park my car on a new epoxy floor?
For polyaspartic, 24 hours minimum and 48 hours is safer. For traditional 100% solids epoxy, 72 hours, no exceptions. The reason is hot tire pickup — warm tires from driving on Jacksonville asphalt can bond to a not-fully-cured coating and lift it when you back out. This is the most common cause of new-coating failure and it’s 100% preventable by waiting. Foot traffic is fine much sooner (8-24 hours), and you can put toolboxes and furniture back at 24-48 hours.
Does Florida humidity affect epoxy cure time?
Significantly. Above 80% relative humidity, traditional epoxy is at risk of amine blush — a milky, sticky surface film caused by moisture reacting with the curing amine hardener. Polyaspartic is even more humidity-sensitive in some formulations. Jacksonville crews work around this by starting early in the morning when humidity is lower, using portable dehumidifiers inside the garage during cure, and delaying coats when the slab temperature is below the dew point. In peak summer, expect cure windows to run 25-50% longer than the product datasheet suggests.
What if it rains during my epoxy install?
If the garage door stays closed during the rain and the coating has been down at least 60-90 minutes for polyaspartic or 4-6 hours for epoxy, you’re fine — the surface has skinned over enough to shed humidity. If rain blows in through an open door onto wet coating, the affected area has to be ground out and recoated. Good crews close the door before any forecast precipitation and use box fans pointed outward to vent solvent vapors without pulling humid air across the floor. If a thunderstorm hits mid-application, work pauses, the door drops, and we wait it out.
How long does the prep work take vs the actual coating?
On a typical 2-car Jacksonville garage, prep takes 4-6 hours and the actual coating application takes 2-3 hours total across all coats. So roughly 60-70% of the labor is prep, 30-40% is coating. This ratio is exactly backward from what most homeowners expect — they think the coating is the main event. In reality, the diamond grinding, crack repair, and surface profiling are what makes the coating last 15-20 years instead of failing in 18 months. If a contractor’s quote shows them spending more time coating than prepping, that’s a red flag worth questioning.

Final Thoughts

Polyurea garage floor coating offers a smart, long-term solution for homeowners looking to improve both the look and performance of their space. With its fast-curing application, it stands up to Florida’s climate and daily use without losing its appeal. For those seeking durability, safety, and a polished finish, polyurea flooring delivers both function and style that lasts.

Table of Contents
epoxy coatings

Call Us Now
(904) 595-9792

Related Epoxy Flooring News

Categories Apex

Commercial vs Residential Epoxy Flooring: Which Coating Is Right for Your Jacksonville Property?

Commercial epoxy flooring installation

Blog

Is Epoxy Better Than Vinyl Flooring? A Complete Comparison Guide

Kyle Long

June 17, 2026

Table of Contents

The “epoxy” rolled onto your neighbor’s garage floor on a Saturday afternoon and the “epoxy” laid down in a Jacksonville auto-body shop or distribution warehouse look almost identical from a fifteen-second YouTube clip. Both are glossy. Both are gray with a few colored flakes. Both came out of a two-part bucket. But underneath that mirror finish, they are engineered for completely different loads, completely different chemical exposures, and completely different life expectancies. Choosing the wrong system is one of the most expensive mistakes a property owner in Northeast Florida can make, because once a failing coating delaminates from a slab, you pay twice: once to grind it off, and once to do it right. This guide breaks down how a true commercial epoxy flooring Jacksonville system differs from a residential one, where each belongs, and what the Florida climate does to both during install and over the long haul.

What Separates Commercial-Grade from Residential-Grade Epoxy at the Molecular Level

The word “epoxy” is a chemistry family, not a single product. Every epoxy coating starts with an epoxide resin (usually a bisphenol-A or bisphenol-F derivative) and a hardener (typically a polyamine or polyamide). When the two parts mix, they cross-link into a thermoset polymer. The differences between residential and commercial systems live in four places: the resin purity, the hardener chemistry, the total film build, and what gets broadcast into the wet coating.

Coating Thickness and Film Build

A typical big-box-store DIY garage kit lays down a total dry film thickness of about 3 to 5 mils — thinner than a credit card. A reputable residential installer using 100% solids epoxy will get you to 12 to 20 mils with a flake broadcast and topcoat. A commercial system starts where residential ends. Light commercial floors run 20 to 40 mils. A self-leveling industrial system in a warehouse or food plant is 60 to 125 mils, and a trowel-applied mortar system for a forklift bay or chemical-resistant containment area can exceed 250 mils — roughly a quarter inch of solid polymer concrete. ASTM D4060 (Taber abrasion) wear rates are not linear with thickness, but you can think of every mil as a buffer between the floor surface and the slab beneath.

Resin Chemistry and Hardener Ratios

Residential 100% solids epoxy is typically a 2:1 mix ratio with a modified amine hardener tuned for room-temperature cure and a long pot life so a homeowner or one-truck crew has time to roll it out. Commercial systems run leaner ratios (often 4:1 or even 1:1 by volume with a higher-purity Novolac or cycloaliphatic amine), shorter pot life, and require power-mix equipment because hand-mixing won’t achieve the molecular blend the spec sheet promises. Novolac epoxies, which are heavily cross-linked, resist acids and solvents that would etch a standard residential floor within weeks.

Aggregate Inclusion

The other quiet difference is what gets broadcast into the coating. Decorative flake (vinyl chip) on a residential floor is cosmetic. In a commercial spec, the broadcast is functional silica quartz, aluminum oxide, or silicon carbide — graded aggregate that gives the floor an OSHA-compliant slip-resistance profile and dramatically extends the abrasion life. A commercial kitchen floor isn’t pretty by accident; the quartz keeps a line cook from going down when a stock pot spills.

Where Commercial Coatings Outperform

The performance gap shows up in three places: chemical resistance, abrasion resistance, and thermal cycling. None of these matter much in a residential garage. All of them matter every single shift in a Jacksonville business.

Chemical Resistance

A residential epoxy will shrug off the occasional dropped beer and a slow drip of motor oil. It will not survive brake fluid (a polyglycol ether that softens many amine-cured epoxies), DEF, hydraulic fluid, battery acid, or the citric and lactic acids in a commercial kitchen. ASTM D1308 spot-test data on Novolac systems shows 24-hour resistance to 50% sulfuric acid and 98% acetic acid where standard BPA epoxies would whiten and soften in under an hour. If you run a brake shop, a food-prep facility, or a brewery, the chemistry of your floor decides whether your slab is protected or merely decorated.

Abrasion Resistance

Forklift wheels — especially hard polyurethane or steel-wheeled pallet jacks — exert point loads up to ten times higher than a passenger-car tire. A residential 12-mil epoxy will start showing wheel tracking and gloss reduction in the first quarter of operation. A 40-mil commercial broadcast quartz system, tested per ASTM D4060 with a CS-17 wheel, typically loses less than 100 milligrams per 1,000 cycles versus 200 to 400 mg for a thinner residential film. Over five years in a 20,000-square-foot Jacksonville distribution center, that delta is the difference between a one-time install and a forced recoat.

Thermal Cycling

Commercial coolers and freezer slabs see 80°F surface swings every door cycle. Heated kitchen floors near fryers and dishwashers see localized thermal shock. Commercial systems are formulated with elastomeric modifiers or applied in conjunction with urethane cement underlayments (Sika Sikafloor PurCem, BASF Ucrete) that flex through thermal cycling without micro-cracking. A standard rigid epoxy in those environments will spider-crack within a season.

Specific Commercial Epoxy Systems and What They’re Spec’d For

The commercial spec book is a different world from the home-improvement aisle. A handful of systems show up again and again in Northeast Florida industrial and institutional builds.

Sherwin-Williams Armor Seal Series

Armor Seal 1000 HS and Armor Seal 33 are workhorse 100% solids epoxies used in light-to-medium commercial environments — automotive service bays, mechanical rooms, light manufacturing. Typical spec is a 6 to 12 mil dry film over a properly prepped slab. The 1000 HS variant is moisture-tolerant on cure, which matters when humidity climbs into the 80s during a July install.

Tnemec Series 282 Tneme-Glaze

Tnemec Series 282 is a high-build polyamide epoxy frequently spec’d into healthcare, pharmaceutical, and food-grade environments because of its smooth, easy-clean surface and resistance to disinfectants. A common Tnemec assembly in a Jacksonville surgical suite is a 282 base over a 201 epoxy primer with an integral cove base — total system around 30 to 40 mils.

Sika Sikafloor and BASF Ucrete

For aggressive thermal and chemical environments — commercial kitchens, breweries, dairy plants, cold-storage warehouses around Jacksonville’s port — urethane cement systems like Sikafloor PurCem and BASF Ucrete are the gold standard. These are 3/16-inch to 3/8-inch trowel-applied mortars that withstand 200°F+ steam cleaning, deep-freeze cycling, and lactic/citric acid exposure. They cost more, but they outlast three or four cycles of epoxy.

Residential Systems and Where They Hold Up

Residential epoxy isn’t inferior — it’s targeted. For the loads and exposures of a private garage, basement, sunroom, or patio, a properly installed residential system will deliver fifteen to twenty years of service for a fraction of the cost. Apex Epoxy Flooring installs three residential systems most weeks of the year in Jacksonville, St. Johns, Nocatee, and the beaches.

Polyaspartic One-Day Systems

Polyaspartic (a subclass of polyurea) cures in 60 to 90 minutes per coat, which means a homeowner can roll a car back into the garage the next morning. UV stability is excellent — no ambering or yellowing in west-facing garage doors. Typical Jacksonville polyaspartic install is a moisture-mitigating primer, a pigmented polyaspartic base, a full chip broadcast, and a clear polyaspartic topcoat with anti-slip additive. Total system: 18 to 25 mils, installed in a single day.

100% Solids Epoxy with Polyurethane Topcoat

A two-day install with longer pot life and a slower, more forgiving roll. The base epoxy is 100% solids (no solvents, no VOCs), the chip broadcast is full or partial, and a polyurethane or polyaspartic topcoat carries the UV and abrasion protection. Total dry film around 15 to 20 mils. This system is more wallet-friendly than a full polyaspartic build and well-suited to garages, basements, and laundry rooms.

Decorative Chip and Quartz Systems

For homeowners who want a designer look — basements, finished pool decks, indoor-outdoor lanais — a quartz broadcast or a designer flake blend over a tinted epoxy base looks stunning and wears well. These systems are residential in load class but use commercial-style aggregate broadcasts for slip resistance, which is a smart compromise around pools and outdoor entertaining areas.

The Florida Factor: Why Jacksonville Is Not Phoenix

Every coating manufacturer publishes a tech data sheet assuming ideal conditions. Northeast Florida is rarely ideal. Three local realities drive 80% of the on-site decisions a competent installer makes.

Humidity and Cure Window

Most epoxy resins are spec’d for 50 to 85% relative humidity at the surface during cure. Jacksonville in July routinely hits 90%+ ambient RH, and dew point can put condensation on a slab even inside a closed garage. Epoxy that flashes off with surface moisture entrained will blush, fish-eye, or fail to cross-link in the top mil — meaning the floor looks fine for 30 days, then peels in sheets. The fix is a humidity-tolerant primer (Sherwin-Williams Armor Seal 1000 HS, Sika Sikafloor 161 W) and disciplined timing — early-morning installs when dew point is well below slab temperature.

Slab Moisture and Vapor Drive

Jacksonville’s water table is shallow. Slabs on grade — especially older 1960s-1980s pours without a proper vapor barrier — have continuous hydrostatic vapor drive from below. Before any commercial install, a serious installer runs a calcium chloride test (ASTM F1869) to measure moisture vapor emission rate in pounds per 1,000 square feet per 24 hours, and ideally an in-situ relative humidity probe (ASTM F2170) reading slab RH at 40% depth. Anything over 3 lbs/1,000 sqft/24 hrs MVER, or 75% RH at depth, demands a moisture-mitigation primer (Sherwin-Williams Floortex or Aquafin VB) before the topcoat goes on. Skip this step, and the floor blisters from below within a year.

Surface Temperature Limits

Concrete in a Jacksonville parking deck or roll-up-door warehouse hits 130-150°F on a summer afternoon. Most epoxies have a maximum substrate temperature of 90°F for application — above that, pot life collapses, the resin flashes before it wets out, and you get pinholes. The discipline is early-start installs (often 4 AM or 5 AM in July), spot-cooling with industrial fans, or scheduling the project for the shoulder season (October-April) when slab temperatures are workable all day.

Total Cost Comparison Per Square Foot Installed in Jacksonville

Pricing varies with slab condition, prep requirements, mobilization, and color/aggregate choice, but the Jacksonville market generally falls in predictable ranges. Treat these as starting points — every floor gets a moisture test and a prep assessment before a firm number lands.

Residential Garage and Home Systems

Standard 2-car garage polyaspartic with chip broadcast: $4 to $7 per square foot installed, or roughly $1,800 to $3,200 for a typical 450-square-foot garage. Single-day install. Includes diamond grinding, crack repair, one chip color, and a clear topcoat with anti-slip.

Light Commercial

Office, retail, light service bay, veterinary clinic, fitness studio: $6 to $10 per square foot. A 3,000-square-foot showroom or service area lands around $18,000 to $30,000. Spec typically includes shot blasting or heavy grinding, moisture mitigation primer, 20-30 mil epoxy or hybrid epoxy/polyaspartic, integral or applied cove base where code requires.

Heavy Industrial and Specialty

Warehouse with forklift traffic, commercial kitchen, brewery, pharmaceutical: $10 to $25 per square foot. A 10,000-square-foot Jacksonville distribution center floor with a 40-mil quartz broadcast system runs $100,000 to $180,000 depending on prep. Urethane cement systems for cold-storage or aggressive-chemical environments push the upper end. These are 10-to-20-year systems with proper maintenance, which is what makes the math work.

When Residential Epoxy Is Wrong for a Business

The temptation to save money by spec’ing a residential-grade kit for a business — or having a handyman who “does garages” handle the warehouse — is the most common reason Apex Epoxy Flooring gets called back to a commercial property within 18 months. Here is where it always goes wrong.

Restaurants Without Integral Cove Base

Florida Department of Business and Professional Regulation food-service codes require a smooth, easily cleanable transition between floor and wall. A residential epoxy installed flat against a baseboard creates a seam that traps food debris and breeds bacteria. A commercial spec includes an integral cove — a 4 to 6 inch radiused upturn formed in epoxy mortar — that meets health inspector standards on day one.

Gyms and Studios Without Anti-Slip Profile

A glossy residential epoxy in a gym becomes a liability the first time someone sweats. Commercial fitness floors use a broadcast aggregate (quartz or aluminum oxide) and a satin urethane topcoat that holds an ADA slip-coefficient above 0.6 wet, per ASTM D2047.

Warehouses With Point Loading

Pallet jack wheels concentrate 1,500 to 3,000 pounds onto a contact patch the size of a quarter. A 15-mil residential coating crushes and tracks within months. A 40-mil broadcast quartz commercial system distributes the load and survives the duty cycle. If a forklift, pallet jack, or stand-up reach truck will touch the floor, the residential spec is wrong.

When Commercial Epoxy Is Overkill for a Home

The reverse mistake is just as common. A homeowner reads about Tnemec or urethane cement and asks for a “commercial-grade” garage floor. For 95% of residential applications, this is wasted money — three to four times the cost for performance the floor will never need.

Daily-Driver Garage

Your car weighs 4,000 pounds spread over four contact patches the size of your hand. Hot tires, road salt in winter (less of an issue in Jacksonville), occasional oil drips — none of this stresses a 20-mil polyaspartic system. Spending $15,000 on a 40-mil industrial broadcast for a residential garage is buying durability you won’t use.

Basement and Interior Living Spaces

A finished basement or sunroom sees foot traffic and furniture. A 15-mil decorative chip system performs beautifully and stays within a sensible budget. The aggressive chemical resistance of an industrial Novolac is irrelevant in a space where the worst spill is a glass of wine.

Patios and Pool Decks

Outdoor residential surfaces need UV stability and slip resistance — both of which are addressed by a polyaspartic with quartz broadcast. An industrial epoxy on an outdoor patio will chalk and yellow in the Florida sun within a year because most industrial epoxies are not UV-stable. The right answer is a residential-class polyaspartic, not a heavy commercial system.

Frequently Asked Questions

Can I put commercial epoxy in my garage at home?
You can, but for almost every homeowner it’s overkill. A residential polyaspartic or 100% solids epoxy at 15 to 25 mils handles passenger-car traffic, hot tires, and dropped tools for 15 to 20 years at roughly a third of the cost of an industrial spec. The exception is a serious home workshop with metal lathes, hydraulic presses, or chemical use — there a light-commercial 20-to-30-mil broadcast system makes sense. For a daily-driver garage, residential is the correct call.
How long does commercial epoxy last in Jacksonville?
A properly installed 40-mil commercial broadcast quartz system in a Jacksonville warehouse or service bay lasts 10 to 15 years before it needs a full recoat, with light topcoat refreshes every 3 to 5 years to maintain gloss and slip resistance. A urethane cement system in a commercial kitchen or brewery can run 15 to 25 years. Life depends almost entirely on slab prep, moisture mitigation, and the discipline of the original install — not the brand name on the bucket. A floor installed on a wet slab with no vapor barrier will fail in 18 months regardless of how much was spent on resin.
Does Florida humidity affect epoxy installation?
Yes, significantly. Jacksonville’s average summer relative humidity sits in the 80-90% range, and the dew point routinely climbs above 70°F. If a slab is at or below dew point when epoxy is rolled out, condensation under the film causes blushing, amine sweat-out, and adhesion failure. Reputable installers schedule summer projects for early-morning starts, use humidity-tolerant primers, and run dehumidifiers in enclosed spaces. The shoulder seasons (October through April) are ideal for large commercial pours because slab temperatures and humidity both cooperate.
What’s the difference between epoxy and polyaspartic?
Epoxy is a thermoset polymer of epoxide resin and amine hardener; polyaspartic is a subclass of polyurea, made from aspartic ester resin and aliphatic isocyanate. The practical differences: polyaspartic cures in 60-90 minutes versus 12-24 hours for epoxy, is fully UV-stable (won’t yellow), and has better abrasion resistance per mil. Polyaspartic is more expensive per gallon and has a much shorter pot life, which makes it a specialist’s coating. Most modern residential garage systems use both: an epoxy or polyaspartic base for adhesion and build, and a polyaspartic topcoat for UV stability and one-day return-to-service.
Do restaurants need a specific type of epoxy?
Yes. Florida health code requires food-service floors to be smooth, non-absorbent, and easily cleanable, with an integral cove base where the floor meets the wall. The right system is either a 40-to-60-mil commercial epoxy with quartz broadcast and an integral cove, or — for serious kitchens with steam, hot oil, and heavy thermal cycling — a urethane cement system like Sikafloor PurCem or BASF Ucrete. A residential garage epoxy installed in a restaurant will fail health inspection on the cove detail alone and will not survive the chemical and thermal duty cycle of a commercial kitchen.

Final Thoughts

Polyurea garage floor coating offers a smart, long-term solution for homeowners looking to improve both the look and performance of their space. With its fast-curing application, it stands up to Florida’s climate and daily use without losing its appeal. For those seeking durability, safety, and a polished finish, polyurea flooring delivers both function and style that lasts.

Table of Contents

epoxy coatings

Call Us Now
(904) 595-9792

Related Epoxy Flooring News

Categories Blog

How Florida Humidity Affects Epoxy Floor Installation (And How Apex Gets It Right)

concrete garage before epoxy installed

Blog

Is Epoxy Better Than Vinyl Flooring? A Complete Comparison Guide

Kyle Long

June 3, 2026

Table of Contents

How Florida Humidity Affects Epoxy Floor Installation (And How Apex Gets It Right)

Florida’s humidity isn’t just uncomfortable — it’s the single biggest threat to your epoxy floor. More epoxy installations fail in Florida due to moisture-related issues than any other cause, which is exactly why our epoxy garage floor installers in Jacksonville, FL build every job around moisture control. And most homeowners never learn this until their floor starts bubbling, peeling, or delaminating six months after installation.

At Apex Epoxy Flooring, we’ve built our entire process around Florida’s unique moisture challenges, and our crews follow the same humidity-controlled installation process for epoxy floor installation in coastal Savannah, GA. Here’s what humidity does to epoxy, why it matters, and exactly how we prevent it from ruining your floor.

The Three Ways Humidity Attacks Epoxy Floors

Moisture SourceWhat HappensResult
Surface condensationMoisture forms on concrete when slab temp drops below dew pointEpoxy won’t bond to wet concrete → peeling
Moisture vapor transmissionWater vapor pushes up through slab from ground belowBubbles, blisters, delamination under coating
High ambient humidityMoisture in the air interferes with epoxy cure chemistrySoft cure, chalky finish, reduced hardness

Any one of these can ruin an installation. In Florida, all three are present most of the year. That’s why humidity management isn’t optional here — it’s the difference between a floor that lasts and a floor that fails.

Surface Condensation: The Invisible Killer

Florida’s concrete garage slabs stay cool from the earth beneath them. When warm, humid air flows into the garage, it hits that cool concrete and condensation forms — the same way a cold glass sweats on a summer day. This moisture film is often invisible to the naked eye, but it’s enough to prevent epoxy from bonding to the concrete.

Contractors who don’t check slab temperature and dew point before installation are gambling with your floor. If the concrete temperature is within 5°F of the dew point, condensation is either forming or about to form — and epoxy should not be applied. It is the same check our Boca Raton epoxy flooring crew runs on every slab before any coating goes down.

💡 How Apex Handles It

Before every installation, we measure concrete surface temperature, ambient temperature, and dew point using calibrated instruments. We only proceed when conditions confirm that no condensation will form during the application and cure window. If conditions aren’t right, we reschedule — we never gamble with your floor.

Moisture Vapor Transmission: The Problem Under the Slab

Florida’s high water table means groundwater is often just a few feet below your concrete slab. That water constantly pushes moisture vapor upward through the porous concrete. You can’t see it, but it’s there — and it creates hydrostatic pressure beneath any coating that tries to seal the surface.

When that vapor pressure exceeds the bond strength of the coating, the epoxy lifts. You see bubbles first, then blisters, then full sections delaminating from the slab. This failure mode can take weeks or months to appear, which is why floors sometimes look perfect at first and fail later.

Professional moisture testing — using calcium chloride tests (ASTM F1869) or relative humidity probes (ASTM F2170) — quantifies exactly how much moisture vapor is moving through the slab. If levels exceed acceptable thresholds, we apply a vapor-mitigating primer that creates a barrier between the slab and the epoxy system.

Ambient Humidity: The Cure Chemistry Factor

Epoxy is a two-part chemical system — resin and hardener react together to form a hard, cross-linked polymer. This chemical reaction is sensitive to ambient conditions. High humidity (above 85% RH) can interfere with the cure process, causing the surface to remain tacky, develop a chalky “amine blush,” or cure softer than specified.

In Florida, relative humidity regularly exceeds 85% — sometimes even inside a closed garage. Professional installers monitor ambient conditions throughout the application process and control the environment when necessary using fans, dehumidification, and timing the installation for optimal conditions — the same environmental controls our epoxy flooring crews across metro Atlanta rely on during humid summer installations.

Why DIY Epoxy Fails in Florida More Than Anywhere Else

DIY epoxy kits don’t come with moisture meters, dew point calculators, or vapor-mitigating primers. They assume you’re working in a climate-controlled environment with dry concrete — conditions that basically never exist in a Florida garage. The kit instructions say “make sure the surface is dry” without explaining how to actually verify that in a state where the air itself is saturated with moisture half the year.

This is why DIY failure rates in Florida — and across the humid coastal Southeast where our Charleston, SC epoxy flooring crew works — are dramatically higher than in drier climates. It’s not that Florida homeowners are less capable — it’s that the climate demands professional-level moisture management that DIY kits don’t provide.

The Apex Florida-Specific Process

StepWhat We DoWhy It Matters in Florida
1. Environmental checkMeasure slab temp, air temp, dew point, RHPrevents condensation-related bond failure
2. Moisture testingCalcium chloride or RH probe testIdentifies vapor transmission before it causes delamination
3. Diamond grindingMechanical profiling with dust controlOpens pores for deep epoxy penetration despite humid conditions
4. Moisture-mitigating primerVapor barrier primer on every Florida installationBlocks moisture vapor from reaching the epoxy system
5. Timed applicationCoat during optimal temperature/humidity windowsEnsures proper cure chemistry for full hardness
6. Polyaspartic topcoatUV-stable, moisture-resistant clear coatSeals the system against ongoing Florida humidity exposure

Florida-Proof Your Floors

Florida’s humidity isn’t going away. But with the right process, the right materials, and the right contractor, it doesn’t have to ruin your epoxy floor. At Apex Epoxy Flooring, every installation is engineered for Florida’s specific conditions — not adapted from a process that was designed for Arizona or Ohio.

Call (904) 595-9792 for a free consultation. We’ll test your slab, check your conditions, and build a floor that’s made to last in Florida’s toughest climate.

Apex Epoxy Flooring — engineered for Florida. Lifetime warranty. Serving all of FL, GA, and SC. (904) 595-9792

Can epoxy be installed in summer in Florida?+
Yes — professional contractors can install epoxy year-round in Florida by managing environmental conditions. We monitor temperature, humidity, and dew point on every installation and adjust timing and ventilation to ensure proper cure regardless of season.
Why is my epoxy floor bubbling?+
Bubbling is almost always caused by moisture vapor pushing up through the concrete slab beneath the coating. This happens when moisture testing is skipped or when a vapor-mitigating primer isn’t used. Professional installations that include moisture testing and primer prevent this issue.
What humidity level is too high for epoxy?+
Most epoxy manufacturers recommend application below 85% relative humidity. Above that level, cure chemistry can be affected, resulting in a softer finish or surface defects. Professional installers monitor conditions throughout the process and control the environment when necessary.

Final Thoughts

Polyurea garage floor coating offers a smart, long-term solution for homeowners looking to improve both the look and performance of their space. With its fast-curing application, it stands up to Florida’s climate and daily use without losing its appeal. For those seeking durability, safety, and a polished finish, polyurea flooring delivers both function and style that lasts.

Table of Contents

epoxy coatings

Call Us Now
(904) 595-9792

Related Epoxy Flooring News

Categories Blog

Can You Epoxy Over an Existing Garage Floor Coating? What Florida Homeowners Need to Know

Garage flake epoxy floor installation

Blog

Is Epoxy Better Than Vinyl Flooring? A Complete Comparison Guide

Kyle Long

May 27, 2026

Table of Contents

You’ve got an existing coating on your garage floor — maybe a DIY kit, maybe paint, maybe a sealer the previous homeowner applied. Now it’s peeling, discolored, or just not holding up. Can you just put new epoxy on top of it?

Short answer: sometimes, but usually no. And doing it wrong means paying twice. Here’s what Apex Epoxy Flooring looks for when evaluating recoating projects.

When You CAN Coat Over an Existing Surface

✅ All of these must be true:

• Existing coating is fully adhered — no peeling, bubbling, or flaking
• Coating is chemically compatible with the new epoxy system
• Surface can be mechanically abraded for bonding profile
No moisture issues beneath the existing coating
• Existing coating is not excessively thick from multiple layers

When You MUST Remove the Old Coating

❌ Any ONE of these = full removal needed:

• Coating is peeling, flaking, or bubbling — even in small areas
• It’s latex paint or acrylic sealer (water-based products)
• You don’t know what the product is
Moisture problems exist (white residue, damp spots, patchy lifting)
• Floor has been coated multiple times already
• Existing coating contains silicone or wax

What Happens If You Coat Over a Bad Surface

Hidden Problem Result Within 6–12 Months
Peeling areas coated overNew coat peels off with old coat beneath it
Moisture beneath old coatingHydrostatic pressure pushes BOTH layers off
Incompatible coating typeChemical reaction causes delamination and bubbling
Smooth surface not abradedNew coat slides off — no mechanical bond
Multiple existing layers stackedEntire stack delaminates as a single sheet

The Real Cost: Doing It Twice vs. Doing It Right

Coating Over (When You Shouldn’t)

💰 Pay for new coating
⏱️ Fails within 6–18 months
💰 Pay for full removal
💰 Pay for new coating AGAIN
= 2x–3x the total cost

Full Removal + Proper Install

💰 One-time cost for removal + coating
✅ Lasts 15–20+ years
✅ Lifetime warranty
✅ Zero callbacks
= Less money, better floor

How Apex Handles Recoating Projects

Step 1: On-site assessment of the existing coating type, adhesion, and moisture conditions. Step 2: Physical adhesion testing. If it pulls up, it all comes off. Step 3: Honest recommendation — in roughly 80% of cases, we recommend full removal. Step 4: Industrial diamond grinding back to raw concrete at CSP-2/CSP-3 profile.

We’d rather give you an honest answer upfront than take your money for a job that won’t last.

Get a Free Assessment

If you’ve got a failing coating and want to know whether it can be saved or needs to come off, call (904) 595-9792 for a free evaluation. No pressure, just honest answers.

🔹 Free On-Site Evaluation

Call (904) 595-9792 or request your assessment online. Lifetime warranty on every installation.

Final Thoughts

Polyurea garage floor coating offers a smart, long-term solution for homeowners looking to improve both the look and performance of their space. With its fast-curing application, it stands up to Florida’s climate and daily use without losing its appeal. For those seeking durability, safety, and a polished finish, polyurea flooring delivers both function and style that lasts.

Table of Contents

epoxy coatings

Call Us Now
(904) 595-9792

Related Epoxy Flooring News

3 Car Garage Flooring for Just $2700

For just $2,700, give your 3-car garage a professional epoxy flooring finish backed by our lifetime warranty. Fill out this form below to take advantage of this limited time offer!

2 Car Garage floors for Just $2300

For just $2,300, give your 2-car garage a professional epoxy flooring finish backed by our lifetime warranty. Fill out this form below to take advantage of this limited time offer!

3 Car Garage Flooring for Just $2700

For just $2,700, give your 3-car garage a professional epoxy flooring finish backed by our lifetime warranty. Fill out this form below to take advantage of this limited time offer!

2 Car Garage floors for Just $2300

For just $2,300, give your 2-car garage a professional epoxy flooring finish backed by our lifetime warranty. Fill out this form below to take advantage of this limited time offer!

Get Started Now

Ready to upgrade your garage with Apex Epoxy Flooring? Fill out the form below, and let us handle the rest. Whether it’s a 2-car or 3-car garage, we’re here to deliver top-notch service.