
Categories Apex

What Causes Concrete Floor Spalling in Florida (and How to Fix It Before Coating)

Garage floor concrete coating

Blog

What Causes Concrete Floor Spalling in Florida (and How to Fix It Before Coating)

Matt@pinnacletechnologies.ai

July 29, 2026

Table of Contents

If your Jacksonville garage slab is shedding thin flakes, showing shallow craters, or leaving a fine gray dust on everything you store on it, you are looking at spalling. And before anyone talks about a new epoxy or polyaspartic floor, that damage needs to be dealt with first. Sound concrete spalling repair is not an optional add-on to a coating job in Northeast Florida, it is the foundation the whole system stands on.

Spalling concrete is the surface breaking away from the slab, usually the top eighth to half-inch. On a coastal slab it rarely happens because of one dramatic event. It builds slowly from moisture pushing up through the concrete, salt air working on the reinforcing steel, and hot tires peeling a weak surface. Left alone, it spreads, and any coating laid over it fails right along with it.

This guide walks through what spalling actually is, why NE Florida slabs get it, how to tell surface damage from a structural problem, and the exact prep sequence a flaking concrete floor needs before a single coat goes down.

Quick answer: Concrete spalling in Florida is surface breakdown driven by moisture, salt air, and hot-tire stress, and it must be ground out and patched with a polymer-modified mortar before any epoxy or polyaspartic coating is applied, or the new floor will peel with it.

  • Coastal spalling is a moisture and salt problem, not a freeze problem, so the fixes are different from what northern guides tell you.
  • A coating bonds to the surface it touches, so a loose, dusting, or pitted concrete top layer must be removed first.
  • Repair means grind to sound concrete, patch with a cement-based polymer mortar, moisture-test, then re-profile.
  • Deep cracks, exposed rebar, or slab movement are structural signs that need evaluation before any concrete surface repair.

What Concrete Spalling Actually Is

Concrete is strong in compression but its surface is the weakest, thinnest part of the pour. The top layer is the “cream,” a finer paste of cement and fine sand that troweling brings up. When that layer loses its bond with the aggregate below, it flakes, chips, and crumbles. That is spalling.

On a garage or pool-deck slab you will see it as:

  • Thin plate-like flakes lifting off, often the size of a coin or a hand.
  • Shallow craters, sometimes called pitted concrete, where flakes have already popped off.
  • A chalky gray residue that wipes off on your shoe or a rag, the sign of a dusting, friable surface.
  • Exposed aggregate, the round stones showing through where the paste is gone.
  • Rough, sandy patches near slab edges, control joints, and downspout splash zones.

It is worth separating spalling from two look-alikes. Scaling is a broader peeling of the surface in sheets. Crazing is a fine spiderweb of hairline surface cracks that usually stays cosmetic. Spalling is the one that opens up real depth, and it is the one that guarantees a coating failure if you skip the repair.

Why NE Florida Slabs Spall: The Real Local Causes

Most spalling articles online are written for cold climates and blame freeze-thaw and de-icing salt. Neither is your problem in Jacksonville. Duval and the surrounding counties almost never hold a hard freeze long enough to fracture a slab, and nobody is throwing rock salt on a garage floor here. The causes on the First Coast are different, and knowing which one is driving your damage decides how the repair goes.

High water table and moisture vapor

This is the big one. Much of Jacksonville, the Beaches, and the St. Johns floodplain sits on sandy soil with a high water table, sometimes just a few feet down. Slabs poured without a proper vapor barrier, or on ground that stays wet, pull moisture up through the concrete continuously. That vapor drive lifts the surface layer from below and is the number one reason coatings blister and delaminate here. A slab can look bone dry and still be pushing several pounds of moisture through every day.

Salt air and rebar corrosion

Homes in Atlantic Beach, Neptune Beach, Jacksonville Beach, and anywhere within a few miles of the ocean or the Intracoastal live in salt-laden air. Chloride from that air migrates into concrete and attacks the reinforcing steel. When rebar or wire mesh corrodes, it expands to several times its original volume and pushes the concrete above it off. This is the most common cause of the deep, chunky spalling you see on older coastal slabs and pool decks.

Hot-tire pickup and surface stress

Florida heat cooks a garage floor, and a car’s tires come home from I-295 hot and soft. As they cool they grip a weak surface and lift it, taking coating or the top of the concrete with it. On an already-marginal slab this accelerates spalling. It is also exactly why a proper garage system uses a coating engineered against it, which we cover in our guide to hot-tire pickup on Florida garage floors.

Poor finishing and curing

A lot of spalling is born the day the slab is poured. Overworking the surface with a trowel, adding water to the mix for easier finishing, or letting the concrete dry too fast in the Florida sun all create a weak, porous top layer that fails early. Slabs poured in the heat without proper curing are common in older subdivisions across Mandarin, Arlington, and the Westside.

Concrete Spalling Repair: Cause, Sign, and Fix

Because the causes differ, so do the fixes. This table maps the common NE Florida drivers of spalling concrete to what you will see and what the repair actually involves.

CauseWhat you seeHow it is fixed
Moisture vapor / high water tableBlisters, damp patches, flaking with white residue, coating that peels in sheetsMoisture testing, then a moisture-mitigation primer before patching and coating
Salt air / rebar corrosionDeep chunks missing, rust stains, exposed steelChip to sound concrete, treat or replace steel, rebuild with polymer-modified mortar
Hot-tire pickupPeeling in tire tracks, lifted flakes in parking pathGrind off weak layer, re-profile, apply a hot-tire-rated coating system
Poor finishing / curingWidespread dusting, sandy surface, shallow flaking over large areasFull diamond grind to remove the weak cream layer, then densify and coat
Freeze-thaw / de-icing saltNot a factor in NE FloridaNot applicable locally
How can I tell moisture spalling from hot-tire damage?

Location and pattern are the tells. Hot-tire pickup shows up in the parking path, in two lanes where the wheels sit, and the flakes lift cleanly. Moisture spalling is more random, often worse near the garage door threshold and any wall that shares a footing with wet soil, and it tends to leave a white powdery residue from mineral salts carried up with the water. If a taped-down plastic sheet shows condensation underneath after a day, moisture is in play.

Why You Must Repair Spalling Before Any Coating

Here is the rule that governs the whole project: an epoxy or polyaspartic coating is only ever as strong as the concrete it is bonded to. The coating does not add structural strength to the slab. It grips the top layer, and if that top layer is loose, dusting, or lifting, the coating pulls it right off.

Skipping concrete spalling repair before coating leads to predictable failure:

  • Delamination. The coating bonds to a weak surface, then peels in sheets as that surface fails underneath it.
  • Blistering. Trapped moisture vapor pushes bubbles up through the film, especially on slabs with no vapor barrier.
  • Telegraphing. Every pit and crater you did not fill shows through the finished floor as a visible low spot.
  • Continued corrosion. Sealing salt-contaminated concrete over active rebar rust just hides a problem that keeps expanding.

A coating installed over unrepaired spalling does not slow the damage, it traps it. That is why any credible installer treats concrete surface repair and moisture testing as non-negotiable steps, not upsells. It is the same discipline behind a durable Jacksonville pool-deck coating, where salt exposure and standing water make prep even more critical.

Can you just coat over pitted concrete to fill the holes?

No. A coating flows into low spots but it does not bond to loose material, so any flake still clinging in a pit becomes a failure point. Pitted concrete has to be ground to sound substrate and the craters filled with a structural patch material first. Only then does the coating have a continuous, solid surface to grip across the whole floor.

Not sure if your slab needs repair or replacement?

Have a flaking or pitted floor looked at by someone who tests moisture and checks the substrate before recommending anything. Serving Jacksonville, the Beaches, and all of Northeast Florida.

Request a Free Estimate

The Concrete Spalling Repair Process, Step by Step

A proper repair on a Florida slab follows a set order. Rushing or skipping a step is where most failures come from.

  1. Diamond grinding. The whole surface is mechanically ground to remove the weak, dusting cream layer and any failing flakes, cutting down to sound concrete. This also opens the pores of the slab so patch material and primer can bite.
  2. Removing loose and contaminated material. Spalled edges are chipped back to solid concrete. Where rebar corrosion is the cause, the concrete is opened up around the steel so it can be cleaned or treated, not just buried.
  3. Patching with polymer-modified repair mortar. Craters and spalled areas are filled with a cement-based, polymer-modified repair mortar that bonds to the old slab and cures to a compatible hardness. These materials are chosen to match the concrete, not a soft filler that flexes independently.
  4. Moisture testing. Before anything seals the slab, moisture is measured, typically with a calcium chloride test or relative-humidity probes. On NE Florida slabs with a high water table this step decides whether a moisture-mitigation primer is needed.
  5. Re-profiling. The repaired, cleaned surface is brought to the right concrete surface profile so the coating mechanically locks in. Patched areas get the same profile as the surrounding slab for a uniform bond.
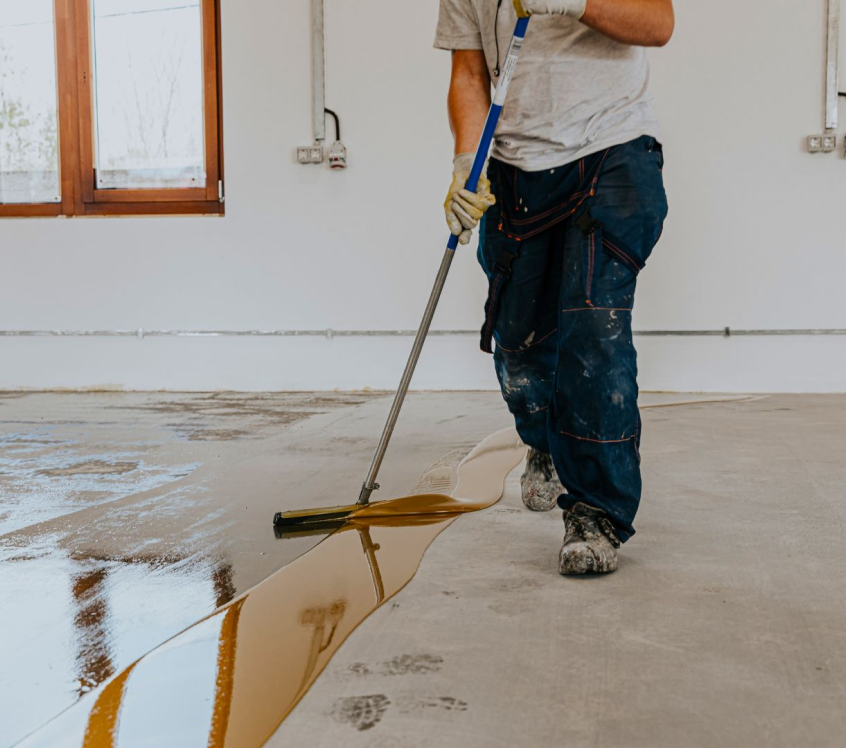
  6. Priming and coating. Only now does the actual coating system go on, over a slab that is sound, dry enough, filled, and profiled.

Every one of those steps exists to solve a specific Florida failure mode. Grinding kills the dusting layer. Patching restores pitted concrete. Moisture testing catches the vapor drive that ruins coastal coatings. Profiling gives the coating something to hold.

How long does spalling repair add to a coating project?

It depends on depth and moisture. Light surface flaking that only needs grinding and thin patching may add a day for cure time. Deep spalling with exposed steel, or a slab that fails a moisture test and needs a mitigation primer, adds more because patch mortars and primers each need their own cure window before the next layer goes on. The point of testing up front is that nobody is guessing, the slab tells you what it needs.

Surface Spalling vs. Structural Damage: Know the Difference

Not all spalling is a coating-prep problem. Some of it is a signal that the slab itself is compromised, and no amount of surface repair fixes that. Learning to read the difference protects you from coating over something that needs real repair.

Surface-level signs (repairable as prep):

  • Flaking limited to the top quarter-inch or so.
  • Shallow pits and craters with sound concrete underneath.
  • Dusting or a sandy surface with no cracking below it.
  • Damage concentrated in tire paths, threshold areas, or splash zones.

Structural warning signs (need evaluation first):

  • Cracks wider than about an eighth of an inch, especially if the two sides sit at different heights.
  • Exposed, actively rusting rebar or wire mesh over a large area.
  • Sections of slab that sound hollow when tapped, a sign of a void or delamination below.
  • Movement, rocking, or new cracks appearing after heavy rain, which points to soil washout under the slab, a real concern on sandy NE Florida lots.

When structural signs show up, the honest answer is assessment before coating, and sometimes slab repair or replacement. A finished floor is only worth installing over a slab that will still be there in a decade.

Does spalling mean my whole slab has to be replaced?

Usually not. The large majority of garage and pool-deck spalling in Jacksonville is surface damage that grinds and patches successfully. Replacement only comes into play when there is deep structural cracking, widespread rebar corrosion that has fractured the slab, or soil movement underneath. That is exactly why testing and inspection come before any recommendation, so surface problems get a surface fix and structural ones get the right call.

Ready to fix a flaking floor the right way?

Start with an honest look at your slab, including moisture testing and a substrate check, so your coating lasts instead of peeling. Free estimates across Duval, St. Johns, Clay, and Nassau counties.

Request a Free Estimate

Protecting a Repaired Slab in the Florida Climate

Once a slab is repaired and coated, a few local habits keep spalling from coming back around the edges:

  • Control water at the source. Redirect downspouts away from the garage apron and pool deck. Standing water at slab edges feeds the moisture cycle that started the spalling.
  • Rinse salt off coastal decks. On Beaches and Intracoastal properties, a periodic freshwater rinse reduces the chloride load working on the concrete and any embedded steel.
  • Use a hot-tire-rated system in the garage. A polyaspartic or high-build epoxy engineered against hot-tire pickup resists the exact stress that lifts weaker surfaces.
  • Reseal joints. Keep control-joint and expansion-joint sealant intact so water is not finding its way under the slab.

Good prep plus good drainage is what separates a floor that lasts from one that spalls again in a couple of Florida summers. You can see how the full range of coating systems fits together on our main services overview.

Frequently Asked Questions

What causes concrete spalling in Florida garages and pool decks?

In Northeast Florida the main causes are moisture vapor rising through slabs on a high water table, salt air corroding embedded rebar near the coast, hot tires lifting a weak surface, and poor original finishing or curing. Freeze-thaw and de-icing salt, the usual culprits in colder states, are not factors here.

Can I coat over spalling concrete without repairing it first?

No. A coating bonds only to the surface it touches, so if that surface is flaking, dusting, or pitted, the coating peels off with it. Concrete spalling repair, grinding to sound concrete and patching with a polymer-modified mortar, must come before any epoxy or polyaspartic goes down.

How is spalling concrete actually repaired before coating?

The slab is diamond-ground to remove the weak top layer, spalled and contaminated areas are chipped back to solid concrete, craters are filled with a cement-based polymer-modified repair mortar, the slab is moisture-tested, and finally the surface is re-profiled so the coating locks in mechanically.

How do I know if my spalling is structural or just surface?

Surface spalling stays in the top quarter-inch as flakes and shallow pits over sound concrete. Structural signs include cracks wider than an eighth of an inch with height differences, large areas of exposed rusting rebar, hollow-sounding sections, or slab movement after rain. Structural damage needs evaluation before any coating.

Will spalling come back after the floor is coated?

Not if the repair and prep are done correctly and drainage is managed. Grinding out the weak layer, patching pitted concrete, and moisture-mitigating the slab removes the underlying failure. Keeping water away from slab edges, rinsing salt off coastal decks, and maintaining joint sealant keeps it from returning.

Final Thoughts

Spalling is a substrate problem, not a coating problem — and it never fixes itself. Repairing the slab first is what makes a new floor last. If your Jacksonville garage or pool deck is flaking, pitting, or dusting, our team can assess the slab and tell you honestly what it needs.

Table of Contents

epoxy coatings
Call Us Now
(904) 595-9792

Related Epoxy Flooring News

Categories Apex

Hot Tire Pickup on Epoxy Garage Floors in Jacksonville & Florida: Why Coatings Peel in the Heat and How to Stop It

Garage flake flooring system

Blog

Hot Tire Pickup on Epoxy Garage Floors in Jacksonville & Florida: Why Coatings Peel in the Heat and How to Stop It

Matt@pinnacletechnologies.ai

July 8, 2026

Table of Contents

You walk into your garage on a hot August afternoon, and there it is: two ugly patches on the floor, shaped almost exactly like where your tires sit. The coating is curled at the edges, maybe bubbled, maybe pulling up in sticky sheets. It looks like your whole epoxy floor is failing. In reality, you’re looking at one of the most common and most misunderstood coating problems in Florida garages: hot tire pickup.

Here’s the frustrating part. Hot tire pickup almost never means your slab is bad or that epoxy “just doesn’t work.” It means the coating you have wasn’t built for the heat and moisture your tires and your Florida climate throw at it. And once you understand the mechanism, the fix becomes obvious: it’s about bond strength, the right chemistry, and honest surface prep.

In this guide, you’ll learn exactly what hot tire pickup is and how to tell it apart from normal tire marks, why Florida’s heat and coastal humidity make it worse than almost anywhere in the country, why big-box DIY epoxy kits fail first, and how a properly installed epoxy-and-polyaspartic system stops the problem for good. We serve garages across Jacksonville, metro Atlanta, Savannah, Charleston, Fort Myers, and Boca Raton, and we see this same failure pattern week after week. Let’s break down what’s really happening under your tires.

What Hot Tire Pickup Actually Is (and Why It Looks Like Your Floor Is Peeling)

Hot tire pickup is when your garage floor coating lifts, curls, or pulls away from the concrete in patches that match your tire footprint. The coating literally releases from the slab and grabs onto the tire instead. You’ll see it right where the car parks, and nowhere else on the floor. That localized pattern is the giveaway.

People confuse it with ordinary tire scuffing, so here’s how to tell the difference. Normal tire marks are surface discoloration; you can often clean them, and the coating underneath is still solid and bonded. Hot tire pickup is structural failure of the bond. Look for these signs:

  • Curled or lifted edges where the coating has peeled up from the concrete in the tire zone.
  • Bubbles or blisters under the coating that weren’t there when it was installed.
  • Sticky or gummy rubber residue fused to the coating, sometimes with bits of coating stuck to the tire.
  • Discoloration and softness in the footprint area, where the coating feels tacky rather than glass-hard.

Why does it concentrate exactly under the tire and not across the whole floor? Because that’s the only place a hot, heavy, contracting rubber surface presses down and grips. The rest of your floor never sees that combination of heat, weight, and pull. So a weakly bonded coating survives everywhere except the one place it gets tested hardest. That’s also why a spot repair on the tire zone alone usually doesn’t hold: the same weak bond exists under the whole floor, waiting for its turn.

The Heat-and-Contraction Mechanism: Why Florida Tires Do This

To understand the fix, you have to understand the physics, and it’s simpler than it sounds. When you drive on Florida asphalt in summer, that pavement can sit well above 95F in direct sun. Your tires, from friction and road heat combined, routinely climb to 140F or higher on a highway run. Then you pull into the garage and park.

Now a hot tire is pressed against your floor coating with the full weight of the vehicle on it. Heat transfers from the rubber into the coating. If the coating has a low heat tolerance, it softens slightly at that contact point. As the tire cools over the next hour or two, the rubber footprint contracts and grips whatever it’s touching. If the coating is only weakly bonded to the concrete, the cooling, shrinking tire wins the tug-of-war and peels the coating up off the slab.

Cheaper coatings make this worse in two ways. First, they re-soften more easily under tire heat, so the bond is even more compromised at the exact moment of stress. Second, they never fully hardened to begin with, so the tire’s grip meets almost no resistance. A high-quality, properly cured coating stays hard through that heat cycle and simply doesn’t let go.

This mechanism is identical in Jacksonville, Fort Myers, Boca Raton, Savannah, and Charleston. The difference from a garage in Ohio or Michigan is that Florida delivers this thermal cycle nearly every day for months on end, with no winter recovery period. Your floor gets stressed and re-stressed continuously all summer. That’s why weak coatings that might limp along for years up north can fail here in a single season.

Why DIY Big-Box Epoxy Kits Fail First in Florida

If you bought a garage floor kit off the shelf and rolled it on yourself, and it’s now lifting under your tires, you’re not alone, and it’s not because you did the job badly. It’s usually the product and the process. Here’s the honest breakdown.

Low solids content. Many DIY kits are what the trade calls paint-grade or water-based epoxy, often in the range of roughly 5 to 12 percent solids. That means most of what you rolled on evaporated, leaving a thin film that behaves a lot like heavy latex paint. It has low heat tolerance and thin build, exactly the wrong combination for hot tires.

Weak surface prep. Most kits tell you to clean and acid-etch the concrete. Etching lightly opens the surface, but it does not create the deep mechanical profile a durable coating needs to lock into. Without real profile, the coating is essentially sitting on top of the slab rather than keyed into it, so the tire has an easy time pulling it off.

Rushing return to service. The instructions may say you can park on it in a day or two. In humid Florida conditions, coatings cure slower, and driving on a floor before it has fully cross-linked leaves it soft and vulnerable to the very first hot day.

Put those three together and you get the real-world DIY timeline we see constantly in coastal and inland Florida garages: not years, but months. Sometimes a single summer. It’s disappointing, but it’s predictable, and it points straight at the actual root cause.

Already seeing tire-shaped patches on your floor?

Have a pro evaluate the bond, moisture, and coating chemistry before you patch over the problem and pay for it twice.

Request a Free Estimate

The Real Root Cause Is Surface Prep and Bond Strength

Strip away the symptoms and hot tire pickup comes down to one thing: the coating never bonded to the concrete strongly enough to resist the tire’s pull. Everything else is downstream of that. So the single most important step in any floor that survives Florida summers happens before a drop of coating goes down.

Mechanical diamond grinding. A professional install starts by grinding the slab with diamond tooling. This does two things at once: it removes surface contaminants and laitance, and it creates a concrete surface profile, a controlled roughness the coating flows into and locks onto as it cures. That mechanical key is what fights the tire. Etching with acid, the DIY standard, cannot produce anything close to the same profile. It under-profiles the slab and leaves the coating with little to grab.

Crack and spall repair. Before coating, cracks, pits, and spalled areas get repaired and filled. If you skip this, tires tend to lift the coating right at those weak seams, because the bond is already compromised there. Fixing them first removes the easy starting points for peeling.

When the profile is right and the repairs are done, the coating becomes part of the floor rather than a skin sitting on it. Under those conditions, a hot, contracting tire can grip all it wants; the coating stays locked into the concrete and simply doesn’t release. That’s the whole game. Chemistry helps, and we’ll get to it, but bond strength is the foundation everything else stands on.

How a Polyaspartic Topcoat Eliminates Hot Tire Pickup

Once the bond is right, the next lever is the coating chemistry itself, and this is where polyaspartic earns its reputation. Polyaspartic is a fast-curing, extremely durable coating, and its most relevant trait for Florida is its heat resistance.

The key concept is glass transition temperature, the point at which a coating starts to soften from a hard solid toward a rubbery state. Polyaspartic formulations engineered for garage floors have a glass transition temperature well above 200F, with systems commonly engineered to handle 300F and up. Compare that to a 140F tire. The tire heat isn’t even close to the point where a quality polyaspartic softens. So the mechanism that lifts cheap coatings, softening under tire heat, simply doesn’t get triggered.

Polyaspartic also cures harder than paint-grade epoxy and stays hard through repeated thermal cycling all summer long. It doesn’t fatigue and go tacky the way a low-solids film does after a few hundred hot-park cycles. Paired with a proper epoxy base coat over a ground-and-profiled slab, you get a full system that bonds into the concrete rather than resting on top of it:

  • The epoxy base penetrates and locks into the ground profile, building thickness and adhesion.
  • The polyaspartic topcoat delivers the hardness, UV stability, and high heat tolerance that shrug off hot tires.

There’s a bonus, too. Polyaspartic cures fast, which means a quicker return to service. Fewer floors get driven on before they’re ready, so you eliminate one of the most common early-failure triggers at the same time you gain heat resistance.

Florida Moisture: The Hidden Partner to Hot Tire Pickup

Heat gets all the blame, but in coastal Florida it has a silent partner: slab moisture. Concrete is porous, and water vapor moves up through it from the ground below. When that vapor pressure is high, it pushes against the underside of a coating. The result is bubbling, blistering, and a weakened bond, which is exactly the condition that makes hot tire pickup far more likely. Weak bond plus hot tires equals lifting.

This is why professionals test before they coat. ASTM moisture testing, including moisture vapor emission rate (MVER) and relative humidity probes, measures how much vapor the slab is actually pushing out. In Jacksonville, Savannah, and Charleston, high water tables and coastal humidity routinely push these readings toward the upper end of the acceptable range. A slab that would test fine in Arizona can be borderline or over the limit here.

When moisture is high, the answer is a moisture-vapor barrier primer, a specialized coat that seals the slab and controls vapor so the main coating can bond and stay bonded. Skipping that step on a damp coastal slab is one of the most common reasons floors fail early in our region. And this is precisely why Florida floors let go where dry-climate floors survive: it isn’t heat alone, it’s heat and humidity working together on the same weak bond.

How to Tell If Your Garage Floor Is at Risk

You don’t need a lab to get a rough read on your own floor. Try this quick self-check, ideally on a hot day after the car has been parked a while:

  1. Press the tire zone. Use a coin edge or a firm fingernail on the coating where your tires sit. If it dents, feels soft, or is tacky compared to the rest of the floor, the coating is heat-softening. That’s a red flag.
  2. Look for blisters and lifted edges. Scan the footprint area for bubbles, curling, or any spot where the coating has separated from the concrete.
  3. Check the coating type. A single-coat, paint-grade epoxy or a DIY kit floor is far more likely to lift than a true multi-coat professional system with a polyaspartic topcoat.

Warning signs that your current floor probably won’t survive another Florida summer include a thin roller-applied kit finish, visible bubbling anywhere, any softness underfoot in the tire area, and prep you know was acid-etch-only. If you check two or more of those boxes, it’s worth booking a professional evaluation before the next heat wave finishes the job for you.

Repair vs. Recoat: What Actually Fixes a Lifting Floor

Here’s the hard truth about repairs. If the underlying floor is soft or was never properly profiled, a spot patch over the tire zone only delays the next failure. You’re bonding a patch to a surface that already proved it can’t hold, and the same heat-and-contraction cycle will find the next weak spot, or lift the patch itself. Spot repair makes sense only when the surrounding floor is genuinely sound and the damage is isolated and superficial.

When the floor is a low-solids DIY kit, or the prep was etch-only, or moisture was never addressed, the durable fix is a full grind-and-recoat with a polyaspartic system. That means grinding off the failed coating, re-profiling the slab, repairing cracks and spalls, testing and controlling moisture, and installing an epoxy base with a polyaspartic topcoat. Done once, correctly, it ends the cycle instead of resetting the clock.

A professional evaluation exists to tell you which path you’re on. A good assessment checks the four things that actually determine success: bond strength, slab moisture, prep quality, and coating chemistry. Those four decide whether your floor lasts.

In the meantime, a few habits can slow the damage as a stopgap, though none of them fix a weak floor: park on tire mats to break direct hot-rubber contact, rotate the car’s position slightly so the same spot isn’t stressed every day, and clean with mild cleaners rather than harsh solvents that attack the coating. Think of these as buying time until you can get the floor properly done, not as a cure.

DIY Kit vs. Professional Epoxy vs. Epoxy + Polyaspartic: How They Compare

FactorDIY Paint-Grade Epoxy KitProfessional 100%-Solids EpoxyEpoxy Base + Polyaspartic Topcoat
Solids & heat toleranceLow solids (~5–12%); softens under tire heatHigh solids; solid heat toleranceHigh glass transition temp (200F+, often engineered 300F+); unaffected by hot tires
Surface prepAcid etch only; under-profiled slabDiamond grinding; proper mechanical profileDiamond grinding plus crack/spall repair
Moisture handlingTypically none; no MVER testingMoisture testing; barrier primer if neededFull ASTM testing plus vapor-barrier primer on coastal slabs
Hot tire pickup resistancePoor; lifts readilyGood with proper installExcellent; engineered to resist it
Typical FL lifespan before failureMonths to a seasonMany years with correct prepLongest-lasting of the three; built for FL heat and humidity

Frequently Asked Questions

Why is my epoxy garage floor peeling where my tires sit?
That’s hot tire pickup. Your tires come off hot Florida pavement, transfer heat into the coating, and as they cool they contract and grip the surface. If the coating is weakly bonded or heat-sensitive, the cooling tire peels it right off the concrete. It shows up only in the tire footprint because that’s the one spot that gets heat, weight, and pull all at once. The real cause is almost always weak surface prep or a low-quality coating rather than a bad slab.
Does polyaspartic coating get hot tire pickup?
A properly installed polyaspartic system resists hot tire pickup. Its glass transition temperature is well above 200F, with formulations often engineered to handle 300F and higher, far above the roughly 140F a summer tire reaches. It stays hard through repeated heat cycles and, over a ground-and-profiled slab with an epoxy base, bonds into the concrete rather than sitting on top. That combination is why it’s the go-to fix for tire-lifting problems in Florida garages.
What temperature do tires reach to cause hot tire pickup?
After highway driving on hot Florida asphalt, tires commonly reach 140F or more in summer. The pavement itself can sit well above 95F in direct sun, and friction adds more heat. When you park, that heat transfers into the floor coating. It doesn’t take extreme temperatures; 140F is more than enough to soften a low-heat-tolerance coating and start the lifting process as the tire cools and contracts.
Can hot tire pickup on an epoxy floor be repaired?
Sometimes, but it depends on the floor. If the surrounding coating is genuinely sound and the damage is isolated, a spot repair can work. But if the floor is a low-solids DIY kit or was prepped with acid etch instead of diamond grinding, patches usually just delay the next failure because the same weak bond exists everywhere. In those cases the durable fix is a full grind-and-recoat with a polyaspartic system. A professional evaluation tells you which path you’re on.
How do I prevent hot tire pickup on a garage floor in Florida?
Prevention starts before the coating goes down. The floor needs diamond grinding for a real mechanical profile, crack and spall repair, moisture testing with a vapor-barrier primer where coastal humidity demands it, and a high-heat-tolerance polyaspartic topcoat over an epoxy base. As stopgaps on an existing floor, tire mats, rotating your parking position, and mild cleaners help slow damage, but they don’t fix a weak coating. The permanent prevention is a properly bonded, heat-resistant system.
Do DIY epoxy garage floor kits hold up in Florida heat?
Usually not for long. Most big-box kits are low-solids, paint-grade products with limited heat tolerance, and they rely on acid etching that under-profiles the slab. Add Florida’s slow humid cure times and continuous summer heat with no winter recovery period, and these floors tend to fail in months rather than years, often with hot tire pickup as the first symptom. They can look great on day one; the problem shows up the first hot summer.
How do I know if my garage floor coating is at risk of lifting?
Do a quick check on a hot day. Press a coin edge into the coating where your tires sit; if it dents, feels soft, or is tacky compared to the rest of the floor, it’s heat-softening and at risk. Look for blisters, bubbles, or curled edges in the tire zone. Also consider what you have: a thin single-coat DIY or paint-grade epoxy is far more vulnerable than a multi-coat professional system with a polyaspartic topcoat. If any of those signs show up, book an evaluation.

Stop hot tire pickup before the next Florida summer

From Jacksonville to Fort Myers, Boca Raton, Savannah, and Charleston, we install epoxy-and-polyaspartic systems engineered for our heat and humidity. Get an honest evaluation of your floor.

Request a Free Estimate

Final Thoughts

Hot tire pickup is almost always a preventable failure — it comes down to slab prep and matching the coating system to Florida heat. If your garage floor is already lifting, or you want a coating engineered to survive hot tires from day one, our team can help you get it right the first time.

Table of Contents

epoxy coatings
Call Us Now
(904) 595-9792

Related Epoxy Flooring News

Categories Apex

Why Epoxy Garage Floors Peel in Florida (And the 6 Prep Steps Apex Never Skips)

Blue epoxy coating

Blog

Why Epoxy Garage Floors Peel in Florida (And the 6 Prep Steps Apex Never Skips)

Matt@pinnacletechnologies.ai

July 1, 2026

Table of Contents

Every August, our phone starts ringing with the same call. Different homeowner, different city, same story: “My epoxy garage floor is peeling and I got it done less than two years ago.” When we drive out to look at it, we know before we open the truck what we’re going to find. It’s never the epoxy itself. An epoxy garage floor peeling in Florida is almost always the result of one — sometimes two — of six specific prep steps that got skipped, shortcut, or cooked down into a “one-day install” package. Below is exactly what we look for, what the failure actually is at a chemistry level, and the six-step prep sequence we run on every single Florida slab before a single ounce of resin leaves the mixing bucket.

What “Peeling” Actually Is (Hint: It’s Not the Epoxy Failing)

When a homeowner tells us their epoxy is peeling, they picture the coating breaking down — cracking, going soft, chalking off in the sun. That’s almost never what’s happening. What’s happening is delamination: the epoxy is still perfectly intact as a film, but the bond between the film and the concrete has released. You can usually pick a sheet up in one piece, flip it over, and see a clean, dusty concrete side. The resin didn’t fail. The interface did.

This matters because it changes the diagnosis. A coating that’s chemically breaking down would need a different product. A coating that’s releasing from the slab needs a different prep procedure. Nine times out of ten in Florida, the epoxy on the ground is a perfectly capable industrial-grade resin — Sherwin-Williams ArmorSeal, Rust-Oleum 9100, Sika Sikagard, all fine products. They just weren’t given a surface they could grab onto and hold.

Why This Distinction Costs Homeowners Thousands

Because peeling looks like a product problem, homeowners often re-coat with a different brand and get the same result 14 months later. The slab is the problem. Until you fix what’s happening at the slab-to-resin boundary, you can burn through three epoxy systems and never solve it.

Florida’s Big 4 Culprits Behind Epoxy Delamination

Every failed floor we’ve torn out in the last decade traces back to one or more of four causes. If you’re wondering why is my epoxy peeling, it’s almost certainly on this list.

1. Moisture Vapor Transmission (MVT)

This is the #1 killer in Florida, full stop. Concrete is porous. In our climate — 90-95% relative humidity from June through September, water table often just a few feet below the slab, no vapor barrier under 1980s-and-older garages — water is constantly wicking up through the slab and evaporating at the surface. When you seal that surface with an impermeable epoxy film, the water can’t evaporate anymore. It builds pressure between the concrete and the resin until it lifts the coating off. This is epoxy floor lifting Florida in a nutshell, and no amount of good epoxy will stop it.

2. Thermal Shock

A closed Jacksonville garage in July can hit 115°F on the slab surface by 2pm and drop 30 degrees the moment a homeowner rolls the door up and a summer thunderstorm blows in. Epoxy and concrete expand and contract at different rates. Repeat that cycle 200 times a year and any weak bond gives up. Coastal homes get an extra kick from salt-laden humidity, which accelerates surface degradation of any exposed edge.

3. Poor Surface Prep

Acid etch alone. Skipped grinding. Skipped vacuum. Coating a slab that still had power-wash water sitting in the pores. The 1-day install trend has compressed a 3-day prep process into a 4-hour compromise, and the coating pays the bill 18 months later.

4. Wrong Product for the Slab Condition

A 25-year-old slab full of hairline cracks and old sealer residue is not the same substrate as new construction. Applying the same primer and topcoat system to both is a coin flip. Florida slabs, especially older coastal ones, often need a moisture-tolerant primer and a two-part crack repair before the color coat ever touches them.

Prep Step #1: Moisture Testing (The Step 90% of Installers Skip)

Before we quote a job, we test the slab. “Looks dry” is not a moisture reading. Concrete can feel bone dry to the touch and still be transmitting 8-12 pounds of moisture per 1,000 square feet per 24 hours — well past the 3-pound threshold most epoxies tolerate.

We use two methods together:

  • Calcium chloride test (ASTM F1869) — a sealed dish of anhydrous calcium chloride sits on the slab for 60-72 hours. We weigh it before and after and calculate MVER (moisture vapor emission rate) in lbs/1000 sqft/24hr. It measures what’s coming out of the surface right now.
  • Relative humidity in-slab probe (ASTM F2170) — we drill a 40% depth hole, insert a Wagner Rapid RH probe, and read the internal moisture equilibrium. This tells us what’s coming next, not just what’s on the surface.

If the calcium chloride reads over 3 lbs, or the RH probe reads over 80%, we either wait, install a mitigation primer, or in extreme cases recommend the homeowner not epoxy at all until the slab dries out. Skipping this test is how installers cheerfully coat a slab that’s guaranteed to reject the coating within a year. This is not optional prep in Florida.

Prep Step #2: Diamond Grinding, Not Acid Etch

An acid etch — usually muriatic or a proprietary blend — opens the pores of the concrete chemically. It works, sort of, on new smooth slabs with no coatings and no contaminants. But it doesn’t remove old sealers, old paint, oil stains, curing compounds, or the laitance layer (the weak, dusty top skin of concrete that forms during finishing). Coating over any of that is coating over a release layer.

Diamond grinding uses 30-grit metal-bond diamond segments on a planetary grinder (we run Husqvarna PG 450s and PG 690s depending on square footage) to physically remove the top 1/32 to 1/16 of the slab, exposing fresh, porous, high-CSP-profile concrete underneath. That’s the surface epoxy is designed to bond to. The industry standard is CSP-3 (Concrete Surface Profile 3, per the International Concrete Repair Institute) — a texture roughly like 40-grit sandpaper. Etch delivers CSP-1 at best.

Grinding also removes hairline crack lips, feathers out old patches, and lets us actually see what condition the slab is in. You can’t diagnose crack repair needs (Step #3) through a wet acid haze.

Why 1-Day Installers Etch Instead of Grind

Grinding takes 4-8 hours for a 2-car garage, generates dust (needs a HEPA vac attachment plus a truck-mounted dust collector), and requires a $12,000 machine. Acid etch takes 45 minutes, requires a $30 jug, and lets a 1-day-install crew get to the coating step by lunch. Guess which one lasts.

Prep Step #3: Crack and Joint Repair

Florida slabs move. Between soil moisture cycling, root heave, thermal expansion, and settlement, a 20-year-old slab typically has anywhere from a dozen to a few hundred hairline cracks. Epoxy is a rigid film. It cannot bridge a moving crack — it will telegraph the crack right through the coating, and moisture will wick up the crack and lift the coating around it.

Our repair spec:

  • Hairline cracks (under 1/16″) — flood with low-viscosity epoxy paste (we use Metzger/McGuire MM-80 or Ardex EP 2000), let it wick in, scrape flush.
  • Structural cracks (1/16″ to 1/4″) — chase with an angle grinder to create a V-groove, fill with polyurea joint filler (Roadware 10 Minute Concrete Mender is our go-to for Florida — sets in 10 min, sandable in 20).
  • Control/expansion joints — we respect them. Epoxy does not go over expansion joints; they’re honored as movement joints in the finished floor and re-caulked with a matching flexible polyurea at the end. Filling an expansion joint with rigid epoxy guarantees a crack pattern in the coating within one season.

This is where a lot of otherwise-competent installers cut a corner. Filling every crack on a 25-year-old slab can take an entire day. Skipping it saves that day. The homeowner pays for the savings later.

Prep Step #4: Vacuum and Dust Management

Grinding produces an enormous amount of extremely fine concrete dust. That dust, if left on the slab or blown around the garage, settles right back into the pores you just opened and becomes a release layer. “Broom clean” is not clean enough. “Blown out with a leaf blower” is worse — you’ve just aerosolized concrete dust and rained it back down onto every surface.

Our sequence:

  1. HEPA-graded shop vacuum (we run Pullman-Holt 45 ASBs, rated for silica dust) with a floor-tool attachment, passed over every square inch twice in perpendicular directions.
  2. Tack rag pass — a resin-impregnated cloth that picks up the last of the microscopic particulate the vacuum missed.
  3. Final visual with a work light held at a low angle across the slab. Any dust catches the light. If we see it, we vacuum again.

When we say “clean,” we mean clean enough that a piece of white paper laid on the slab and picked up comes back white. That’s the standard the primer needs.

Prep Step #5: Primer Coat Selection (Where 1-Day Installers Really Fail)

The primer is what actually bonds to the concrete. The color coat and topcoat bond to the primer. Skipping the primer to save an hour and a coat is where the majority of 1-day installs quietly fail — the color coat is doing double duty as primer and finish, and it’s not formulated for the substrate.

For Florida slabs, we specify a moisture-tolerant primer. Our two workhorses:

  • Ardex MC-Rapid — a fast-curing moisture control primer that tolerates up to 100% RH and 25 lbs MVER. On any slab that tested above 3 lbs calcium chloride, this goes down first as a moisture mitigation layer.
  • Sherwin-Williams ArmorSeal 1000 HS Primer — solvent-free 100%-solids epoxy primer for slabs that tested clean but still need deep penetration into the ground profile. Wets out into the CSP-3 texture and gives the color coat a mechanical AND chemical bond to work with.

The primer coat also lets us catch any remaining issues — bubbles, outgassing pinholes, off-color patches — before we commit to a full color layer. A pinhole in the primer is a repair. A pinhole in the color coat is a re-do.

Prep Step #6: Environmental Control at Time of Application

Epoxy is a two-part chemical reaction. The reaction rate — and the finished properties of the film — depend on temperature and humidity while it cures. Get either wrong and you get epoxy floor bubbling, amine blush (a greasy haze that ruins topcoat adhesion), soft spots, or a coating that never fully cures at all.

Our application window:

  • Slab temperature between 55°F and 95°F (we IR-thermometer the slab before mixing, not the air).
  • Ambient relative humidity below 85%.
  • Slab temperature at least 5°F above the dew point — the biggest cause of a hazy, blush-y finish is applying resin to a slab that’s condensing moisture out of Florida air.

Practically, this means we schedule Florida coating days for early morning starts (slab is still cool, ambient RH hasn’t peaked), keep the garage door closed during application (a wide-open garage lets 92% RH air blow directly onto the wet resin), and run a portable dehumidifier if the day is marginal. In August in Jacksonville or Charleston we’ve walked away from a scheduled install day, rescheduled a week out, because the dew point was going to catch us at 10am. The homeowner didn’t love it. But we’ve never re-coated a floor for that reason either.

How to Spot a Bad Prep Job Before You Sign the Contract

If you’re getting estimates from any epoxy installer — Apex or otherwise — here’s the shortlist of questions that separate a real prep spec from a 1-day-install pitch. If you can’t get straight answers to these, walk away.

The 7 Questions to Ask Every Estimator

  1. Do you do a calcium chloride or in-slab RH test before quoting? If the answer is “we don’t need to” or “we just look at it,” you’ve found your problem.
  2. Do you grind or acid etch? The answer needs to be “diamond grind to CSP-3.” Anything else, next estimator.
  3. What primer do you use, and is it moisture-tolerant? They should be able to name the specific product. “Whatever comes in the kit” means there is no primer.
  4. How do you handle expansion joints? Correct answer: honor them, don’t coat over them, re-caulk with flexible polyurea. Wrong answer: “we just fill them with the epoxy.”
  5. How do you handle cracks? Correct answer names a specific crack filler (polyurea, epoxy paste) and describes the V-groove chase for wider cracks.
  6. How many days is the install? A legitimate Florida install is 2-3 days: grind + repair Day 1, primer Day 2, color/flake + topcoat Day 3. Anything faster is compressing prep.
  7. What’s the warranty and what voids it? A real warranty is 10-15 years on delamination. If it’s 1 year and vaguely worded, they know the coating won’t outlast the warranty on paper.

Apex builds our estimates around exactly the 6-step prep sequence above. We show homeowners the moisture readings, we show them the CSP-3 texture after grinding, and we schedule the install around the weather instead of around a marketing calendar. It’s slower. It’s also the difference between a floor you walk on for 15 years and a floor you re-do in 18 months.

Frequently Asked Questions

Why is my epoxy garage floor peeling?

In Florida, the overwhelming cause is moisture vapor transmission — water wicking up through the concrete slab and building pressure between the epoxy and the concrete until the bond releases. Secondary causes are inadequate prep (acid etch instead of diamond grinding), no moisture-tolerant primer, unrepaired cracks, or the coating being applied outside the correct temperature and humidity window. The epoxy itself is almost never at fault. What’s happening is called delamination, and it means the bond between the film and the slab has failed, not the coating chemistry.

Can peeling epoxy be repaired or does it need to be replaced?

Small isolated peel spots — under a few square feet, with a clean edge — can sometimes be spot-repaired: cut back to a sound edge, feather-grind the exposed concrete, prime, and re-coat the patch. But if the underlying cause was moisture vapor transmission or a failed prep job, the peel will keep spreading regardless of the patch. In practice, once a garage floor is peeling in more than one location, the correct fix is a full removal, re-grind, and re-prep with a moisture-tolerant primer system. Trying to patch a systemic prep failure is throwing good money after bad.

How long does epoxy last on a Florida garage floor?

A properly prepped, moisture-tested, correctly primed Florida garage floor with a 100%-solids epoxy or polyaspartic topcoat should last 15-20 years with no delamination and minimal cosmetic wear. Poorly prepped floors — the “one-day install” market — commonly fail within 12-24 months. The lifespan is almost entirely a function of prep, not the epoxy brand. In coastal environments (Jacksonville Beach, Charleston, Savannah), UV and salt air can dull the topcoat sheen after 8-10 years, but the bond stays intact and the floor is easily refreshed with a single re-topcoat.

Does moisture in concrete cause epoxy to fail?

Yes — and in Florida it’s the single biggest cause of failure. Concrete is porous, and in our climate the slab is constantly transmitting water vapor from the ground upward through the pores. When you seal that surface with an impermeable epoxy, the water vapor builds hydrostatic pressure between the concrete and the coating film. Eventually the pressure exceeds the bond strength and the coating lifts. This is why calcium chloride testing and in-slab RH testing are non-negotiable before quoting a Florida floor, and why any slab reading over 3 lbs/1000 sqft/24hr needs a moisture-mitigation primer like Ardex MC-Rapid before the color coat goes down.

Is diamond grinding better than acid etching for epoxy prep?

Yes, significantly. Diamond grinding physically removes the top layer of the concrete, including the weak laitance layer, any old sealers or contaminants, and produces a CSP-3 (Concrete Surface Profile 3) texture that epoxy is engineered to bond to. Acid etching only opens the pores chemically and does nothing to remove old coatings, curing compounds, or contamination. Etching produces a CSP-1 profile at best, which most modern high-solids epoxies consider insufficient. Every professional-grade epoxy manufacturer — Sherwin-Williams, Sika, Rust-Oleum industrial line — specifies mechanical grinding in their published prep instructions. If an installer is quoting acid etch as the only surface prep, they’re outside the manufacturer’s specification and the warranty on the coating itself is likely void.

Final Thoughts

Polyurea garage floor coating offers a smart, long-term solution for homeowners looking to improve both the look and performance of their space. With its fast-curing application, it stands up to Florida’s climate and daily use without losing its appeal. For those seeking durability, safety, and a polished finish, polyurea flooring delivers both function and style that lasts.

Table of Contents

epoxy coatings

Call Us Now
(904) 595-9792

Related Epoxy Flooring News

Categories Apex

Polyaspartic Garage Floor: Honest Pros, Cons & Cost in Florida

flake epoxy flooring garage

Blog

Polyaspartic Garage Floor: Honest Pros, Cons & Cost

Matt@pinnacletechnologies.ai

June 30, 2026

Table of Contents

The Short Version

Polyaspartic garage floors cost roughly $7–$12 per square foot installed, cure in 1 day, hold color under UV, and last 15–20 years — but they slip more when wet, are harder to spot-repair, and cheap formulas yellow within 2 years. For most Florida garages, an epoxy base with a polyaspartic topcoat (the Apex Hybrid) outperforms either chemistry alone.

Polyaspartic garage floor coatings are having a moment. Every contractor’s truck has the word stenciled on the side, every Facebook ad promises a “one-day install that lasts a lifetime,” and the product really is impressive — UV-stable, fast-curing, and tougher than the epoxy it’s slowly replacing. But polyaspartic is not a miracle, and the way it gets sold often glosses over real drawbacks that a homeowner deserves to hear before signing a contract. After installing thousands of square feet of every coating chemistry made, here’s the honest picture: where polyaspartic shines, where it stumbles, what it actually costs in Florida and South Carolina garages, and the one hybrid system Apex Epoxy Flooring of Jacksonville uses on most residential jobs because it solves the problem polyaspartic alone can’t.

What Polyaspartic Actually Is (and Isn’t)

The chemistry, in plain English

Polyaspartic is an aliphatic polyurea — a two-component reaction product of an aliphatic polyisocyanate and a polyaspartic ester resin. In plain English: it’s a cousin of polyurethane that cures by a slower, more controllable version of polyurea’s chemistry, which is why it dries fast enough to recoat in 60–90 minutes but slow enough to roll out without curing in the bucket. It was originally developed by Bayer in the early 1990s for steel-bridge coatings — places where they needed UV stability, abrasion resistance, and the ability to apply in marginal weather. Garages came later.

What it is not

Polyaspartic is not epoxy. It is not “modified epoxy” or “epoxy 2.0,” and any sales pitch using those terms is mislabeling the product. Epoxy and polyaspartic have different chemistries, different cure mechanisms, and different long-term behaviors. Polyaspartic is also not the same as polyurea (its faster, more brittle cousin used in truck bed liners). And it is not, by itself, a “garage floor coating” — it is a clear or pigmented topcoat that performs best when applied over a properly bonded base layer. The single-coat polyaspartic jobs you sometimes see at the low end of the market are technically possible, but they sacrifice the build thickness and chip-broadcast layer that give a coating its visual texture and structural durability.

Why “aliphatic” is the word to look for

The word “aliphatic” is the one that should appear on any product spec sheet you’re handed. Aliphatic polyaspartics are UV-stable — they won’t yellow in sunlight. Aromatic polyaspartics (rare in residential garage work but they exist on the cheap end) will amber and fade within 18–24 months of UV exposure. If your installer can’t tell you which one they’re spraying, that’s a problem worth pressing on.

Polyaspartic vs Epoxy: Side-by-Side

This is the comparison that determines which coating ends up on most garage floors. Both work. Both can last 15–20 years installed correctly. They are not the same product, and the differences matter for some homeowners more than others.

Property Polyaspartic Traditional Epoxy
Recoat window60–90 minutes12–24 hours
Full cure (drive on)1–2 days5–7 days
UV stabilityExcellent (aliphatic)Poor — yellows in months
Abrasion resistanceHigher (Taber CS-17 ~25mg loss)Good (Taber CS-17 ~35mg loss)
Cost per square foot$7–$12 installed$5–$9 installed
Pot life (working time)20–30 minutes30–60 minutes
Recoatability years laterDifficult — needs full sandModerate — chemical re-bond possible
Color/design flexibilityMostly clear topcoat over flakesFull color base + flake or metallic
Humidity sensitivityHigh during applicationModerate — can blush over 80% RH
Installer skill requiredHigh (fast pot life punishes mistakes)Moderate (forgiving working time)
“Polyaspartic lets you drive on the floor the next day. A traditional epoxy install ties up your garage for the better part of a week before tires can touch it.”

The summary read is this: polyaspartic wins on speed, UV stability, and a slight edge on abrasion. Epoxy wins on cost, working time, and color/design range (most metallic, marbled, and full-color designer floors are built on an epoxy base because polyaspartic’s short pot life makes intricate finishes impractical). Neither is “better” in isolation — they’re built for different priorities.

True Polyaspartic Floor Cost Per Square Foot

The number that gets quoted publicly is usually too low. Real installed cost for a quality polyaspartic system in Florida or coastal South Carolina lands between $7 and $12 per square foot for a single-color base with flake broadcast and a clear polyaspartic topcoat. For a typical 500 sq ft two-car garage that’s $3,500 to $6,000. Big variance, and the variance is real because the number of coats, the brand of resin, the prep condition of the slab, and whether moisture mitigation is needed all move the price.

Cost by garage size

Garage Size Budget (single-coat) Mid (standard) Premium / Hybrid
1-car (~250 sq ft)$1,250–$1,500$1,750–$2,250$2,500–$3,250
2-car (~500 sq ft)$2,500–$3,000$3,500–$4,500$4,500–$6,500
3-car (~750 sq ft)$3,750–$4,500$5,250–$6,750$6,750–$9,750
4-car / oversized (1,000+ sq ft)$5,000+$7,000+$9,000+

What you’re paying for at each price tier

At the $5–$6 per square foot end, you’re getting a thin, often single-coat polyaspartic with light flake broadcast and minimal prep — typically acid etch rather than diamond grinding. These jobs look fine for a year or two and then start peeling at the garage door threshold where hot tires repeatedly hit the same spot. At $7–$9 you’re getting a real diamond-grind prep, a base coat with full flake broadcast, and a single clear polyaspartic topcoat. This is the sweet spot for most residential installs. At $10–$12 you’re getting either a hybrid system (epoxy base plus polyaspartic top, which we’ll get to) or a premium polyaspartic with double topcoats for thicker build and longer wear life — common on commercial showrooms and high-traffic residential bays.

Square footage discounts and regional differences

Most installers run a fixed mobilization cost — equipment rental for the grinder, dehumidifier, vacuum, plus crew transit. That fixed cost spreads across the square footage, so a 1,000 sq ft three-car garage often costs less per foot than a 400 sq ft single bay. Charleston-area jobs tend to run 5–10% higher than Jacksonville because of the longer drive time and ferry/bridge logistics for some neighborhoods, while Savannah and Tampa-area pricing typically tracks within a dollar of Jacksonville’s range.

Hidden cost drivers buried in the quote

The headline price almost never includes these line items. Open each one before signing — if any apply to your slab and they aren’t accounted for, you’ll see them as change-orders mid-install.

Moisture-vapor mitigation primer (+$1.50–$3/sq ft) +
On-grade Florida slabs frequently read above the 5 lbs/1000 sqft/24hr calcium chloride threshold where a standard primer will eventually delaminate. A moisture-vapor mitigation primer (Aquafin VB-2K, Sika MoistureGuard, or similar epoxy-based MVB primer) seals the slab so the topcoats bond. If your slab tests high and this isn’t in the quote, the coating will fail — usually within 12–18 months.
Crack chase & joint fill (+$200–$500) +
A slab with 50+ hairlines needs each crack widened with a grinder, vacuumed, and filled with a flexible polyurea joint filler before coating. Skip this step and every crack will telegraph through the finished floor within months as the slab moves seasonally.
Oil-stain remediation (+$300–$600) +
A bay parked in for 20 years usually has petroleum saturation an inch deep into the concrete. That oil migrates back up under fresh coating and causes fisheyes and bond failure. Proper remediation means a degreaser scrub, hot-water extraction, sometimes a poultice draw, then a fresh prep pass. Allow $300–$600 if your slab has visible drip stains.
Threshold & spalled-corner repair (varies) +
The garage door threshold and the apron edge near the driveway are the most common spall zones. Patching with a polyurea or epoxy mortar before coating prevents the new floor from chipping along those edges. Per-linear-foot pricing varies, but budget $150–$400 for typical residential damage.

If a quote is dramatically below the others, ask which of these are included and which are change-order items if discovered during prep.

Pros and Cons of Polyaspartic

The trade-offs are real on both sides. Click through each panel below for the honest pros and cons most sales decks leave out.

Pros of polyaspartic +
  • One-day install. You can be parking on it the next day — not the next week.
  • UV stable. True aliphatic resins hold their color even with direct sunlight pouring in through an open garage door.
  • Higher abrasion resistance than epoxy, with measurably lower Taber CS-17 wear values.
  • Application window stretches from 0°F to 140°F — useful for shoulder-season installs when epoxy chemistry is too slow to kick.
  • Glossier, easier-to-clean wear surface. Spills wipe up cleanly and the gloss doesn’t dull as fast as epoxy.
  • Chemical resistance against motor oil, brake fluid, gasoline, and most household chemicals.
Cons of polyaspartic +
  • Slippery when wet without an anti-slip aggregate — coefficient of friction drops under 0.4 on a bare topcoat.
  • Harder to repair years later. Recoating requires a full sand-down; spot patches show as a visible outline.
  • Cheap formulas yellow within 18–36 months if they’re not true aliphatic resin.
  • Humidity sensitive during install. Above 75% RH or below the dew point you get pinholes, microblistering, and haze.
  • 20–30 minute pot life. No recovery time for missed spots; punishes inexperienced crews.
  • Limited color and design range — mostly clear topcoat over flakes, no metallics or marbled finishes.
  • Costs $2–$3/sq ft more than a traditional epoxy on the same slab.

Drawbacks installers won’t volunteer

The cons list above is honest, but a few items deserve a longer look. These are the ones that most often surface as complaints six months after install.

Slipperiness when wet

A smooth polyaspartic topcoat without aggregate added is genuinely slick when wet. Track in some rainwater on a Tuesday morning and a polyaspartic floor with no anti-slip additive has a coefficient of friction that drops to around 0.4 — below the OSHA recommended 0.5 for walking surfaces. The fix is simple: a polymer anti-slip aggregate (Shark Grip, polypropylene shot, or aluminum oxide) broadcast into the topcoat. Every installer offers it. Not every installer mentions it. Always ask, and if you have kids, dogs, or anyone with mobility issues using the garage, insist on it.

Harder to repair down the road

Polyaspartic cures into a tight chemical network that doesn’t accept a fresh polyaspartic coat well after the surface has aged. To recoat a 5-year-old polyaspartic floor, the installer has to fully sand the surface with 80-grit to break the gloss and create mechanical tooth, then apply a tie-coat primer, then the new polyaspartic. By contrast, a 5-year-old epoxy floor can often be lightly scuff-sanded and direct-recoated. Practically, this means a damaged polyaspartic floor that needs a section repair almost always shows a visible patch outline, while an epoxy patch can blend in more cleanly.

UV yellowing on cheap formulations

Aliphatic polyaspartic is supposed to be UV stable, and brand-name resins from SPARTACOTE, Citadel, Versatile Building Products, and Sherwin-Williams General Polymers genuinely are. But the market is flooded with cheaper polyaspartic resins (often imported, often unlabeled as to whether they’re true aliphatic or a blend) that yellow visibly within 18–36 months. The yellowing is most obvious on white, gray, and pastel base colors. If your garage gets significant direct UV through windows or an often-open door, this matters. Demand the product data sheet and look for the term “aliphatic” plus a yellowing index spec (Delta-b under 2 after 1,000 hours QUV testing is good).

Installation humidity sensitivity

Polyaspartic chemistry reacts with ambient moisture during cure. Above 75% relative humidity, or when the slab surface is colder than the dew point, the curing reaction produces CO2 bubbles trapped in the film — small surface pinholes or microblistering that compromise the wear surface and look like a permanent haze. Jacksonville and Charleston routinely hit 80–90% RH from May through October. A serious crew brings a portable dehumidifier and an infrared thermometer to every install; a casual crew rolls coating onto a 70°F slab in 85% humidity and prays. The product datasheets all warn about this. Most homeowners never see the warning.

“Jacksonville and Charleston routinely hit 80–90% relative humidity from May through October — the exact conditions polyaspartic chemistry hates. The installer’s dehumidifier matters as much as the coating brand.”

Short pot life punishes mistakes

Once mixed, polyaspartic has 20–30 minutes of working time before it starts to thicken in the bucket. Epoxy gives you 30–60 minutes. That extra time isn’t laziness padding — it’s recovery time. If a coat goes down with a holiday (a missed spot), epoxy lets you fix it before kicking; polyaspartic frequently does not. This is why polyaspartic installs reward experienced crews and punish casual ones. The fastest-curing chemistry on the market also has the smallest margin for error.

When Polyaspartic Is the Wrong Choice

Not every garage should get polyaspartic. Here are the situations where a traditional epoxy or hybrid system is genuinely the better answer. Open each panel to see whether your situation fits.

You want a metallic or designer finish +
Metallic epoxy floors — the swirled, marbled, three-dimensional finishes that look like polished granite — require a long working time to manipulate the metallic pigments before they kick. Epoxy’s 30–60 minute pot life is barely enough. Polyaspartic’s 20 minutes is not. Same goes for full-flood color blending, custom logos, and decorative inlays. Apex’s garage epoxy floor service handles the designer end of the market with epoxy-based systems specifically because polyaspartic can’t deliver those finishes.
The budget is tight and you’ll be in the house under 5 years +
If you’re flipping the house in 2–3 years, a properly-installed traditional epoxy floor at $5–$7 per sq ft delivers equivalent visual quality to a polyaspartic system at $9–$11. The polyaspartic’s longer life advantage doesn’t matter when you won’t be there to enjoy it. Spend the savings on closing costs.
The slab has serious moisture problems +
Polyaspartic is more sensitive to substrate moisture than epoxy. On slabs reading above 5 lbs/1000 sqft/24hr on a calcium chloride test (common on older on-grade Florida slabs), epoxy with a true moisture-vapor barrier primer is the safer system. Polyaspartic over high-moisture concrete fails sooner — sometimes within a year.
You’re DIY-ing it +
Polyaspartic’s short pot life and humidity sensitivity make it almost impossible to install successfully as a homeowner DIY project. Epoxy is more forgiving; if you absolutely insist on rolling your own coating, use an epoxy kit and lower your expectations on longevity. Better yet, let a pro do it — the cost difference between a Behr kit and a professional install is smaller than people think once you factor in the cost of doing it twice.

The Apex Hybrid System: Epoxy Base + Polyaspartic Top

For roughly 70% of the residential installs Apex Epoxy Flooring does across Jacksonville, Charleston, Savannah, Tampa, and the Atlanta metro, the answer to “epoxy or polyaspartic?” is “both.” A hybrid system uses 100% solids epoxy as the base coat — pigmented in your color, with a full flake broadcast — then tops it with a clear aliphatic polyaspartic. You get the best of both chemistries.

Why the hybrid wins for most homeowners

The epoxy base coat does what epoxy does well: deep, rich color, generous working time for clean flake broadcast, full color and design range, strong mechanical bond to the prepped slab, lower material cost on the thickest coat. The polyaspartic topcoat does what polyaspartic does well: UV stability so the color doesn’t yellow, faster cure so you’re back in the garage by the next day, harder abrasion resistance against hot tires and dropped tools, and a glossier, easier-to-clean wear surface. The combined system costs $9–$13 per sq ft installed and outlasts either chemistry alone.

How the install flows day by day

  1. Day 1, morning — diamond grind, crack chase, vacuum, tack.
  2. Day 1, afternoon — epoxy primer if needed, then pigmented epoxy base coat at 8–12 mils, with flake broadcast to refusal into the wet base. Cure overnight (12–16 hours).
  3. Day 2, morning — scrape the flakes flat with a pole-razor, vacuum the loose chips, lay the clear polyaspartic topcoat.
  4. Day 2, evening — walk on the floor.
  5. Day 4 — drive on the floor.

The hybrid is two days on site instead of polyaspartic’s one, but the result lasts measurably longer.

Warranty and longevity in real Florida conditions

A correctly-installed hybrid system in a Jacksonville two-car garage typically shows no measurable wear at the 7-year mark and minor edge wear at 12–15 years. The same garage with single-coat polyaspartic over insufficient prep often shows hot-tire pickup by year 3 and visible flake loss by year 5. Apex backs hybrid installs with a 15-year residential warranty that covers peeling, hot-tire pickup, and UV yellowing — full disclosure of what’s covered up front, no asterisks burying common failures.

Frequently Asked Questions

Is polyaspartic really better than epoxy for a garage floor? +
It depends what you’re optimizing for. Polyaspartic cures faster, resists UV yellowing better, and has a slight edge on abrasion resistance. Epoxy gives you more color and design options, longer working time for complex finishes like metallics, and costs less per square foot. For most Jacksonville and Charleston residential garages, a hybrid system using epoxy as the base coat with a clear polyaspartic topcoat delivers the strongest combination of looks, longevity, and value. Single-coat polyaspartic by itself is the right answer mostly for showrooms, commercial bays, and homeowners who absolutely need to be back in the garage within 24 hours.
How much does a polyaspartic garage floor cost in Florida? +
Plan on $7–$12 per square foot installed for a quality single-system polyaspartic floor with diamond grinding, full flake broadcast, and a clear polyaspartic topcoat. For a 500 sq ft two-car garage that’s $3,500–$6,000. A hybrid epoxy-base plus polyaspartic-top system runs $9–$13 per square foot. Quotes substantially below $7 per square foot almost always exclude diamond grinding, moisture testing, or use a thinner topcoat that won’t last more than a few years.
Does polyaspartic yellow in the sun? +
True aliphatic polyaspartic from a reputable brand (SPARTACOTE, Citadel, Sherwin-Williams General Polymers, Versatile Building Products) is UV-stable and will not yellow noticeably, even after years of direct sun exposure. Cheaper imported polyaspartic resins, including some sold as aliphatic but blended with aromatic components, will amber visibly within 18–36 months. Always ask for the product data sheet and look for the word “aliphatic” plus a Delta-b yellowing index under 2 after 1,000 hours of QUV testing. If your installer can’t produce the sheet, that’s a problem.
Is polyaspartic slippery when wet? +
A bare polyaspartic topcoat with no anti-slip aggregate added is slick when wet — coefficient of friction can drop below 0.4, under the OSHA recommended threshold of 0.5 for walking surfaces. The fix is broadcasting a polymer anti-slip additive (Shark Grip, polypropylene shot, or aluminum oxide) into the topcoat while it’s wet. Every reputable installer offers this; not all mention it unless you ask. If you have kids, pets, or anyone with mobility limitations using the garage, insist on the anti-slip add-on.
How long does a polyaspartic garage floor last? +
A correctly-installed polyaspartic floor over a properly diamond-ground slab typically lasts 15–20 years in residential service with no visible wear other than light gloss reduction. A hybrid epoxy-plus-polyaspartic system in the same conditions often pushes 18–25 years. The two factors that shorten polyaspartic life the most are insufficient surface prep (acid etching instead of diamond grinding) and a too-thin single topcoat that wears through at the garage door threshold within 3–5 years. Ask any installer to quote you mil thickness of the topcoat — 4–6 mils wet is the floor.
Can I install polyaspartic myself as a DIY project? +
Strongly not recommended. Polyaspartic’s 20–30 minute pot life and high humidity sensitivity make it the least DIY-friendly coating chemistry on the market. The fast cure leaves no recovery time for missed spots, the humidity reactivity causes pinholes if applied in the wrong conditions, and the diamond grinding equipment required for proper prep is expensive to rent. Epoxy is more forgiving for DIY. If you absolutely insist on installing polyaspartic yourself, expect to redo it within a few years — and the redo will cost more than hiring a pro the first time, because the failed coating has to be ground off before the new one goes down.
How soon can I park on a new polyaspartic floor? +
Foot traffic about 6–8 hours after the topcoat goes down; light driving the next day; full hot-tire resistance at about 72 hours. The Apex Hybrid system extends those windows by roughly one day because of the epoxy base coat, but the polyaspartic top still gets you back to the garage faster than a 5–7 day pure-epoxy cure.

Get an Honest Quote on Your Polyaspartic Garage Floor

If you’re weighing polyaspartic for a garage in Jacksonville, Charleston, Savannah, Tampa, Boca Raton, or the Atlanta metro, the right next step is a no-pressure walkthrough where an installer measures the bay, runs a quick moisture and prep assessment, and gives you a real number with the line items spelled out. Apex Epoxy Flooring will tell you straight up when polyaspartic is the right choice, when traditional epoxy makes more sense, and when our hybrid epoxy-plus-polyaspartic system is the better investment for your specific slab and how you use the space. No upsell pressure, no rushed close — just the actual answer for your garage. Call (904) 595-9792 or request your free in-home quote online, and we’ll be out within a few business days.

Final Thoughts

Polyurea garage floor coating offers a smart, long-term solution for homeowners looking to improve both the look and performance of their space. With its fast-curing application, it stands up to Florida’s climate and daily use without losing its appeal. For those seeking durability, safety, and a polished finish, polyurea flooring delivers both function and style that lasts.

Table of Contents

epoxy coatings

Call Us Now
(904) 595-9792

Related Epoxy Flooring News

Is polyaspartic better than epoxy for a garage in Florida?

For most sunny, humid Southeast garages, a polyaspartic topcoat is the stronger pick. It holds up to UV light without yellowing, cures much faster, and handles heat well. Epoxy is still a great base coat. Many Apex Epoxy Flooring garage systems use an epoxy base with flake and a polyaspartic topcoat.

  • Polyaspartic resists yellowing from sun through an open garage door.
  • It cures fast, so the job often wraps in a day or two.
  • Epoxy gives a thick, strong base coat and more working time.
  • Either coating needs a ground, moisture-tested slab to bond well.
  • A combined system uses the strengths of both.
Categories Apex

Epoxy Garage Floor Cost in 2026: Real Pricing Breakdown by Garage Size

Typical Price Range for Garage Floor Coatings

Blog

Epoxy Garage Floor Cost in 2026: Real Pricing Breakdown by Garage Size

Matt@pinnacletechnologies.ai

June 30, 2026

Table of Contents

The Short Version

Epoxy garage floors run $1,500–$10,500 installed in 2026 depending on garage size, system grade, and prep work. Most 2-car garages land at $2,200–$5,800 for a pro-grade flake or polyaspartic-top system. The 3x price swing between cheap and pro-grade is almost always topcoat chemistry + concrete prep — not labor.

Search “epoxy garage floor cost” and you’ll get answers anywhere from $600 to $9,500 for the same 2-car garage. That spread isn’t dishonesty — it’s the difference between a $1.50/sq ft DIY roller kit, a $3/sq ft franchise one-day job, and a $9/sq ft full polyaspartic system on a slab that needed structural repair before a single drop of resin hit the concrete. This guide breaks down what an epoxy garage floor actually costs in 2026, what’s hiding inside the quote you’re looking at, and the four hidden cost drivers that turn a $3,500 estimate into a $5,200 final invoice. Numbers below come from real Apex Flooring quotes across Jacksonville, Tampa, Atlanta, Charleston, Savannah, and our other Florida and Georgia markets — not industry averages pulled from a 2018 survey.

Average Epoxy Garage Floor Cost by Garage Size

Square footage is the single biggest line item on any coating quote, but the per-square-foot number you see advertised — usually $3 to $7 — is only half the story. The other half is the minimum mobilization cost. A crew, a grinder, a vacuum, a generator, and a truckload of resin still has to show up whether your garage is 240 sq ft or 800 sq ft, so very small jobs carry a higher effective cost per foot.

2026 Installed Pricing by Garage Size

Garage SizeTypical Sq FtDIY KitBudget Pro (1-day)Premium Polyaspartic
1-car240–320$200–$450$1,800–$2,600$2,400–$3,400
2-car400–560$400–$800$2,800–$3,900$3,600–$5,200
2.5-car560–680$550–$1,000$3,400–$4,600$4,400–$6,200
3-car600–800$650–$1,200$3,900–$5,400$5,200–$7,400
4-car / shop900–1,400$1,000–$2,000$5,400–$8,400$7,200–$11,500

The premium polyaspartic column reflects a full surface-prep grind, crack repair, two coats of pigmented basecoat, broadcast vinyl color flake to refusal, and a UV-stable polyaspartic topcoat. The “budget pro” column reflects a thinner two-coat system installed over an acid-etched or lightly ground slab — fine for a clean garage that won’t see hot tires or chemicals, undersized for the average Jacksonville garage where afternoon rain and 95-degree humidity sit on the floor every summer.

Per-Square-Foot Math

If you want to back into your own number, here’s the rough 2026 range for North Florida and the Southeast:

  • $2.50–$3.50/sq ft — basic two-coat epoxy or single-broadcast flake, acid-etched prep, 1-year workmanship warranty.
  • $4.00–$5.50/sq ft — full diamond-grind prep, broadcast flake, polyurethane or polyaspartic topcoat, 5–10 year warranty.
  • $6.00–$9.00/sq ft — premium polyaspartic or polyurea system, full flake to refusal, color-matched flake blend, 15-year to lifetime warranty.
  • $10+/sq ft — metallic epoxy, decorative quartz, or custom logo installs. Often double the materials cost.
“The 3x price swing between a $1,500 floor and a $4,500 floor is almost never labor — it’s topcoat chemistry plus how aggressively the slab was prepped.”

What’s Included in a Professional Epoxy Quote (and What’s Not)

The single most common reason two quotes look $1,800 apart for the “same” job is that one of them is missing line items. A real apples-to-apples comparison requires both quotes to spell out every step.

Included in a Real Pro Quote

  • Diamond grinding with a CCS-30 or larger planetary grinder and a HEPA vacuum — not acid etch. Acid etch is a $400 shortcut that fails first.
  • Crack and joint repair — chase out the crack, vacuum, fill with a polyurea or polyaspartic joint filler, shave flush.
  • Two pigmented basecoats — single-coat installs fail. The second coat is where you build the mil thickness that protects the concrete.
  • Color flake broadcast to refusal — meaning we throw flake until the floor literally can’t hold any more. Light flake is a tell that the contractor is saving $40 of materials.
  • UV-stable topcoat — polyaspartic or polyurethane. Pure epoxy yellows and chalks in direct sunlight, which means any garage with a window or open door.
  • Cleanup and haul-away of grinding slurry, old paint chips, and packaging.
  • Workmanship warranty with the contractor’s name and license on it — not a manufacturer pamphlet.

Usually Not Included (Watch For These)

  • Moisture testing. A calcium chloride or relative humidity probe test costs us $40–$80 to run. If your slab fails, you need a moisture mitigation primer that runs $1.10–$1.80/sq ft on top of the base price.
  • Concrete patching beyond simple crack fill — spalled corners, hot-tire scaling, or pitted surfaces over 1/8″ deep are usually a separate line item at $4–$8/sq ft of patched area.
  • Old coating removal. If your slab already has paint, sealer, or an old epoxy layer, removing it adds $1.50–$3.50/sq ft. This is where most “recoat” quotes balloon.
  • Furniture and vehicle moving. Most contractors will move it; some charge $150–$300 per garage.
  • Drain or trench work. Anything plumbing-adjacent is a separate trade.

The Rule of Thumb

If a quote is more than $1,500 lower than the next two you got, ask which of those items got dropped. The honest answer is usually “we acid-etch instead of grind” or “we do a single basecoat.” Both will look fine for 18 months. Neither will survive the Florida summer cycle of heat, humidity, and hot tires for 10 years.

Cheap Epoxy vs Pro-Grade Systems: Why Prices Vary 3x

A $1,500 floor and a $4,500 floor are not the same product. The chemistry, the prep, and the labor hours behind each are different categories. Here’s what you’re actually buying at each tier.

Tier 1: DIY and Big-Box Kits ($1.50–$2.50/sq ft)

The hardware-store epoxy kit is a water-based or low-solids epoxy paint. It’s typically 30–50% solids by volume, which means half of what you roll on evaporates as it cures. The dry film thickness is 3–6 mils — about the thickness of a sheet of paper. It scratches with a snow shovel, peels under hot tires within 12–18 months, and turns yellow in direct sun. There is a place for these kits — a basement workshop floor that never sees a vehicle is a fine candidate. A daily-driven Florida garage is not.

Tier 2: Budget Contractor / One-Day Franchise ($2.50–$4.00/sq ft)

This is where most “$1,999 special” ads live. You’ll usually get a 100% solids epoxy basecoat or a thinned polyaspartic, acid-etch or light-grind prep, a partial flake broadcast, and a single topcoat. The total dry film thickness lands around 15–25 mils. It looks great on day one. Common failure modes at 2–5 years: edge lift at the garage door threshold, hot-tire pickup in the parking spots, and yellowing in the sun strip near the door. Warranty is usually 1–3 years and limited to “manufacturing defects” — not adhesion failure.

Tier 3: Full Pro Polyaspartic ($4.00–$7.00/sq ft)

This is the system we install most often. Full CCS-30 diamond grind to expose concrete pores, vacuum, joint and crack repair, a flexible polyurea or polyaspartic basecoat, full vinyl flake broadcast until the floor is saturated, scrape and vacuum the excess, then two clear polyaspartic topcoats. Dry film thickness runs 30–45 mils. UV-stable, hot-tire resistant, chemical resistant, and abrasion rated for commercial floors. Real-world life: 15–20 years with normal residential use. Warranty: 10–15 years on materials and workmanship. This is the system on every quote we send for a garage epoxy floor install in Florida or Georgia.

Tier 4: Decorative or Industrial Specialty ($7–$12+/sq ft)

Metallic epoxy, decorative quartz, custom color-matched flake blends, ESD floors, chemical-containment urethane cement. These exist for showrooms, custom car garages, restaurant kitchens, and industrial settings. For a residential garage, this tier is usually about looks rather than performance — a Tier 3 system is mechanically equal to most Tier 4 systems for half the cost.

Hidden Cost Drivers: What Turns $3,500 Into $5,200

The five line items below are responsible for nearly every “the quote went up” conversation in our business. They are not surprises to the installer — they are surprises to the homeowner because the cheaper bid didn’t include them. When you’re comparing quotes, ask explicitly about each of these. Tap any driver below to see the dollar impact and what triggers it.

1. Cracks, joints, and concrete repair+

Garages built before 1995 in Florida often have control joints that have widened to 3/8″ or more, plus spalling at the door threshold where rain has cycled freeze-thaw and salt damage for thirty years. Every linear foot of crack repair runs $4–$8. Spalled-corner rebuild with a polymer-modified patch runs $40–$120 per corner depending on depth.

A typical 30-year-old Jacksonville slab needs $300–$600 of crack and edge repair before a coating goes down. New construction (post-2015) usually needs less than $100.

2. Moisture vapor testing & mitigation+

Florida slabs sit on a high water table. Vapor pressure pushes moisture up through the slab continuously — sometimes at 8–12 lbs per 1,000 sq ft per 24 hours, well above the 3 lb threshold where standard epoxy bonds reliably.

If your slab tests high, we install a moisture mitigation primer (typically an epoxy-based vapor barrier) that adds $1.10–$1.80/sq ft. Skipping this is the #1 reason coatings peel in Florida — the moisture pushes the coating off the slab from underneath. We covered this in detail in our Tampa epoxy service notes; the Gulf Coast slabs run even higher than Jacksonville.

3. Hot-tire pickup risk on hot-climate driveways+

Hot tires off a Georgia or Florida highway can hit 160–180°F. That heat plasticizes a weak coating and the tire literally pulls the epoxy off the slab when the car cools and the rubber re-grips.

Mitigation is a combination of full broadcast flake (the flake breaks the tire’s contact surface), a polyaspartic topcoat with high cross-link density, and parking on hot days only after the car has cooled in the driveway. Tier 1 and Tier 2 floors do not mitigate this; Tier 3 does. There’s no “add-on” line item for hot-tire resistance — it’s baked into the spec or it isn’t.

4. Surface prep beyond a standard grind+

“Light grind” and “deep grind” are not the same operation. A slab with thick old paint, mastic from a removed carpet pad, or an old epoxy layer needs an aggressive 16-grit metal-bond grind followed by a finer resin-bond pass. That’s two passes instead of one, plus diamond-tool wear.

Add $0.75–$2.00/sq ft for a slab with existing coatings to remove. This is where a “we’ll just go right over the old paint” contractor wins the quote and loses the floor in year two.

5. Slope, drain, and color-blend upgrades+

If your garage was poured without a slope to the door (or worse, slopes toward the house) and you want water to drain out, that’s a separate self-leveling underlayment job at $3–$6/sq ft. Adding a center trench drain is plumbing work and a permit, not a coatings job.

Custom flake blends — matched to a specific paint color, two-tone borders, or a logo — usually run an extra $300–$900 in materials and an extra crew-hour or two of layout. Beautiful, but a real line item.

Is Epoxy Worth the Cost vs Polyaspartic or Paint?

The honest answer depends on what you’re solving for. Below is how we frame the choice for homeowners who ask us to compare options on the same garage.

Quick Comparison — Cost per Year

System2-Car InstalledLifespanCost / Year
Epoxy paint (Tier 1)$400–$8001–3 yrs$130–$400
100% solids + polyurethane (Tier 2–3)$2,800–$4,5008–12 yrs$300–$450
Polyaspartic system (Tier 3)$3,600–$5,20015–20 yrs$200–$300
Sealed bare concrete$500–$9005–7 yrs$90–$180

Polyaspartic posts the lowest cost-per-year of any garage coating, and the fastest install — you’re back to driving in 24 hours, vs 3–4 days for traditional epoxy. Most homeowners who do the math end up here, which is why we wrote a dedicated polyaspartic floor coating overview.

When Bare Sealed Concrete Wins

For detached workshops, storage garages, and rental properties where peeling would be a maintenance call you don’t want, a $0.80–$1.50/sq ft densifier plus penetrating sealer is the underrated option. The floor stays grey, stains show, but it doesn’t peel, doesn’t yellow, and won’t ever need to be ground off.

How to Read a Quote and Avoid Getting Burned

If you’re collecting bids, here’s the short checklist to lay them side by side. Anything missing is a question to ask before you sign.

  1. What is the prep method — acid etch, light grind, or full diamond grind? (You want full diamond grind.)
  2. How many coats of pigmented base, and what is the dry film thickness target?
  3. Is the flake broadcast to refusal, or partial coverage?
  4. What is the topcoat product and the manufacturer’s name? (You want polyaspartic or polyurethane, not pure epoxy.)
  5. Is moisture testing included? What happens if the slab fails?
  6. What does the warranty cover — materials only, or materials and workmanship? Who is the responsible party 10 years from now?
  7. Is the company licensed and insured in your state? (In Florida, ask for the CGC or CBC license number.)

If a contractor pushes back on any of these questions, you have your answer. Reputable installers in Jacksonville, Atlanta, and the rest of the Southeast will walk you through every line item before you ever sign.

Frequently Asked Questions

Why is one quote $1,500 and another $5,800 for the same garage?+

Three reasons. First, prep method — a true diamond grind costs $1–$2/sq ft more in labor than acid etch, and a contractor quoting acid etch will always be cheaper. Second, system thickness — a 12-mil system uses about a third of the resin of a 35-mil system. Third, warranty exposure — a contractor offering 15 years has to price in the cost of fixing failures, and a contractor offering 1 year doesn’t. Cheap quotes aren’t dishonest, they’re just buying you a different product.

Can I DIY a garage floor epoxy kit?+

You can, and for some uses it’s the right call. A Drylok or Behr Premium 1-Part Epoxy will run you $200–$400 in materials and a weekend of labor. It will look great for 12–24 months. After that, you’ll see peeling around the door threshold and in the parking lanes. If you’re staging a house for sale or coating a basement workshop, paint is fine. If you park daily and live in Florida or Georgia humidity, you’ll repaint twice in the time a polyaspartic floor lasts once.

Is a 1-car garage half the price of a 2-car?+

No, but it’s closer than you’d think. There’s a fixed mobilization cost — a crew, a grinder, and a vacuum still have to show up. A 1-car job is usually 60–70% of a 2-car job total, not half. That’s why per-square-foot pricing on very small jobs runs higher than the advertised rate. If you have a detached 1-car or a workshop bay, consider combining it with another small project on the same trip to spread the mobilization.

How long does an epoxy garage floor last?+

Depends on the system. A DIY paint kit gives you 1–3 years in a real garage. A budget contractor install with thin film and acid-etch prep gives you 3–7 years. A full polyaspartic system with diamond-grind prep and broadcast flake gives you 15–20 years. The variable isn’t the brand of resin — it’s the prep and the film thickness. A premium product over bad prep fails just as fast as a budget product.

Does Florida humidity affect epoxy garage floor cost?+

Yes. Florida slabs commonly fail moisture tests, which means an additional vapor-barrier primer at $1.10–$1.80/sq ft. We also have to time installs around dew point — if humidity is over 80% and the slab is colder than the air, condensation forms during cure and the coating delaminates. We watch the forecast and sometimes reschedule, which a fly-by-night installer won’t bother doing. Expect a Florida quote to run 10–15% higher than the same job in Atlanta for these reasons.

Is it cheaper to recoat an existing epoxy floor or grind it off?+

Almost always cheaper to grind it off and start over. Recoating an existing coating only works if the old coating is well-bonded, the same chemistry family, and lightly scuff-sanded. In practice, 80% of the existing coatings we inspect have edge failures, hot-tire spots, or thin areas — the new coat will bond to those weak spots and fail with them. Full grind-and-recoat costs $0.75–$2.00/sq ft more than a fresh install, but you get the full warranty and the full lifespan. Recoating buys you 2–3 years and a hidden failure waiting to happen.

What about financing — can I split a $4,800 floor into payments?+

Yes. Apex offers 0% promotional financing on qualifying coating installs (typically 6–18 months same-as-cash, subject to credit approval) plus longer-term fixed-rate options through our consumer-finance partner. For a $4,800 polyaspartic 2-car, that lands around $267/mo on an 18-month same-as-cash plan or roughly $95–$120/mo on a 60-month fixed plan. Ask your estimator for current promotions when you book the in-home assessment.

Final Thoughts — and a Free Quote

The right epoxy garage floor budget is the one that matches your slab condition, your climate, and your timeline for owning the house. A $1,500 paint job in a dry Atlanta garage that gets sold in 18 months is a smart spend. A $4,800 polyaspartic system in a Jacksonville garage where you plan to retire is a smart spend. The wrong spend is the $3,000 middle option that gets installed over a slab that needed $600 of repair, and shows hot-tire failure in year three.

If you want a real number on your specific garage — not a per-square-foot estimate — Apex Flooring offers free in-home assessments across Jacksonville, Tampa, Atlanta, Charleston, Savannah, Fort Myers, Boca Raton, Hialeah, Port Charlotte, and St. Petersburg. We’ll measure the slab, run a moisture probe if it’s warranted, point out any crack or spall repair, and give you a written quote with every line item spelled out so you can compare it line-by-line to any other bid.

Call (904) 595-9792 or request a free quote online. We’ll tell you straight whether your slab is a Tier 2 or Tier 3 job, whether moisture mitigation is needed, and exactly what your 2026 epoxy garage floor cost will be — no high-pressure sales, no “today-only” pricing tricks, no surprise line items on installation day.

Final Thoughts

Polyurea garage floor coating offers a smart, long-term solution for homeowners looking to improve both the look and performance of their space. With its fast-curing application, it stands up to Florida’s climate and daily use without losing its appeal. For those seeking durability, safety, and a polished finish, polyurea flooring delivers both function and style that lasts.

Table of Contents

epoxy coatings

Call Us Now
(904) 595-9792

Related Epoxy Flooring News

Gray flake epoxy garage floor installed by Apex

Garage Floor Special

One Flat Price for Your Garage Floor

2-Car Garage$2,300
3-Car Garage$3,200
  • Standard garages done in one day
  • 25-year transferable warranty
  • Free on-site estimate

Claim Your Price

Answer a few quick questions and we'll reach out to set up your free estimate.