
Apex Epoxy Flooring

Author: Apex Epoxy Flooring Team

Written by the Apex Epoxy Flooring team in Jacksonville, Florida. We install epoxy, polyaspartic and polyurea floor coatings across Florida, Georgia and South Carolina, and have since 2018.

Categories Apex

Cracks in Your Garage Floor: Which Ones a Coating Fixes and Which Ones Come Back

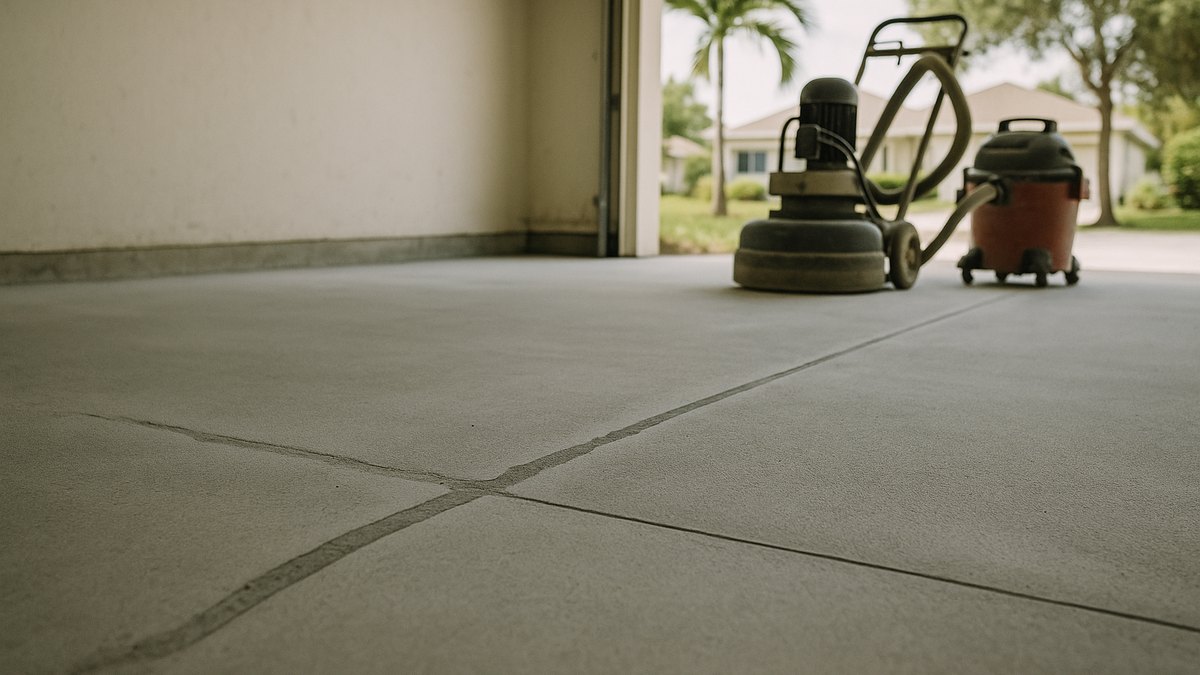
Garage concrete floor diamond ground for a coating, with a long crack chased, filled and ground flush beside a saw-cut control joint

Garage Floor Prep

Cracks in Your Garage Floor: Which Ones a Coating Fixes, Which Ones Come Back, and Which Ones Need a Look First

Home
/
Blog

Almost every garage floor we look at has cracks. Thin lines wandering out from a corner, a straight crack running alongside the saw cut, a spiderweb of fine lines near the door. Most homeowners point at them and ask the same thing: can you coat over that?

Usually, yes. But the honest answer depends on what kind of crack it is, because a floor coating bonds to the concrete and goes wherever the concrete goes. Some cracks disappear for good under the right prep. Some come straight back through any coating on the market. And a few are telling you something that has nothing to do with flooring.

The short version. Hairline shrinkage cracks are cosmetic. They get repaired as part of the prep and the coating hides them for good. Saw cut control joints are meant to be there and should be filled or honored, not ignored. A crack that is still moving will come back through any coating, epoxy or polyaspartic, and a crack with one side higher than the other, or one that keeps widening, needs a structural look before anyone coats it. Water or white powder coming up through a crack is a moisture problem, and it gets tested and dealt with first.

Why almost every slab cracks

Concrete shrinks as it cures and dries. A garage slab is a big, thin piece of concrete sitting on the ground, and as it shrinks, it cracks somewhere. That is normal, and it is why builders cut control joints into the slab: straight grooves that give the cracks a tidy place to form instead of a random one.

The ground underneath adds its own movement. Across much of Florida, slabs sit on sandy fill that can settle where it was not compacted well, especially near the edges and around plumbing trenches. In parts of Georgia and the Carolinas, clay soils swell when they get wet and shrink when they dry out, which moves the slab with the seasons.

So the question is never whether a garage floor has cracks. It is which kind, and whether they have finished moving.

The four kinds of cracks we see

Hairline shrinkage cracks. Thin lines, often in a loose web pattern, with both sides level. They are cosmetic. They get opened up, filled and ground flush during prep, and the coating hides them for good.

Control joints. The straight saw cuts in the slab. They are meant to be there, and often the slab has already cracked neatly underneath them, which is exactly their job. They can be filled and coated over for a seamless look, or left open and carried through the coating. More on that below.

Settlement cracks that have stopped. Random cracks from the slab settling after it was poured, sometimes years ago. If they have stopped moving and both sides are level, they are repairable, and once filled and ground flush they behave like the rest of the floor.

Active cracks. These are still moving. They open and close with the seasons, keep getting longer or wider, or have one side sitting higher than the other. No coating fixes an active crack. It will crack along the same line, because the coating is bonded to concrete that is still moving. The cause has to be dealt with first.

How to tell whether a crack is still moving

You do not need special tools to get a good first read:

  • Run your hand across it. If one side sits higher than the other, the slab has moved vertically. That is a structural sign, not a cosmetic one.
  • Mark the ends. Put a pencil mark and a date at each end of the crack. If it grows past the marks over a few months, it is active.
  • Look at the edges. Old, stable cracks tend to have dirty, rounded edges. Fresh, sharp edges and loose debris suggest recent movement.
  • Check the width. Hairlines are routine. Anything wider than about a quarter of an inch deserves a closer look.
  • Look around the house. Doors that have started sticking, or new cracks in the interior walls next to the garage, point to movement beyond the floor.

If any of those raise a flag, the right next call is a structural engineer or a foundation specialist, not a flooring contractor. We would rather tell you that than coat over a problem and watch it come back.

What crack repair looks like during prep

Crack repair happens as part of surface prep, before any coating goes down. On a typical garage:

  • The whole floor is diamond ground to open the surface so the coating can bond.
  • Each crack is chased with a crack chasing blade, widening it slightly into a clean channel of solid concrete.
  • The channel is vacuumed out so nothing loose is left in it.
  • It is filled with a fast setting crack filler, deliberately overfilled.
  • The repair is ground flush with the floor around it.
  • Spalled and pitted areas get patched the same way. Our guide to concrete spalling repair before coating covers that in detail.

Only then does the coating system go down. Skipping or rushing this step is one of the most common reasons coatings fail early, which we cover in why epoxy garage floors peel in Florida.

Control joints: fill them or keep them?

This is a genuine choice, and it depends on your slab.

Filling the joints and coating over them gives a seamless floor with nothing to catch dirt. If the slab is stable, that holds up well. If the slab still moves a little with the seasons, a fine line can appear along the joint in the finish, because the joint is doing its job underneath.

The alternative is to keep the joints working: fill them with a flexible filler, or re-cut them through the finished coating so they stay open as straight, clean lines. You give up a little of the seamless look, and in exchange the floor moves where it was designed to move.

We look at how the slab has behaved so far and talk the trade-off through with you on site.

Will the repair show through the new floor?

A crack that has stopped moving and has been repaired properly is structurally gone. Whether you can see where it was depends on the finish.

A full flake floor hides repairs best. The broadcast chips break up the surface so a filled crack disappears. Solid colors are less forgiving, because a perfectly uniform surface shows any slight difference in texture. Metallic finishes are the most revealing of all, since the flowing pattern can pick out lines underneath.

If your slab has a lot of repairs, that is worth factoring into the finish you choose.

When the crack is really a moisture problem

Sometimes a crack is the visible end of a different problem. White, chalky powder in or around a crack, a crack that looks damp when the rest of the floor is dry, or water seeping up after heavy rain all mean moisture is moving up through the slab.

Coating over that without addressing it is how a floor ends up blistering or lifting. Moisture gets tested before we coat, and where it is high, a moisture mitigating primer goes down first. In Florida, with high water tables and long humid summers, that test is not optional. We explain why in how Florida humidity affects epoxy floor installation.

When we tell you to wait

There are a few situations where the right answer is not yet:

  • A new slab that has not cured for at least 28 days
  • An active crack, still widening, growing or offset, until the movement has been looked at
  • Water coming up through cracks until the moisture has been tested and addressed
  • Signs of foundation movement elsewhere in the house

None of these mean you cannot have a coated garage floor. They mean the floor will last far longer if it goes down on a slab that has stopped moving. When it is ready, our garage floor coating systems and polyaspartic coatings go down over a properly prepared slab.

Frequently asked questions

Can you put epoxy over cracked concrete?
Yes, in most cases. Hairline cracks and cracks that have stopped moving are repaired as part of the prep and disappear under the coating. A crack that is still moving, has one side higher than the other or keeps widening needs its cause addressed first, because any coating bonded to the slab will crack along it again.
Will cracks come back through a polyaspartic or epoxy coating?
A properly repaired crack that is no longer moving should not come back. A crack that is still active will reflect through any coating, epoxy or polyaspartic, because the coating is bonded to the concrete and follows it. That is why reading the crack before coating matters more than the product.
Should control joints be filled before coating?
It depends on whether the slab is still moving. Filling and coating over control joints gives a seamless look, but if the slab moves, a fine line can show along the joint. Leaving the joints open, or re-cutting them through the coating, keeps the joint working. We talk through the trade-off on each floor.
When should I worry about a crack in my garage floor?
Get it looked at if one side of the crack sits higher than the other, if it is wider than about a quarter of an inch, if it keeps growing, or if water or white powder comes up through it. Doors that stick or new cracks in interior walls alongside it are also worth a structural opinion.
How are garage floor cracks repaired before coating?
The floor is diamond ground first. Cracks are then opened up with a crack chasing blade so the filler has clean, solid concrete to bond to, vacuumed out, filled with a fast setting crack filler, and ground flush with the surrounding floor before the coating system goes down.
Do hairline cracks need to be repaired?
Yes, as part of the prep. On their own they are cosmetic, but filling them before coating keeps them from showing as fine lines in the finish, especially under solid colors and metallic systems.

Have your cracks read before anyone coats over them

Most garage cracks are routine, and the right prep makes them disappear for good. The ones that are not routine are much cheaper to catch before the coating goes down than after.

Apex works with in-house crews across Florida, Georgia and South Carolina. We will walk the slab with you, test it for moisture, tell you which cracks are cosmetic and which need attention first, and recommend a system that suits your floor.

Request a free assessment

Categories Apex

Metallic Epoxy Floors: How the Look Is Made, and Where It Goes Wrong

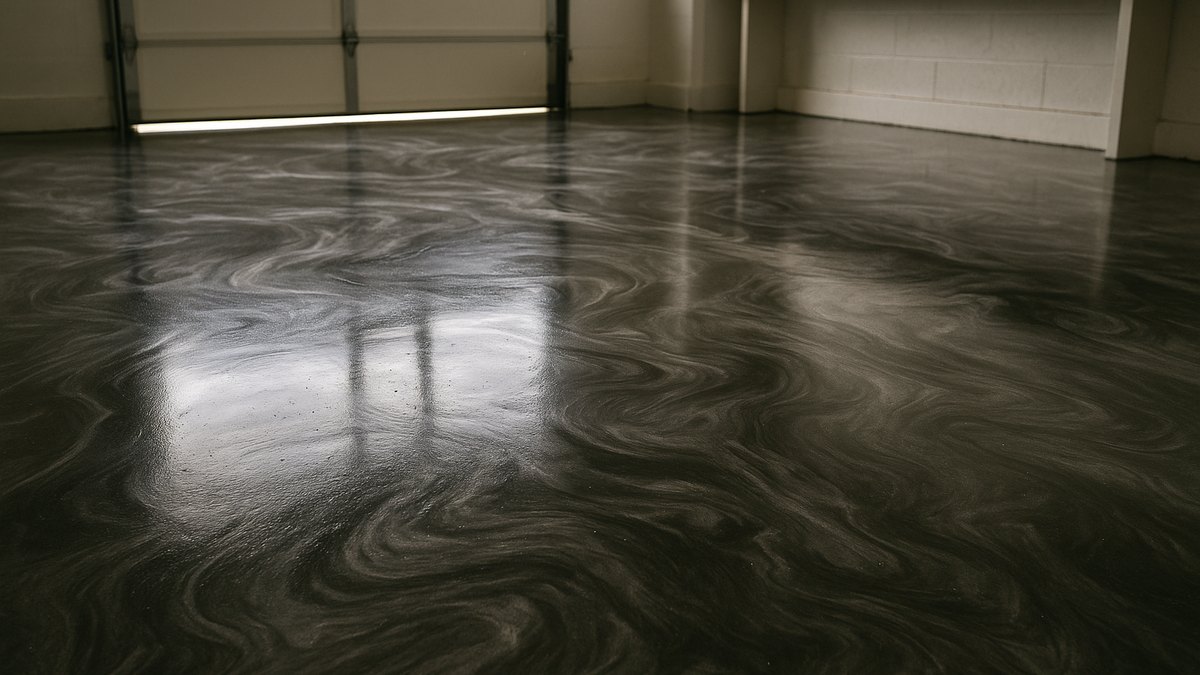
Metallic epoxy garage floor with a swirling charcoal, pewter and silver pattern

Metallic Epoxy

Metallic Epoxy Floors: How the Look Is Made, and Where It Goes Wrong

Home
/
Blog

A metallic epoxy floor is the one people stop and stare at. It has depth and movement, like polished stone or liquid metal frozen mid-swirl, and in the right light it looks like it is still moving.

It is also the floor that is easiest to get wrong. Metallic epoxy asks more of the concrete underneath it, more of the installer, and more of the owner’s expectations than any other epoxy finish. The same qualities that make it look extraordinary are the ones that make it unforgiving.

This guide covers how that look is actually made, why no two metallic floors ever match, and the handful of things that decide whether a metallic floor still looks this good years from now.

The short version. Metallic epoxy gets its depth from reflective pigments that keep moving while the resin cures, so every floor is unique and no sample can be matched exactly. It looks best indoors, out of direct sun, where it will not take heavy grit. It needs meticulous prep and a dry slab, a UV resistant clear topcoat if sunlight reaches it, and an honest decision about slip resistance before the topcoat goes down. Get those right and it holds up. Skip them and it shows every shortcut.

How the metallic look is actually made

A metallic floor is built in layers, and each one matters.

It starts with the concrete. The surface is diamond ground to open it up and give the coating something to grip, then cracks, pits and spalls are repaired. After that comes a primer and a pigmented base coat. The base coat is more important than it looks, because its colour shows through and changes how the finished floor reads.

Then comes the metallic layer itself: epoxy resin carrying reflective, pearlescent pigments. While the resin is still wet, those pigments keep moving and settling, and the installer shapes that movement. Rollers, trowels and a few other techniques create the swirls, veins, cells and ripples that give each floor its character.

Finally, a clear topcoat goes over everything. It protects the metallic layer from wear, adds or controls the gloss, and on many floors it is where slip resistance and UV protection come from.

Why no two metallic floors ever match

Because the pigment moves on its own while the resin cures, a metallic floor is partly designed and partly the result of physics. Temperature, humidity, the thickness of the layer and the installer’s technique all change how the pigment flows and settles.

That means a sample board shows you a colour family and a style of movement, not a pattern you will get exactly. Two floors poured with the same product, the same colours and the same technique will still look different.

For most people that is the whole appeal. It is also why the best way to choose is to look at several finished floors, agree on the effect you want, and trust the installer with the details. If you need an exact, repeatable finish across several rooms, a flake or solid colour floor is the more predictable choice. Our guide to flake vs metallic vs quartz vs solid epoxy compares them side by side.

Where metallic epoxy looks best

Metallic floors shine, literally, in spaces where they can be seen and are not ground down by grit.

That includes kitchens, living areas, home offices, showrooms, retail spaces and garages used as a showroom, workshop or home gym. In commercial spaces the look carries a lot of weight for very little floor area.

They are a harder fit in a busy daily garage. Road grit, sand tracked in from outside and hot tires all work against a glossy surface. That does not rule metallic out for a garage, but it does mean choosing the topcoat carefully and accepting that it will show wear sooner than a flake floor, which hides small marks in its pattern. Our page on garage epoxy floors covers the options.

Prep: where most metallic floors succeed or fail

Every epoxy floor depends on its prep. Metallic floors depend on it more, because a glossy, reflective surface shows every flaw underneath it.

A crack that would disappear under a flake floor can telegraph straight through a metallic one. A patch of contamination can stop the coating from bonding. A slab that was not ground evenly can show up as a change in the way the light plays across the floor.

That is why proper grinding, crack and spall repair and a clean, sound surface are not optional steps. If your concrete is flaking or pitted, it has to be dealt with first, and our guide to concrete spalling in Florida explains why. The same prep principles are behind why epoxy garage floors peel.

Moisture in the slab

Moisture is the other quiet killer, and it is a real issue across much of Florida, Georgia and South Carolina, where slabs often sit over damp soil and a high water table.

Concrete breathes. Moisture moves up through a slab from the ground below, and if too much is coming through, it can push against the coating from underneath. That can show up as bubbles, cloudy patches or a coating that lets go altogether.

A proper installation tests the slab for moisture before anything is applied. If the reading is high, the answer is a moisture mitigating primer or system under the metallic layer, not hoping for the best. Humidity during installation also affects how epoxy cures, which we cover in how humidity affects epoxy floor installation.

Sunlight and the topcoat

Standard epoxy does not like ultraviolet light. Over time, direct sun can make it yellow and dull, and on a metallic floor, where the whole point is clarity and depth, that shows up quickly.

If sunlight reaches the floor, through a glass door, a big window or an open garage, the clear topcoat needs to be UV stable. That is where a polyaspartic or similar topcoat earns its place over the epoxy. It protects the colour underneath and takes the day to day wear. Our guide to polyaspartic vs epoxy explains how the two work together, and our polyaspartic floor coating page covers the system.

Slip resistance, and the trade-off nobody mentions

A deep, glossy metallic floor can be slippery when it gets wet. In a kitchen, a bathroom, a garage where cars bring rain in, or anywhere near an entrance, that matters.

The fix is an anti-slip additive in the topcoat, which adds a fine texture you can feel underfoot. The trade-off is that texture scatters light, and the more grip you add, the more it softens the mirror-like depth that makes a metallic floor look the way it does.

There is no universal right answer. A showroom floor that never gets wet can stay glossy. A garage or a kitchen may be better with some grip. What matters is making the decision deliberately, before the topcoat goes down, rather than discovering it on the first rainy day.

Keeping it looking good

Metallic floors are easy to live with once they are down, as long as a few habits stick.

  • Dust mop regularly. Grit is what scratches a glossy surface, so removing it matters more than washing.
  • Use a pH neutral cleaner and avoid harsh or abrasive products.
  • Put walk-off mats at entrances to catch grit before it reaches the floor.
  • Use felt pads under furniture and equipment that gets moved.
  • Recoat the topcoat when it wears. The metallic layer underneath does not have to be redone.

Looked after that way, a metallic floor keeps its depth for years. For more on how long epoxy lasts in general, see how long does epoxy flooring last.

Frequently asked questions

How is a metallic epoxy floor made?
The concrete is ground to open its surface, repaired and primed, then a pigmented base coat goes down. The metallic layer is epoxy resin loaded with reflective pigments that keep moving while the resin is wet, and the installer shapes that movement with rollers, trowels and other techniques. A clear topcoat finishes it and protects the pattern underneath.
Will my floor look exactly like the sample?
No, and no installer can promise that it will. The pigment moves while the resin cures, so every metallic floor is one of a kind. A sample shows the colour family and the style of movement. The best way to set expectations is to look at finished floors and agree on the general effect you want, rather than a specific pattern.
Is metallic epoxy slippery?
A high gloss finish can be slippery when wet. An anti-slip additive in the topcoat adds grip, but the more texture you add, the more it softens the reflective effect that makes metallic floors look the way they do. Where the floor will get wet regularly, that trade-off is worth deciding before the topcoat goes down.
Does metallic epoxy scratch easily?
A glossy metallic surface shows scratches and scuffs more readily than a flake floor, which hides small marks in its pattern. A durable clear topcoat makes a big difference, and so do walk-off mats and felt pads under furniture. In a busy garage with grit tracked in daily, a flake floor is often the more forgiving choice.
Is metallic epoxy a good choice for a garage?
It can be, particularly a garage used as a showroom, a workshop or a home gym. For a garage that sees daily vehicle traffic, road grit and hot tires, it needs the right topcoat and a realistic expectation that it will show wear sooner than a flake floor.
How long does a metallic epoxy floor last?
A properly installed floor on well prepared concrete can last many years, and the clear topcoat is what takes most of the wear. Prep, moisture in the slab, sunlight and traffic decide how long it keeps looking its best. A worn topcoat can be recoated without redoing the metallic layer beneath it.

See finished metallic floors before you decide

Every metallic floor is different, so the most useful thing you can do is look at a few real ones and talk through the effect you want, where the floor is, how much sun it gets and how it will be used.

We will test the slab for moisture, check its condition and walk you through what will work in your space. See the full range on our metallic epoxy floor page.

Request a free assessment

Categories Apex

ESD and Static-Control Flooring

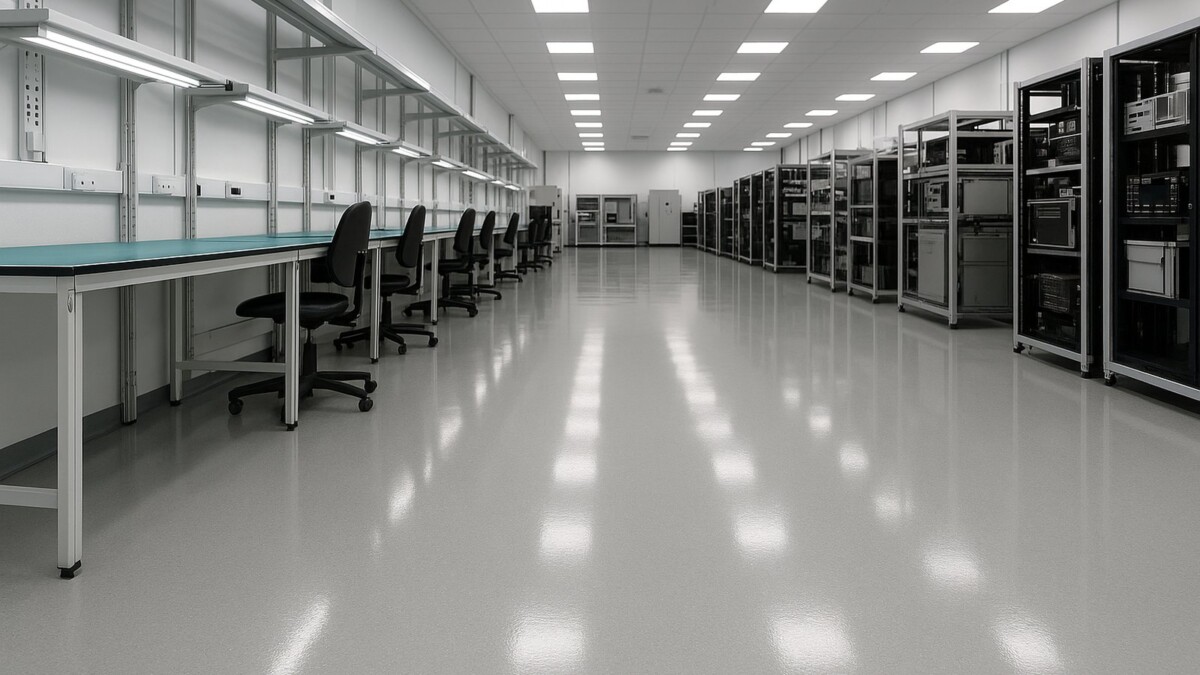
ESD static-control epoxy floor in an electronics manufacturing facility

ESD and Static-Control Flooring

Somebody has told you the new line needs an ESD floor: a customer audit, an equipment vendor, or a line buried in a contract you are bidding. Now you are reading data sheets, several of them say ESD or static dissipative across the top, and you are working out whether one of those products gets you a compliant floor.

On its own, it does not. A static-control floor is a grounded electrical assembly that happens to look like a coating, and the part that makes it work is buried underneath, out of sight from day one.

The short version. A static-control floor is a conductive or dissipative coating over an embedded conductive grid, usually copper strip, physically tied to a grounding point. The coating carries charge sideways into the grid, the grid carries it to ground, and without that connection you have a floor with conductive filler in it and nowhere for the charge to go. Conductive and dissipative are two targets on one resistance scale, your spec says which, and the floor only counts once it has been tested in place and retested on a schedule.

What static is actually doing to your parts

Static is generated by contact and separation. A person walking, a cart rolling, a tote sliding off a rack: two surfaces touch, electrons move, and they separate holding opposite charges. On a dry day, a person walking across an insulative floor is one of the most reliable charge generators in the plant.

People cannot feel most of it. You generally do not notice a discharge until it is well up into the thousands of volts, and plenty of modern components are damaged far below that. Your operators can be zapping parts all shift and report an uneventful day.

The damage also does not always show up at test. Some events kill a device outright, which is at least honest. The ones that hurt are latent, where a device is wounded, passes every functional test you run, ships, and dies in the field weeks or months later. They come back as warranty claims with no obvious root cause, very hard to trace to a floor.

The floor is not the only control. It is the one sitting under every person, cart and chair in the building, whether anyone remembers procedure or not.

Conductive or dissipative: the split that shapes the build

Both move charge to ground. The difference is how fast, which is really a question of how much resistance sits between the surface and the ground point.

Conductive systems sit at the low end of the resistance scale and drain charge quickly. Dissipative systems sit higher and bleed it off more gradually. As a rough shape of that scale, the industry treats somewhere around a million ohms as the dividing line, with dissipative running up toward a billion ohms before a floor stops doing useful work. Treat that as orientation, not as specification. The target and the way it is measured come from your ESD control program and the system you are buying. Apex puts it plainly: these floors “dissipate static charge within the specified range.” The specified range is the one in your documents.

Faster is not automatically better. Where technicians work on or near energized equipment, a low-resistance path underfoot is a personnel safety question, and specs often call for a dissipative floor precisely to keep resistance in the path. Areas handling energetic materials or flammable vapors tend to go conductive on purpose, because there the goal is to never let charge accumulate.

The part nobody sees: the embedded grounding grid

This is the part most people are missing, and it is why a static-control floor is a different job from a standard industrial epoxy floor installation.

After the slab is prepped, a grounding grid, typically copper strip, is laid across the floor before the coating goes down, and a conductive primer goes over the top in direct contact with it. The conductive layers move charge horizontally until it reaches a grid run, and the grid carries it to a ground connection tied into the building ground at a point the electrical design specifies.

Apex states the capability directly: “For electronics assembly, cleanrooms, aerospace and defense work, and any area with static-sensitive processes, we install ESD / static-control systems with an embedded conductive grid tied to a grounding point.”

The grid layout is not improvised. Spacing, the number of ground connections, and how the grid crosses joints and doorways come from the manufacturer’s details and the electrical design. More than one ground tie is common, so one damaged connection does not orphan the floor.

The ground connection is a permanent, inspectable part of the building, not a wire taped to a column. Document it, so nobody rips it out during the next equipment install.

The grid also goes in during installation. There is no practical way to add one later without taking the floor back off.

Why a coating alone is not an ESD floor

Install a conductive coating with no grid and no ground connection and you have built a large isolated conductor. The surface carries charge around efficiently and has nowhere to put it. That is not static control, and it will not survive an audit: the auditor will ask for resistance-to-ground readings and there is no ground to measure.

That is the trap in the phrase “ESD coating.” The coating is one layer of a system that also includes the prepared slab, the grid, the conductive primer, the body coat, the topcoat and the ground connection. Every layer above the grid has to stay inside the electrical range too. Putting a standard sealer or a floor wax over a finished ESD floor is one of the fastest ways to kill it, usually months later, courtesy of a cleaning contractor nobody told.

Who actually needs one

Electronics assembly is the obvious case: board assembly, rework, test, and anywhere bare components are handled.

Cleanrooms have a second reason: charged surfaces attract airborne particulate, so static control and contamination control are the same conversation, and the floor has to be seamless and low-shedding too.

Aerospace and defense covers avionics, instrumentation and precision assembly. Apex’s industrial page describes this group as needing “ESD static-control and low-dust finishes that hold tolerances under heavy component handling.”

Munitions and energetics are a different problem with the same solution: the risk is not a damaged component but an ignition source near material that must never see one, and the requirements are stricter. Pharmaceutical and chemical operations hit that during powder handling and solvent transfer. Server rooms and data halls need it around staging and spares storage, where hardware gets unboxed and worked on rather than racked.

If none of that describes your operation, you probably do not need a static-control system, and a well-built commercial epoxy floor will serve you better.

How it gets verified, and why once is not enough

This is the only kind of floor whose acceptance criteria are electrical. When it is finished it gets measured: point-to-point readings across the surface, and resistance-to-ground readings back to the ground connection, at multiple locations with the specified instrument.

ANSI/ESD S20.20 is the program standard most US facilities are audited against, with IEC 61340-5-1 as the international counterpart. Those documents govern the control program as a whole, not just the floor, and reference separate test methods for the floor material alone and for floor and footwear measured with a person standing on it. Do not take resistance numbers from an article, this one included. Take them from your spec and your test report.

Readings also move with humidity and temperature, generally rising as the air gets drier, which is why test conditions are part of the method. Ambient conditions matter during the install for the same reason, which we cover in Florida humidity and epoxy floor installation.

And verification is not a one-time event. A compliance program expects periodic re-testing of the control items, floors included, because floors wear, get cleaned with the wrong chemistry, and get a mystery coat of something applied to them. Put the re-test on the maintenance calendar and specify the cleaning chemistry in writing.

The floor is half a system, and footwear is the other half

A grounded floor does nothing for someone in ordinary rubber-soled shoes. The person is insulated from the floor, and the charge stays on them.

That is why ESD footwear, heel grounders or toe straps go with the floor, and why the two are qualified together rather than separately. The standard test methods measure them as a combination with a person in the loop, because that is the real circuit: person to shoe to floor to grid to ground.

The consequences are mostly procedural. Footwear gets checked at a tester routinely, because heel straps fail and nobody notices. Carts, chairs and workbenches have to be in the system too, since a wheeled chair with insulative casters is just a charged object with a person on it.

The floor is the foundation of the program. It is not the program.

What has to be true about the slab first

None of the electrical work matters if the coating comes off, and an ESD system takes the grid with it when it fails.

The slab still has to be mechanically prepped, cracks patched, and moisture verified first. Apex describes its industrial prep as taking “your existing slab, mechanically profiled to a Concrete Surface Profile of 2 to 3. Cracks patched. Moisture verified.” That is no different here, just less forgiving, because a delamination is now an electrical failure as well as a cosmetic one. The prep failures behind ordinary coating loss are the same ones, covered in why epoxy floors peel and the prep steps that prevent it.

Moisture vapor from below adds one wrinkle. Where a slab needs a moisture-mitigation primer, that layer is normally a barrier product with no conductive properties, so the build-up has to keep the conductive layer and the grounding grid electrically connected above it. Settle that at submittal, not on the morning of the install.

Frequently asked questions

What is ESD flooring?
It is a floor built to carry electrostatic charge to ground instead of letting it build up on people and equipment. In a resinous system that means conductive or dissipative coating layers over an embedded conductive grid tied to a grounding point. The coating alone is not the floor: the ground path is.
What is the standard for ESD testing?
ANSI/ESD S20.20 is the program standard most US facilities are audited against, with IEC 61340-5-1 as the international counterpart. They set up the control program and reference separate test methods for flooring materials and for flooring and footwear measured with a person. Your spec names which methods and targets apply.
Is static dissipative the same as conductive?
No. They are two ranges on the same resistance scale: conductive sits lower and moves charge faster, dissipative sits higher and bleeds it off more gradually. Both are grounded systems built the same way underneath, and which one you install is a spec decision, not a preference.
When to use static dissipative flooring?
Dissipative is the common choice in electronics assembly and static-sensitive work, and it is often required where people work on or near energized equipment, because keeping some resistance in the path matters for personnel safety. Conductive systems tend to appear where charge must never accumulate at all, such as areas handling energetic materials or flammable vapors.
What is the best flooring for grounding?
There is no single best material. For industrial areas that also take forklifts, carts, chemicals and wash-downs, a seamless resinous system with an embedded grounded grid is usually the practical answer: it grounds and takes the abuse in one build. Tile and mat products meet the electrical requirement too, but they bring seams.
What is the difference between a grounding mat and an ESD mat?
In everyday use both describe a surface tied to ground through a cord, usually at a workbench. The distinction that matters is scope: a mat protects the area it covers, while a grounded floor covers the whole space and works whether or not the operator remembers to connect anything.
What are the specifications for ESD flooring?
A real spec names a resistance target, the test method and conditions used to confirm it, the grounding detail and number of tie points, and often a limit on body voltage generated by the floor and footwear together. It should also state the cleaning chemistry allowed and the re-test interval. A spec that says only “ESD coating” plus a product name is incomplete.

Talk to Apex about a static-control floor

If you have a spec in hand, the next step is a conversation about your slab, your ground points and your schedule, because the grid and the ground connections get planned before anything is mixed. If you do not have one yet, we can tell you what your system manufacturer and your ESD program will need from the building.

Apex installs industrial systems with in-house crews across FL, GA and SC, including ESD and static-control floors with an embedded conductive grid tied to a grounding point.

Talk to Apex about your facility

Categories Apex

Epoxy Flooring for Restaurants

Restaurant & Food Service Floors

Epoxy Flooring for Restaurants: What Survives the Kitchen Line, What Belongs Out Front, and How the Install Fits Around Service

Home
/
Blog

Your quarry tile is twenty years old. The grout around the fryer bank has washed out below the tile face, an inspector made a note about the floor-wall junction behind the dish machine, and a server went down carrying a tray last month. Meanwhile you serve six days a week.

The question is almost never whether to coat the floor. It is which system goes in which room, and how the work happens without going dark.

The short version. A restaurant is three floors under one roof, and speccing them the same way is how you end up recoating in two years. The kitchen line and dish pit want a quartz-broadcast epoxy with an integral cove, or urethane cement under heavy thermal loads. Front of house wants flake or metallic under a slip-graded satin topcoat. Work gets phased zone by zone so you keep serving. And if the slab is under 28 days old, wet from below, or moving, the answer is not yet.

A restaurant is three floors, not one

Walk the building the way the floor experiences it, not the way the plan draws it.

Zone one is the kitchen line and dish pit: hot oil, boil-overs, steam, near-boiling discharge water, high-pH degreasers, and grease worked in by mats and cart wheels. A chemical and thermal problem.

Zone two is front of house and the bar, looked at by every guest, hit with drink spills and wet shoes off the sidewalk. An appearance and wet-traction problem.

Zone three is everything else: walk-in, dry storage, back hall, mop closet, patio. None of it justifies the kitchen spec.

One system across all three either overbuilds the dining room or underbuilds the line. Underbuilding the line is what shuts you down on a Saturday night.

Zone one: the kitchen line and the dish pit

Thermal shock kills commercial kitchen floors, not abrasion.

A coating and the slab under it expand at different rates. Dump near-boiling dishwasher water on a thin coating a few hundred times and the bond line takes that stress every cycle. It shows first as a hairline halo around a drain, then as a sheet.

For most kitchens the working spec is a heavy commercial epoxy with a quartz broadcast and an integral cove. Apex calls their quartz epoxy system “Ideal for restaurant kitchens, medical facilities, and high-traffic commercial spaces,” and the aggregate is why: “the varying sizes of the quartz particles create a textured surface that enhances traction and grip underfoot, reducing the risk of slips and falls,” including when the floor is wet or oily. That texture is the body of the floor, not a topcoat additive.

Heavier lines move up a class. Urethane cement expands and contracts much closer to concrete than epoxy does, which is why it survives steam and hot wash-down. As Apex puts it on their industrial flooring page: “Urethane cement is the heavy hitter for food and beverage, breweries, and cold storage.”

The dividing line is practical. If your crew closes with a deck brush and a degreaser, a quartz-broadcast commercial epoxy is enough floor. If you steam clean, hot pressure wash, or run a high-temp dish machine discharging to a floor sink, spec urethane cement in that footprint and epoxy elsewhere. Changing systems mid-kitchen is a legitimate answer.

Zone two: front of house and the bar

Out front the floor has two jobs: look like part of the room, and keep guests upright.

Flake handles most dining rooms. Vinyl chip is hand-broadcast into the wet basecoat until the surface refuses more, then cured, scraped flat, vacuumed, and sealed. Camouflage is why it works: flake hides crumbs, scuffs, and a dropped ramekin between bus rounds. A solid gray floor shows every footprint by seven o’clock.

Metallic epoxy belongs where the floor is part of the design: the bar, the entry, a private dining room. A metallic layer is a look, though, and traction comes from the topcoat over it. Anywhere guests carry drinks or step in off a wet sidewalk, specify a satin, slip-graded topcoat, not the highest gloss available.

The server aisle and the swinging door take kitchen exposure while staying visible from the tables, so that strip usually wants the kitchen system with a finer broadcast.

Zone three: walk-in, dry storage, and the patio

The walk-in is a scheduling problem more than a materials problem. Most coatings will not cure properly on a slab in the thirties, so the box has to warm up and hold there through cure, which means product comes out and the compressor goes off. Urethane cement is built for cold storage.

Dry storage, the back hall, and the office are light duty, where flake is plenty.

The patio is a sun problem: standard epoxy ambers under direct UV, so anything outdoors needs a UV-stable polyaspartic or urethane topcoat. And cove the mop closet. It is a wet room with a floor sink, and a common write-up.

What a food-service inspection looks at on your floor

Restaurants are licensed and inspected at state level, and Florida, Georgia and South Carolina all work from the same source: the FDA Food Code, which each state adopts by reference. The agency name on the paperwork changes. What an inspector wants from your floor does not.

For a floor that shakes out to a short list. Surfaces in food prep, warewashing, and walk-in refrigeration have to be smooth, durable, non-absorbent, and easily cleanable. The floor-wall junction has to be coved and closed so debris cannot pack into a corner no tool reaches. Floors have to be sufficiently slip resistant for how the room is used, and sloped to drain where they are cleaned by flushing water.

Apex says the same thing plainly: “Restaurants and commercial kitchens. Health codes require non-porous, slip-resistant, and easy-to-clean flooring in food service environments.”

The wall cove is the most common write-up, and there is already a full breakdown of why a residential-style flat-against-the-baseboard install fails in their comparison of commercial versus residential epoxy specs. Read that one for the wall detail.

What it does not cover is where inspectors go next: the drain, the door threshold, the equipment curb, the column base. A cove that stops at the room perimeter and dies into a raw concrete ring around a floor sink has moved the problem, not solved it. Apex describes their sanitary work as seamless systems “with integral cove base at wall and drain transitions,” and the drain half is what most people skip.

Why the quarry tile is usually what comes out

The tile is rarely the failure. Quarry tile is a dense fired clay body and it lasts. The grout is the failure.

Cementitious grout is porous. It drinks water and grease, erodes under high-pH degreasers and hot wash-down, and recedes below the face of the tile. You are left with a grid of narrow channels holding grease a flat mop cannot reach, which is what an inspector runs a finger into.

Once the grout is gone, water gets under the tile, the setting bed releases, and tiles rock. Now you have a trip hazard and a sanitation finding in the same square foot. Regrouting is a treadmill, because every regrout has to bond to a substrate already saturated with grease.

Demolition, not coating, drives the schedule. Tile and setting bed have to come off, which is loud, dusty, and slower than people expect, and it tends to reveal a slab that does not slope where the drawings said.

Drains, slope, and the edges that decide how long it lasts

Coated floors almost never fail in the middle. They fail at edges.

Every termination should be mechanically keyed, which means a saw-cut groove at the drain ring, at door thresholds, and at slab edges, so the coating locks into the concrete instead of feathering out to nothing. A feathered edge is what a mop bucket wheel catches and peels first.

At drains, the coating needs to run into the drain body and terminate inside the ring. Stopping short leaves a band of bare concrete that stays permanently wet, and that is where lifting starts.

If your floor ponds today, a coating will give you a glossier puddle in the same place. Slope has to be rebuilt in mortar before the finish goes down.

None of it works without prep. Apex is direct that “Diamond grinding is the professional standard: it mechanically opens the concrete to a uniform CSP-2/3 profile so the coating bonds into the slab.” That matters double in a kitchen, because years of grease have migrated into the top of the slab.

Phasing a multi-zone install around service

Phasing should be settled before a crew is booked, not after.

Apex phases larger commercial floors by section so the operation keeps running, with most spaces back in service within 24 to 48 hours. Fast-cure polyaspartic and urethane-cement systems let them stage work by zone, with many jobs done over a weekend or a scheduled maintenance window.

A workable sequence starts where you are least exposed: dry storage, back hall, office. Take the dining room on your closed day. Save the kitchen and dish pit for the longest continuous window you have, because they need the most equipment moved and the most cure time protected.

Decide early what moves and what gets detailed around. Line equipment on casters rolls out; a hood-anchored range battery and a built-in dish machine do not, and anything staying put gets a curb and cove detail drawn before the grinder starts.

Cure expectations matter as much as the calendar. Fast-cure polyaspartic topcoats accept foot traffic in hours and light traffic overnight, but full chemical cure keeps developing through the first week: no aggressive degreaser, no hot wash-down, no heavy static load. Tell your closing crew in writing, or someone will hit a two-day-old floor with the strongest thing under the sink.

When we say not yet

Three conditions where the right answer is to wait, and a contractor who will not say so is not doing you a favor.

Green concrete. Apex is blunt: “The other thing we will not do is coat green concrete. A slab needs its cure time before anything goes on it, and coating early is almost always a callback.” Their rule of thumb is concrete under 28 days old, so on a new build that clock is part of your opening schedule.

Active moisture vapor. This is the quiet one, because you cannot see it. In their words, “Below-slab moisture vapor is the number-one cause of coating failure and delamination, and it’s invisible until the floor is peeling.” You find out by testing: a calcium chloride test under ASTM F1869, and ideally an in-situ relative humidity probe under ASTM F2170. If readings come back high, the options are a vapor-mitigation primer first, or moving to urethane cement, which Apex notes “can be installed over damp or newer concrete where standard epoxy can’t, after moisture testing.”

A moving slab. Cracks that open and close with the season, or a joint that has stepped, will telegraph through any coating over them.

Frequently asked questions

Is epoxy flooring good for restaurants?
Yes, when it is specified by zone. A seamless coating with an integral cove gives you the smooth, non-absorbent, easily cleanable surface food-service code asks for, with no grout lines to hold grease. The caution is that a residential-grade product will not survive thermal cycling on a working line.
What type of flooring is best for a commercial kitchen?
For most kitchens, a heavy commercial epoxy with a quartz broadcast and an integral cove base. For lines with steam, hot wash-down, fryer banks, or high-temp dish discharge, urethane cement, because it moves with the concrete under thermal shock instead of debonding from it.
What is the best commercial flooring for restaurants?
There is no single answer across the whole building, which is the trap. Quarry tile is durable but its grout is the recurring failure, sheet vinyl lifts at the wall in a wet kitchen, and sealed concrete alone is porous. A zoned approach outlasts using one product everywhere.
Are epoxy floors good for a kitchen?
Draw a line between a home kitchen and a commercial one. In a house, epoxy is mostly an aesthetic choice. In a commercial kitchen it is a code and safety system: coved, slip-graded, chemical-resistant, sloped to drain, and seamless.
What is the downside of epoxy flooring?
It is unforgiving about the slab underneath. Green concrete, unaddressed moisture vapor, a moving crack, or grease-contaminated concrete all show up later as delamination, and none of them are the coating’s fault. Standard epoxy also ambers under direct UV.

Talk to someone who will spec your floor zone by zone

If you can walk the building and say which zone gets which system and why, you are most of the way to a floor that lasts. The rest is testing the slab, detailing the drains and thresholds, and building a sequence that fits between your closes.

Apex works with in-house crews across Florida, Georgia and South Carolina, phases commercial floors by section so you keep serving, and will tell you when to wait.

Request a free assessment

Categories Apex

Warehouse Floor Striping: OSHA Color Rules

Warehouse Floor Marking

Warehouse Floor Striping: What OSHA Requires, What the Colors Mean, and Why the Lines Belong Inside the Coating

Home
/
Blog

Every warehouse we walk into has the same story painted on the floor. The aisle lines near the dock doors are worn down to ghosts. Somebody laid tape over the bad sections, and the tape edges have curled and collected black grime. There are two different yellows, because the last touch-up did not match, and a red line near the electrical panel that nobody currently working there can explain.

Floor marking gets treated as the last item on a warehouse project, which is why it is usually the first thing to fail. It is also the item an OSHA compliance officer can evaluate from across the building without asking anyone a question.

Here is what the rules actually say, what the colors are supposed to mean, and why the way most lines get applied is the reason you are repainting them.

What OSHA actually requires

Less than most people assume, and the vagueness is the problem.

29 CFR 1910.22(b) requires that permanent aisles and passageways be appropriately marked. 29 CFR 1910.176(a) requires that where mechanical handling equipment is used, sufficient safe clearances are allowed for aisles, that aisles and passageways be kept clear and in good repair, and that permanent aisles and passageways be appropriately marked.

Read those closely and notice what is missing. There is no mandated line width. No mandated color for aisles. No mandated aisle dimension. OSHA says mark them, keep them clear, and give equipment safe clearance, then leaves the execution to you.

Where OSHA does get specific is color for hazards. 29 CFR 1910.144 designates red as the basic color for fire protection equipment and danger, and yellow as the basic color for designating caution and marking physical hazards. And 29 CFR 1910.37 requires exit routes to be kept free and unobstructed, which in practice means the path to an exit needs to be visibly defined and not stacked with pallets.

The practical translation. OSHA will not cite you for using the wrong shade of blue on a material staging area. It will cite you for aisles that are not marked, for markings so worn they no longer communicate, and for blocked or unmarked egress. Faded is the same as unmarked when a forklift operator cannot see it.

Beyond OSHA, most facilities follow the ANSI Z535.1 safety color convention and the 5S floor-marking practice that grew out of lean manufacturing. Those are not law, but they are what auditors, insurers and incoming employees expect, and a facility that follows them looks run rather than improvised.

What the colors mean

This is the convention in general industrial use. Standardizing on it means a new hire or a temp from an agency reads your floor correctly on day one.

Color Standard meaning
Yellow Aisleways, traffic lanes, work cells, and physical hazards
White Equipment, workstations, racking, carts and fixtures
Blue Raw materials and incoming inventory
Green Finished goods
Orange Material awaiting inspection
Red Defects, scrap, rework and red-tag areas
Red and white stripes Keep clear for safety and compliance reasons: fire equipment, eyewash stations, electrical panels
Black and yellow stripes Physical hazards: trip, crush, caught-between, low clearance
Black and white stripes Keep clear for operational reasons, no safety implication

The red and white versus black and white distinction matters more than people expect. Red and white means something bad happens if this is blocked in an emergency. Black and white means it just gums up your operation. Using them interchangeably trains people to ignore both.

Where the required clearances live: the National Electrical Code requires working clearance in front of electrical panels, and fire code requires clear access to extinguishers and to the path of egress. Those clearances exist whether or not you mark them. Marking them is how they actually stay clear, because "keep this three feet clear" is an instruction people forget and a painted rectangle is not.

How wide should the lines be, and how wide the aisles?

Lines: 2 to 4 inches is the common range, with 4 inches used in high-traffic lanes and large open floors where sight lines are long. Wider lines read faster at forklift speed and survive wear longer before they need attention.

Aisles: OSHA does not publish a universal number, because the correct width depends on what is driving through it. The standard the industry works to is at least three feet wider than the widest piece of equipment or load that will use the aisle, and more where equipment turns, meets oncoming traffic, or works next to pedestrians. Pedestrian walkways separated from forklift traffic are the single highest-value marking most warehouses can add, and they are frequently the one that is missing.

The real problem: how the lines are applied

Almost all warehouse marking is done one of three ways, and the difference between them is why you are reading an article about repainting lines.

Tape

Fast, needs no cure time, and the building keeps running while it goes down. In an office, a lab, or a light-duty area, tape is a legitimate answer.

Under forklift traffic it is not. Wheels that turn in place shear the edges up, and once an edge lifts it peels. The lifted edge then collects dirt and becomes its own trip hazard. In a genuine traffic lane, tape is a recurring maintenance item, not a solution.

Paint applied on top of a finished floor

Better than tape, and this is what most facilities have. The limitation is structural: the paint sits on top of the coating, which means it is the highest point on the floor and takes every wheel, every pallet jack, every dropped tool. It is the first thing to abrade. Traffic lanes go patchy while the same paint under a rack looks new, which is exactly why so many warehouse floors have two shades of yellow.

It also has an edge. A small one, but enough to catch dirt and to give a squeegee or scrubber something to ride over.

Striping integrated into the coating system

The lines go down after the base coat and before the clear topcoat. The topcoat then seals over them.

Three things change. The marking is flush with the floor, so there is no edge to lift, catch or collect grime. It is no longer the wear surface, because the clear coat above it is, which means the lines wear at the same rate as the floor rather than faster. And it cleans like the rest of the floor, since an auto-scrubber passes straight over it.

The tradeoff is honest: it has to be planned before the floor goes in, and changing the layout later means recoating the affected area rather than painting a new line. If your racking moves every quarter, integrated striping is the wrong choice and we will tell you so.

How long each method lasts, and what it takes to maintain

All three work on the day they go down. What separates them is how they behave a year later in the lanes that get driven.

Method How it fails Under an auto-scrubber How often it gets redone
Tape Edges shear where wheels pivot, then peel and trap grime The deck catches the raised edge and lifts it further A one to two year item in a forklift lane
Paint on top of the floor Abrades from the top down; it is the highest point on the floor Scrubs clean, but the edge holds a dirt line that stays Lanes show wear in two to four years, touch-ups sooner
Striping integrated into the coating Does not fail on its own; it wears when the topcoat wears Flush with the floor, so the machine runs straight over it Redone when the floor is recoated, not before

Maintenance follows from that. Tape needs somebody walking the lanes and replacing lifted runs before they turn into trip hazards. Painted lines need a return visit with masking, layout and cure time. Striping under the topcoat needs only the cleaning you already do: neutral pH detergent, a soft to medium brush, and no aggressive solvents or high-alkaline strippers, which haze the clear coat.

Wear is never even. It concentrates where forklifts pivot rather than roll: dock approaches, the mouth of every rack aisle, cross-aisle turns. Judge a floor there, not by the open middle.

What re-marking takes out of your operation

The line work is the small part. What a reapplication really takes is floor time, and that lands on operations rather than maintenance.

Stage What has to happen What it does to the operation
Clearing the zone Staged product and anything parked in the lane moves somewhere else You lose the work area and the space the product went to
Layout and masking Lines pulled and verified against where the racking sits today The lane is out of service before a container is opened
Application Material goes down a zone at a time to keep partial use Traffic reroutes through aisles never sized for it
Cure before wheel traffic Foot traffic returns well before forklifts can; full cure takes longer still The lane stays shut after the crew goes home, which schedules underestimate

On a single shift you can sometimes absorb that. On two shifts there is no window, so the work moves to nights or weekends and you staff supervision, receiving and security around it.

This is the real argument for putting the lines under the topcoat. Not what the striping is worth on a proposal, but how many times you shut a lane to redo it. Integrated marking costs more up front and then stops asking for the floor back.

Getting the layout right before anything gets marked

The most expensive marking mistake is not the wrong product. It is marking the wrong layout beautifully.

Before we chalk a line we want to know: where forklifts actually travel as opposed to where the drawing says they travel, where people walk between the break room and the floor, where the pinch points are at dock doors and blind corners, what has to stay clear by code, and what is genuinely permanent versus what moves with the season.

That last one decides the whole strategy. Permanent traffic lanes, egress paths and code clearances belong in the coating. Seasonal staging that reconfigures twice a year belongs in tape, honestly and deliberately, because it is going to move.

Florida warehouses have one extra problem

Concrete moves moisture. A slab in Northeast Florida with a high water table, no vapor barrier, or a barrier that was compromised during construction will push vapor up through the slab continuously. That vapor is what delaminates coatings, and when the coating lets go, the striping goes with it.

This is why we moisture test before quoting rather than after. A beautifully marked floor on an untested slab is a floor that will need doing twice. We covered the broader version of this in what Florida warehouse floors actually have to survive.

The other thing we will not do is coat green concrete. A slab needs its cure time before anything goes on it, and coating early is almost always a callback.

Frequently asked questions

Does OSHA require floor markings?
Yes. 29 CFR 1910.22(b) and 1910.176(a) both require permanent aisles and passageways to be appropriately marked, and 1910.176(a) also requires safe clearances and that aisles be kept clear and in good repair. What OSHA does not do is dictate the color or width, which is why the ANSI Z535.1 convention has become the default.
What is the best paint for warehouse floor lines?
For a floor that sees forklift traffic, the better question is not which paint but where the line sits. Any coating applied on top of a finished floor is the wear surface and abrades first. Line work placed under a clear topcoat is protected by it and lasts as long as the floor does.
What is floor striping?
Marking a floor with lines and shapes that define aisles, walkways, storage zones, equipment locations and keep-clear areas, so traffic and material flow are visible without anyone having to explain them.
Do the colors actually matter legally?
Red and yellow do. OSHA 1910.144 designates red for fire protection equipment and danger, and yellow for caution and physical hazards. The rest of the palette, blue for raw materials, green for finished goods and so on, is convention rather than regulation, but auditors, insurers and new employees all expect it.
How wide should warehouse aisles be?
OSHA does not publish a single number. Industry practice is at least three feet wider than the widest load or piece of equipment using the aisle, with more room where equipment turns or works alongside pedestrians.
How long does floor striping last?
Tape in a forklift lane is often a one to two year item. Paint on top of a floor typically shows wear in traffic lanes within two to four years while looking fine everywhere else. Striping sealed under a topcoat lasts as long as the coating system.
Can you just stripe our existing floor without recoating it?
We install striping as part of a coating system rather than as standalone line-painting work, because integrating it under the topcoat is what makes it last. If your floor is due for recoating anyway, that is the moment to get the marking right. If it is not, we will say so rather than sell you a line job that will wear out.
What areas do you cover?
We work across Florida, Georgia and South Carolina on industrial and commercial floors, including warehouses, distribution centers, manufacturing plants and processing facilities.

Plan the marking with the floor, not after it

If you are coating or recoating a warehouse floor, that is the only good moment to get the striping right. The layout work happens once, the lines go under the topcoat, and you stop scheduling repaints.

We install industrial epoxy flooring with line striping built into the install, including safety line striping, walkways and hazard markings in the same scope. For the floor underneath it, see solid-color epoxy for warehouse and distribution floors, and if you are weighing specifications, how commercial systems differ from residential builds covers why the industrial spec exists.

Request a site assessment and quote

Call Apex Flooring at (904) 595-9792

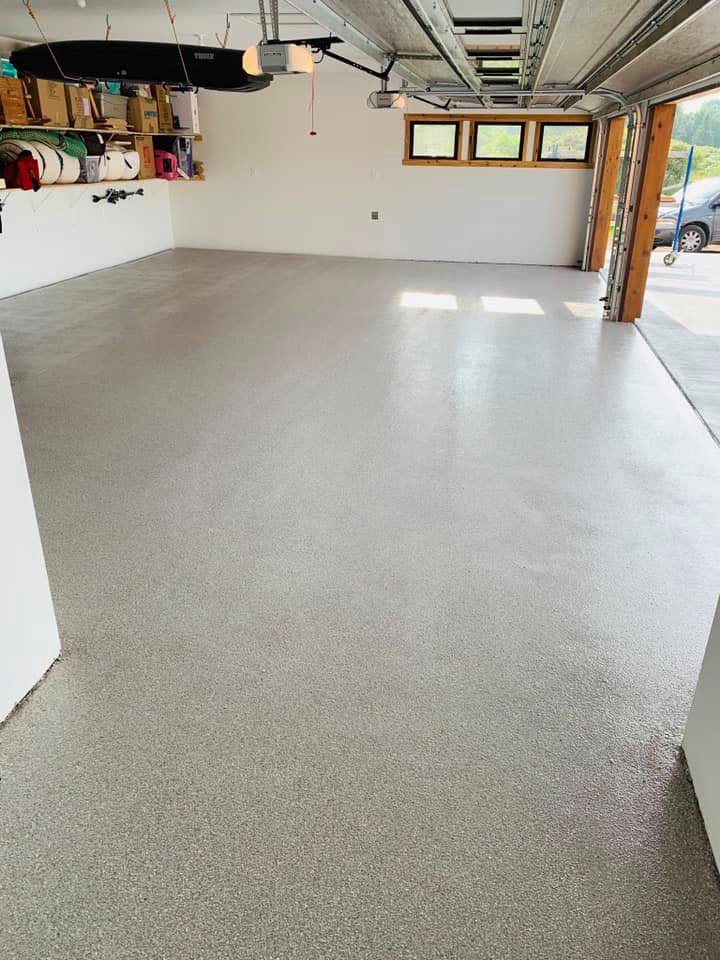
Gray flake epoxy garage floor installed by Apex

Garage Floor Special

One Flat Price for Your Garage Floor

2-Car Garage$2,300
3-Car Garage$2,700
  • Standard garages done in one day
  • 25-year transferable warranty
  • Free on-site estimate

Claim Your Price

Answer a few quick questions and we'll reach out to set up your free estimate.